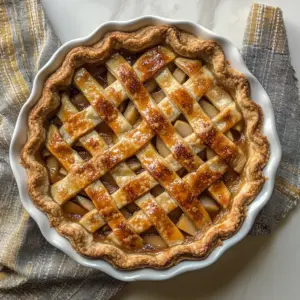
Homemade Apple Pie
The ultimate comfort food, this Homemade Apple Pie is a sweet blend of warm spices and tender apples, all encased in a flaky crust. Perfect for cozy fall evenings or holiday gatherings, this pie is sure to please everyone at the table. Make it tonight to enjoy a slice of nostalgia!
Equipment
- 9-inch glass or stainless steel pie dish
Ingredients
- 2 1/2 cups cups all-purpose flour
- 2 tablespoons tablespoons white granulated sugar
- 1 1/2 teaspoons teaspoons kosher salt
- 1 cup cup unsalted butter cold and straight from the fridge
- 3/4 cup cups very cold water divided
- 1/2 small lemon juiced (about 1 1/2 tablespoons)
- 3-4 whole medium to large apples (pink lady, gala and honeycrisp are my favorites), peeled, halved, cored and thinly sliced
- 1/4 cup cup all-purpose flour
- 1/2 cup cup light brown sugar
- 1 1/2 teaspoons teaspoons ground cinnamon
- 1 teaspoon teaspoon pure vanilla extract or 1/2 teaspoon vanilla paste
- 1/2 teaspoon teaspoons kosher salt
- 2 tablespoons tablespoons crème fraîche or sour cream
- 1 large egg beaten (for egg wash)
- 1 tablespoon tablespoon turbinado sugar for topping (optional)
Instructions
- In a large bowl, mix together the 2 1/2 cups of all-purpose flour, 2 tablespoons of white granulated sugar, and 1 1/2 teaspoons of kosher salt. This forms the base of your crust and ensures the flavors are evenly distributed.
- Using a box grater, grate the cold butter into the flour mixture. This allows for small bits of butter to be evenly distributed, which will create a flaky crust.
- Transfer the bowl to the freezer for 10 minutes to chill. It’s important that the mixture stays cold so that the butter remains solid while baking.
- After 10 minutes, take the mixture out and use your hands to break the butter bits into the flour until they resemble the size of small peas. You want a crumbly texture that still has some larger pieces of butter.
- Slowly add in half of the recommended water and mix until combined. You want the mixture to start coming together, but it will still look shaggy at this point.
- From here, add one tablespoon of water at a time until the dough forms a cohesive mass. Too much water will make the crust tough, so add it gradually.
- Flour your counter and dump the dough onto it. Knead it a few times until it holds together well. Aim for a smooth texture but don’t overwork it.
- Divide the dough into two discs and wrap each in plastic wrap. Transfer them to the refrigerator to chill for at least one hour, ideally overnight for best results.
- While the dough chills, peel your apples if you prefer. Halve them, remove the cores, and slice them thinly into 1/4-inch pieces. This ensures even cooking and a nice texture.
- In a large bowl, squeeze the lemon juice over the sliced apples, ensuring to catch any seeds. This will enhance the flavor and keep the apples from browning.
- Add the 1/4 cup of all-purpose flour, 1/2 cup of light brown sugar, 1 1/2 teaspoons of ground cinnamon, 1 teaspoon of vanilla extract, and 1/2 teaspoon of kosher salt to the apples. Toss gently until the apples are thoroughly coated.
- Next, add 2 tablespoons of crème fraîche to the apples and toss until evenly distributed. This will add a rich creaminess.
- Remove the first disc of dough from the refrigerator and let it come to room temperature for about 5 minutes. Flour your work surface and rolling pin generously.
- Roll out the first disc to a 13-inch round. Wrap it around your rolling pin and unroll it over a 9-inch pie dish. Gently fit the dough into the bottom and up the sides of the dish.
- Trim the excess dough, leaving about a 1/2-inch overhang. Recombine the scraps for the lattice design later. Chill the pie shell while you roll out the second disc.
- Repeat the rolling process with the second disc and cut it into 3-inch strips for the lattice top. Reroll the scraps as needed.
- Fill the pie shell with the apple filling, ensuring it’s evenly distributed.
- Lay out five strips of dough on top of the filling, leaving about 1/2-inch spaces between them. Then lay the remaining strips perpendicular, which will help you see how to weave them.
- Carefully fold back every other strip of dough and layer the opposite strips on top, weaving them under and over each other. This lattice will create a beautiful pattern.
- Once assembled, trim the edges of the strips, leaving about a 1-inch overhang. Tuck the edges under for a clean finish. Create a crimped edge for a decorative touch.
- Chill the pie in the freezer for 30 minutes. Meanwhile, preheat your oven to 400 degrees F.
- Brush the entire pie with the beaten egg for an egg wash and sprinkle with turbinado sugar for a crunchy topping.
- Transfer the pie to a baking sheet and bake for 20 to 25 minutes until the edges are lightly browned. Then reduce the temperature to 350 degrees F and bake for another 40 to 45 minutes, until it’s deeply golden brown.
- Keep an eye on it – if the crust gets too dark, cover it with foil.
- Let the pie cool for at least two hours to firm up before slicing. Serve with a scoop of ice cream or a dollop of whipped cream to take it over the top!
Notes
- Make the dough ahead: You can make your pie dough ahead of time and freeze it for up to 3 months.
- Make the pie ahead: Assemble this entire pie and stick it in the freezer overnight and then bake it off the next day. It’ll work very well.
- To store a baked pie: Cover lightly with a clean kitchen towel and store on the kitchen counter. The fridge can make the crust soggy due to moisture.