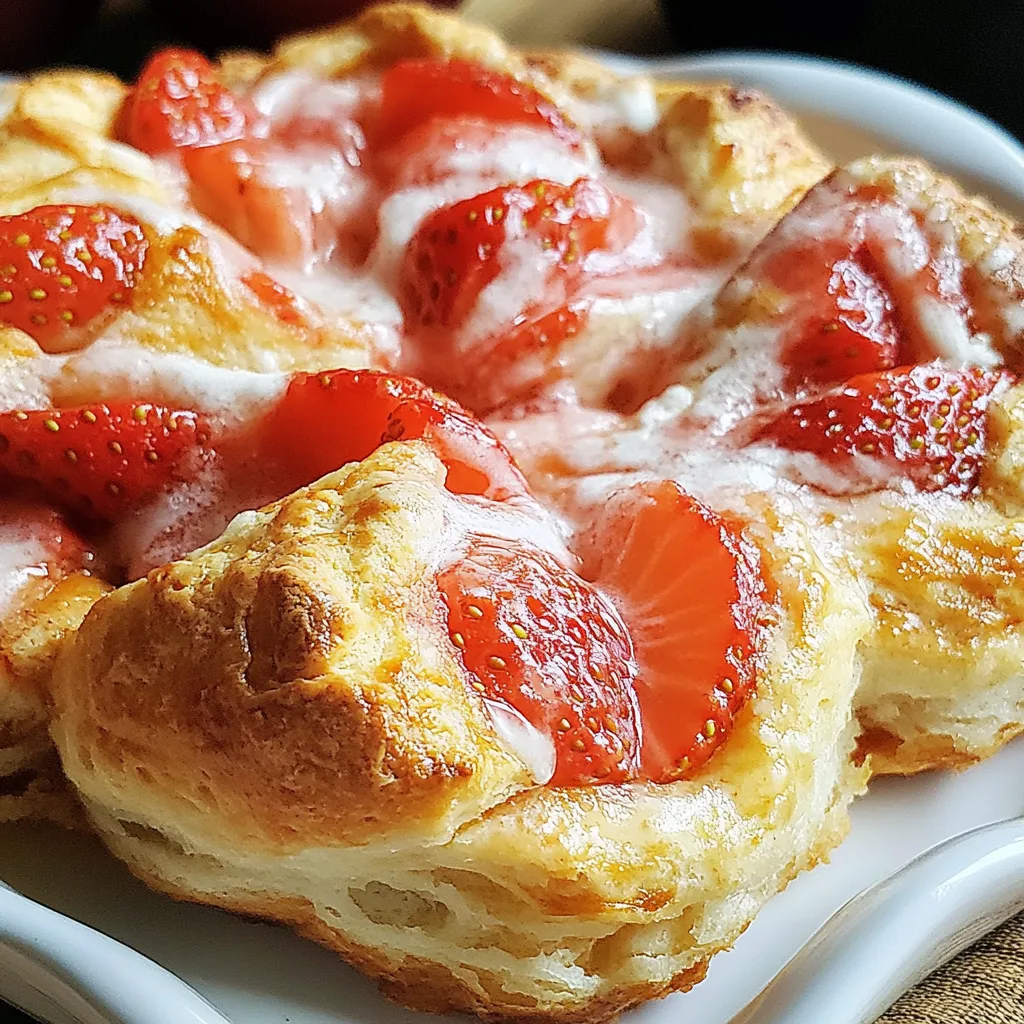
Strawberry Biscuit Rolls
Growing up, my grandmother’s kitchen was the heart of our family gatherings, filled with the warm aroma of freshly baked treats. One of my absolute favorites was her Strawberry Biscuit Rolls. I still remember the first time she taught me how to make them. The combination of fluffy biscuits and sweet strawberry spread brought joy not just to my taste buds, but also to my heart. Each roll was like a delicious hug, perfect for breakfast, a snack, or even a delightful dessert. As I rolled the dough and lathered it with fruity goodness, I felt connected to generations of love and tradition. The best part? They always disappeared faster than I could bake them! Now, I want to share this cherished recipe with you. These rolls are not just a treat; they’re a warm reminder of family and love. Let’s dive into making Strawberry Biscuit Rolls and create some delicious memories of your own.
Recipe Snapshot
22 mins
10 mins
12 mins
Easy
250 kcal
3 g
Gluten-Free, Low FODMAP
10 g
Mixing Bowl, Baking Sheet, Chef’s Knife, Skillet, Frying Pan, Oven
The Appeal of This Strawberry Biscuit Rolls
Perfect for Any Occasion
There’s something special about Strawberry Biscuit Rolls that makes them perfect for any occasion. Whether it’s a lazy Sunday morning or a festive family gathering, they fit right in. The bright flavor of strawberries combined with the soft, buttery biscuits brings smiles to everyone’s face.
Simple Ingredients
You’ll love how straightforward the ingredients are. With just a handful of basics, you can whip up these rolls without a hassle. The simplicity means you can make them on a whim, and let’s be honest, who doesn’t love a spontaneous baking adventure?
Versatile Treat
These rolls aren’t limited to just one use. Enjoy them warm out of the oven, or serve them with a scoop of ice cream for a delightful dessert. They also make for a lovely brunch addition, and your guests will be asking for your secret!
Family Tradition
Making Strawberry Biscuit Rolls can become a cherished family tradition. Invite your loved ones to join in the fun of rolling the dough and spreading the strawberry goodness. It’s a wonderful way to create lasting memories and teach the next generation about the joy of baking.
Sweet and Fruity Flavor
The sweetness of the strawberry fruit spread is the star of the show here. It contrasts beautifully with the buttery biscuits and provides a burst of flavor in every bite. You’ll find yourself reaching for just one more roll!
Quick and Easy
Even if you’re not a seasoned baker, these rolls are designed to be quick and easy. With minimal steps and a short baking time, you’ll find that you can enjoy homemade goodness in no time!
What You’ll Need for Strawberry Biscuit Rolls
When it comes to making Strawberry Biscuit Rolls, the ingredients are simple yet effective. Each one plays a crucial role in delivering that signature flavor and texture. The key players here are the fluffy buttermilk biscuits and the bright, sweet strawberry fruit spread, working together to create a delightful treat.
- Buttermilk biscuits: These serve as the base for the rolls, offering a light and fluffy texture that perfectly complements the sweet filling.
- Strawberry fruit spread: This adds a burst of fruity sweetness, making each bite irresistible. It’s the heart of this roll!
- Confectioner’s sugar: Used for a delightful glaze that adds some sweetness and a lovely finish to the rolls.
- Milk: A key ingredient for the glaze, providing just the right consistency.
Strawberry Biscuit Rolls Instructions
Making Strawberry Biscuit Rolls is a fun and rewarding experience. You’ll love how quickly they come together and how delicious they turn out! Let’s get into the steps.
- Preheat your oven to 475º F. This high temperature ensures that your biscuits will rise beautifully and get a lovely golden color. While waiting, grease a skillet or a round cake pan to prevent sticking.
- Prepare your buttermilk biscuits according to the package instructions. This usually involves mixing the ingredients until they form a dough, which should be soft yet workable. Roll out the dough into a flat rectangle on a lightly floured surface.
- Spread the strawberry fruit spread evenly over the dough. Make sure to cover the entire surface for maximum flavor in each bite. Feel free to use more or less depending on your sweetness preference!
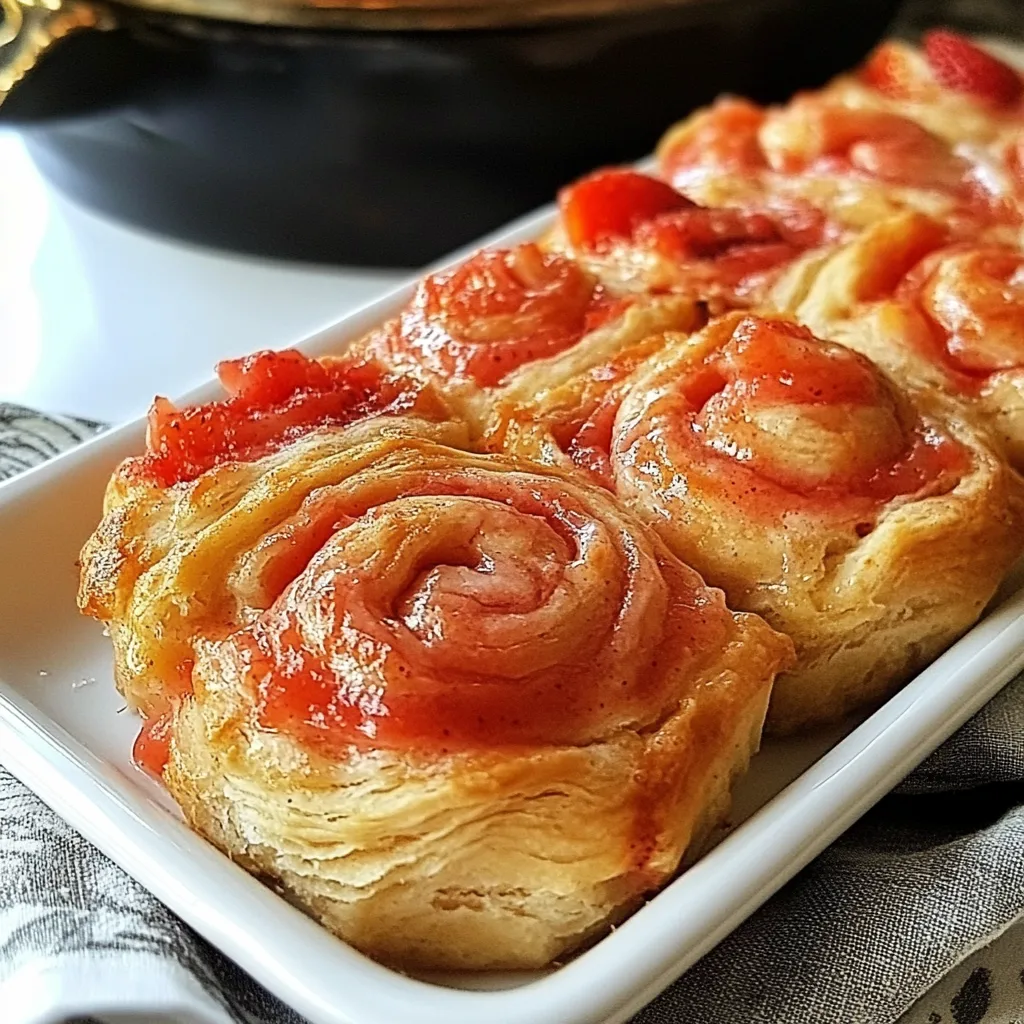
- Carefully roll the dough into a long log, starting from one end and rolling tightly. This will help create those beautiful swirls when you cut them. Cut the log into slices about 1 and a half to 2 inches wide.
- Place the sliced rolls into your prepared skillet or round cake pan. Arrange them closely, but not touching, so they have room to expand while baking. This arrangement helps in achieving a nice, fluffy texture.
- Bake the rolls in the preheated oven for 10 to 12 minutes. Keep an eye on them; they should rise and become golden brown. You’ll know they’re done when they’re cooked throughout and smell incredible!
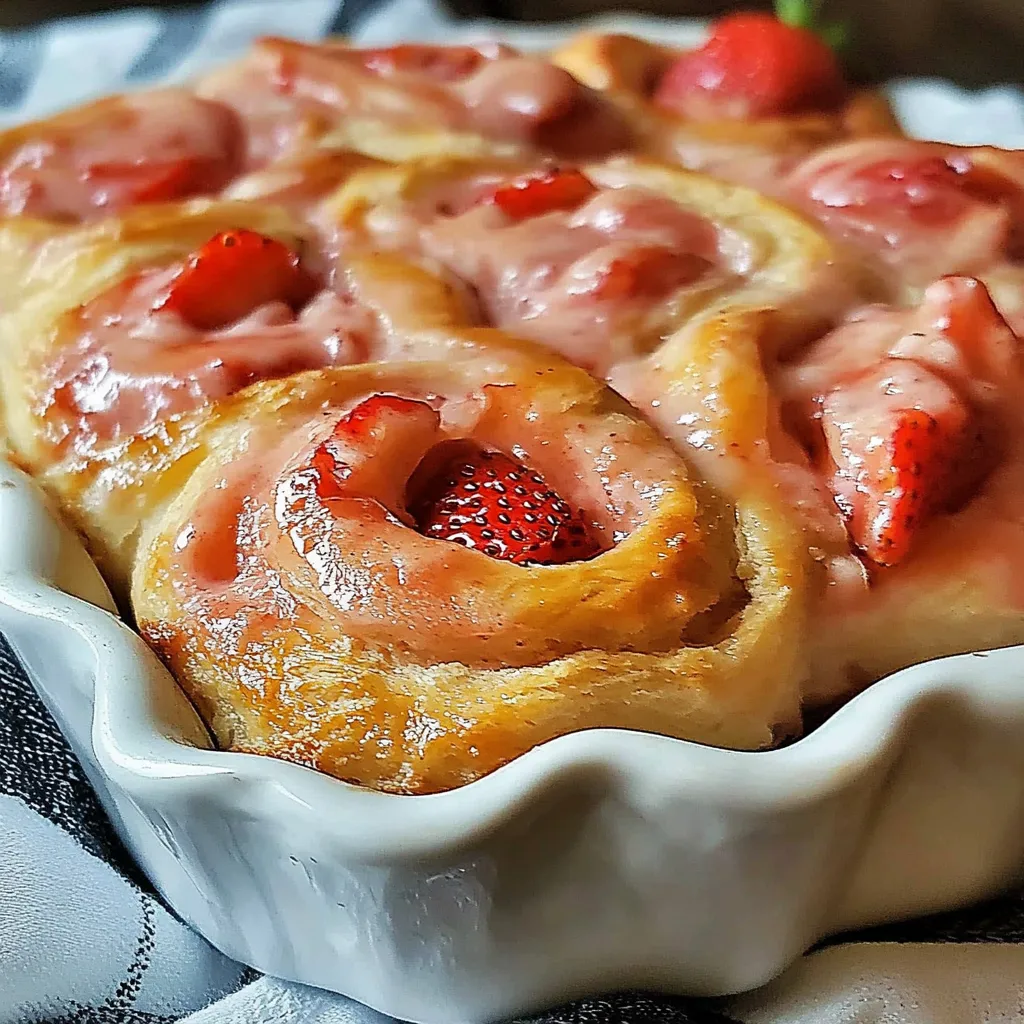
- Once baked, remove the rolls from the oven. Allow them to cool slightly before drizzling with the optional glaze.
- For the glaze, mix together the confectioner’s sugar and milk in a small bowl. Start with a small amount of milk and gradually add more until you reach your desired consistency. A thicker glaze will stay on top, while a thinner one will drip beautifully down the sides.
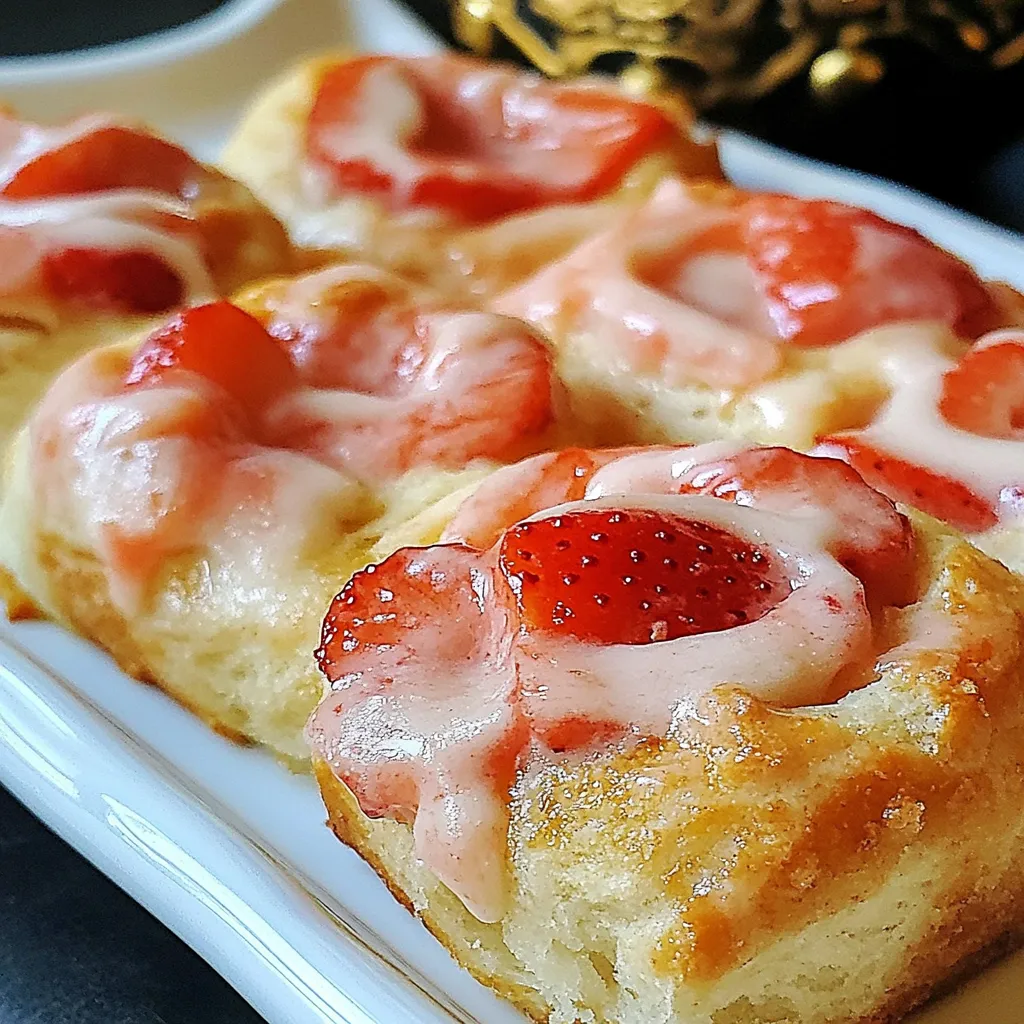
- Drizzle the glaze over your warm rolls and serve immediately. Watching the glaze melt into the rolls is a sight to behold, and the flavor combination will surely impress your family and friends!
Things Worth Knowing
- Don’t rush the baking: Make sure your oven is preheated properly. If the temperature is too low, the rolls won’t rise as expected.
- Quality Ingredients: Using high-quality buttermilk biscuits and fresh strawberry fruit spread will significantly enhance the flavor of your rolls.
- Glaze Consistency: Adjust the amount of milk in your glaze to achieve your preferred thickness. A thicker glaze will provide a rich topping, while a thinner glaze will soak into the rolls, enhancing their moisture.
- Keep an Eye on Them: Every oven is different, so start checking the rolls a few minutes before the recommended time. You want them golden brown but not overcooked.
Make It Your Own
These Strawberry Biscuit Rolls are versatile and can be tailored to your taste. Here are some fun tips to make this recipe your own!
- Storage: Store any leftovers in an airtight container at room temperature for up to two days. You can also refrigerate them if you prefer.
- Freezing: These rolls can be frozen before or after baking. If freezing before baking, place the sliced rolls in the pan, cover tightly, and freeze. Bake directly from the freezer, adding a few extra minutes to the cooking time.
- Pairing: Serve your rolls with a dollop of whipped cream or a side of fresh fruit for a delightful breakfast or brunch experience.
- Variations: Experiment with different fruit spreads like raspberry or apricot for a unique twist. You can even add chocolate chips for a decadent dessert!
- Gather Friends: Invite friends over for a baking session. Making these rolls together will make for a fun afternoon and delicious treats at the end!
Perfect Matches for Strawberry Biscuit Rolls
When serving Strawberry Biscuit Rolls, consider these delightful options to complement this sweet treat:
- Fresh Fruit Salad: A light and refreshing side that pairs perfectly with the richness of the rolls.
- Whipped Cream: A dollop on top adds a creamy texture and enhances the flavors beautifully.
- Tea or Coffee: These rolls make for an excellent accompaniment to your morning or afternoon beverage.
- Seasonal Occasions: Whether it’s Easter brunch, a spring picnic, or a cozy family gathering, these rolls are a hit!
- Storage Tips: To keep your rolls fresh, store them in a cool, dry place. To revive them, a quick reheat in the oven can restore their fluffy texture.
- Garnish with Mint: A sprig of fresh mint on the side elevates the presentation and adds a hint of freshness.
FAQ
Conclusion
These Strawberry Biscuit Rolls are a delightful combination of fluffy biscuits and sweet strawberry goodness, making them a must-try recipe for any kitchen. I encourage you to gather your loved ones and give this recipe a shot. The smiles and satisfied sighs at the dinner table will be so worth it!

Strawberry Biscuit Rolls
Equipment
- Mixing Bowl
- Baking Sheet
- Chef's Knife
- Skillet
- Frying Pan
- Oven
Ingredients
- 1 package Buttermilk biscuits
- 0.25 cup Strawberry fruit spread
- 3 tablespoons Confectioner’s sugar
- 1 tablespoon Strawberry fruit spread
- 1 teaspoon Milk
Instructions
- Preheat your oven to 475º F. Grease a skillet or round cake pan and set aside. Prepare buttermilk biscuits according to instructions all the way through rolling out your biscuit dough. Spread strawberry fruit spread on top of biscuit dough and roll dough into a long log. Cut dough into 1 1/2-inch to 2-inch slices. Place into prepared skillet or round cake pan. Bake 10-12 minutes, until biscuits are cooked throughout. Remove from oven and drizzle with optional glaze.
- In a small bowl, mix together all of the ingredients for the glaze. If you prefer a thinner glaze, add more milk. If you prefer a thicker glaze, add more confectioner’s sugar.
Notes
- Tip 1: Store any leftovers in an airtight container at room temperature for up to two days.
- Tip 2: You can freeze these rolls before or after baking.
- Tip 3: Serve with a dollop of whipped cream for a delightful experience.
- Tip 4: Experiment with different fruit spreads like raspberry for a unique twist.
- Tip 5: Invite friends over for a baking session!