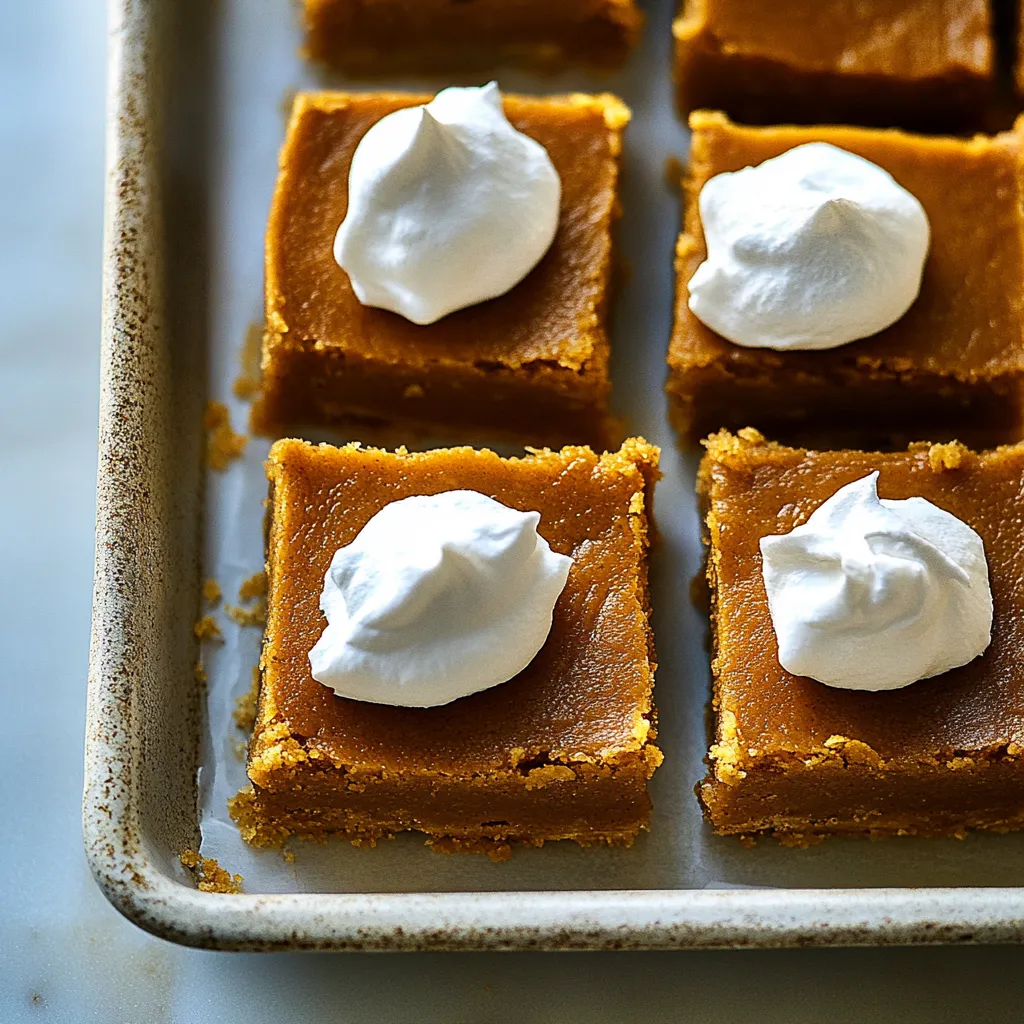
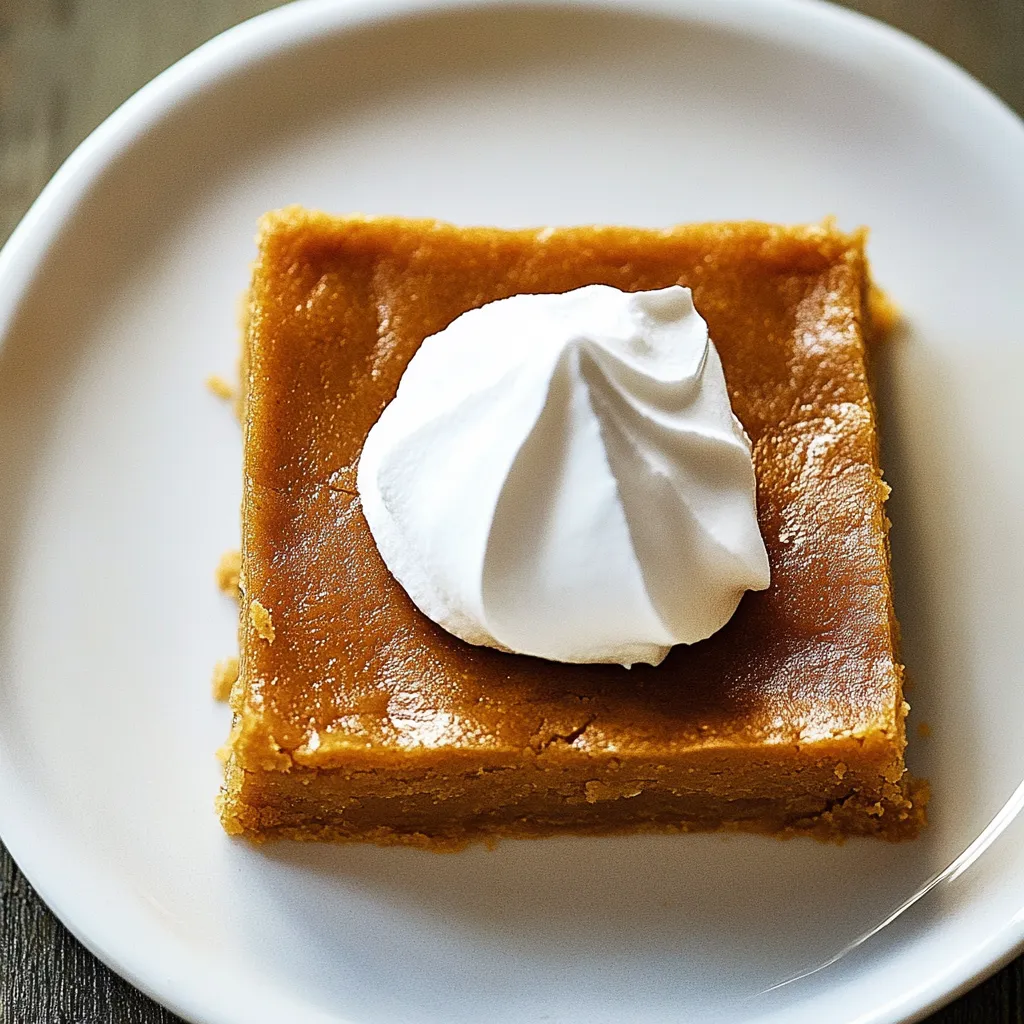
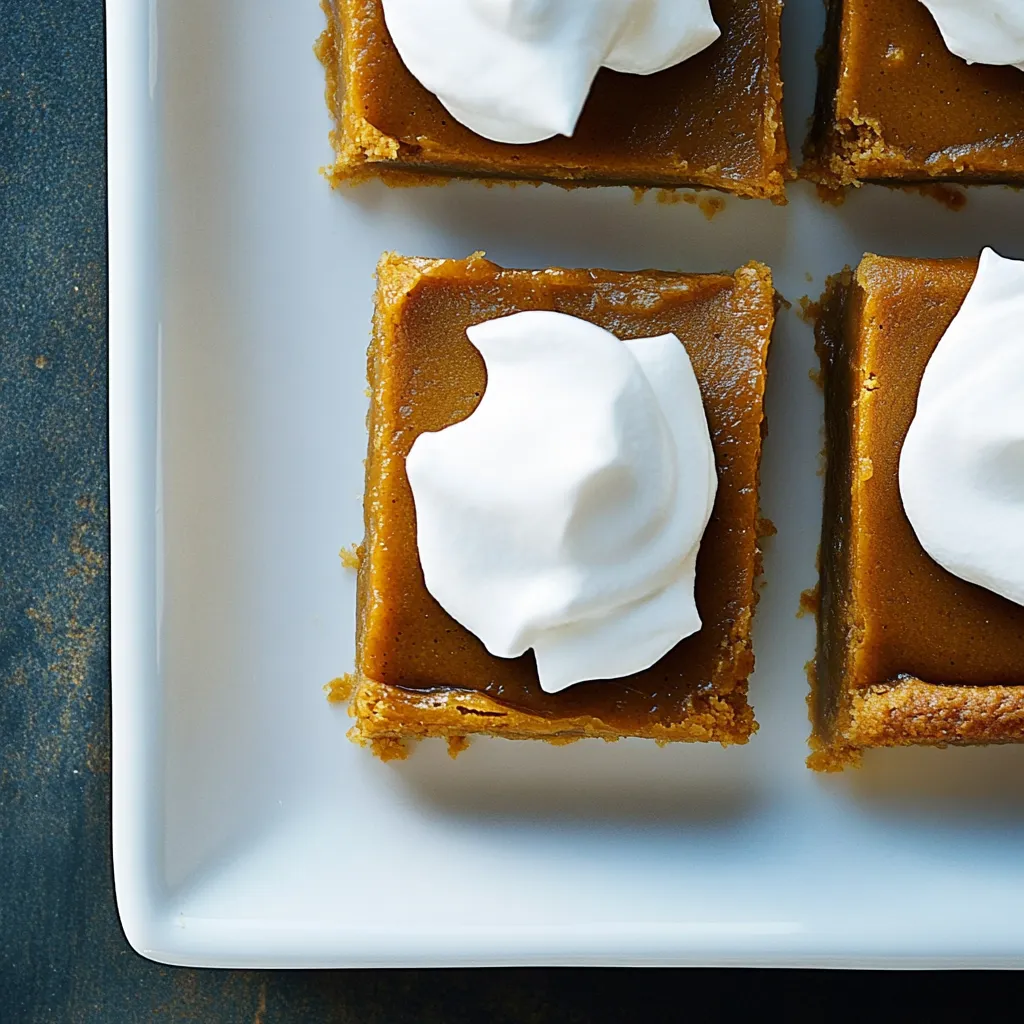
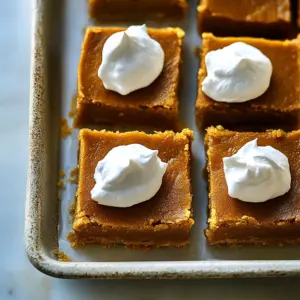
Pumpkin Pie Bars
Every autumn, as the leaves turn vibrant shades of red and gold, I can’t help but crave a slice of home. The aroma of warm spices fills my kitchen, and I find myself reminiscing about the smells of my childhood—especially the scent of fresh Pumpkin Pie Bars baking in the oven. It was a staple during family gatherings, and I have vivid memories of my grandmother preparing her secret recipe. These bars, rich and creamy, with that perfect balance of sweet and spicy, have a way of wrapping you in a cozy embrace. As I gathered with loved ones around the table, the Pumpkin Pie Bars were always the highlight, devoured in moments and leaving everyone wanting more.
Recipe Snapshot
60 mins
0 mins
0 mins
Easy
300 kcal
4g g
Gluten-Free, Low FODMAP
12g g
Mixing Bowl, Baking Sheet, Whisk, Frying Pan, Oven
Why This Pumpkin Pie Bars Hits Different
Comforting Fall Flavor
There’s something so comforting about the flavors of fall. When you bite into these Pumpkin Pie Bars, you’re greeted with the warm notes of cinnamon, ginger, and nutmeg, which are quintessential fall spices. They evoke memories of chilly evenings and the anticipation of the holidays.
Easy to Make
One of the best parts about these Pumpkin Pie Bars is how simple they are to make. With straightforward ingredients and clear steps, even novice bakers can whip them up with ease. The process is quick and doesn’t require fancy equipment, making it accessible to everyone.
Perfect for Gatherings
Whether it’s Thanksgiving dinner or a cozy fall gathering, these bars are always a hit. They’re easy to slice and serve, making them a great option for sharing. Your friends and family will be impressed, and you’ll love how effortlessly they come together.
Versatile Treat
These Pumpkin Pie Bars are not just for the holidays; they can be enjoyed year-round. Pair them with a cup of coffee in the morning or serve them as a delightful dessert after dinner. Their versatility makes them a staple in my home.
Deliciously Creamy
The filling is what truly makes these bars special. With a blend of creamy pumpkin puree, rich heavy cream, and just the right amount of sweetness, you’ll find the texture is silky and satisfying. Each bite melts in your mouth, leaving you wanting just one more piece.
What to Buy for Pumpkin Pie Bars

When preparing to make Pumpkin Pie Bars, it’s essential to choose quality ingredients that will enhance the flavors and create the perfect texture. Each ingredient plays a specific role in this delightful treat, contributing to both the crust and the filling. From the buttery notes of the crust to the spiced warmth of the filling, the key players come together to create a harmonious dessert.
- 1 ½ cup graham cracker crumbs: Provides the base for the crust, giving it a slightly sweet and crunchy texture that complements the creamy filling.
- 7 tablespoons butter, melted: Adds richness and helps bind the crust together, ensuring it holds its shape when sliced.
- ¼ cup brown sugar: Contributes a deep sweetness and moisture to the filling, enhancing the overall flavor profile.
- 2/3 cups granulated sugar: Balances the flavors, providing the necessary sweetness to the filling.
- 1 ½ teaspoon cinnamon: The star spice that adds warmth and depth to the filling, quintessential in pumpkin desserts.
- ¾ teaspoon kosher salt: Enhances the sweetness and balances the flavors in the filling.
- ¼ teaspoon all-spice: Adds a complex spice flavor that works beautifully with pumpkin.
- ¼ teaspoon ginger: Provides a hint of warmth and zest that complements the pumpkin.
- ¼ teaspoon cardamom: Adds an exotic touch, enhancing the depth of flavor in the bars.
- 2 large eggs: Acts as a binder, giving the filling a rich and creamy texture.
- 1 ½ teaspoons vanilla extract: Introduces a sweet aroma and flavor that rounds out the filling.
- 1 cup fairlife whole milk: Creates a creamy texture, making the filling silky and smooth.
- 1 15 oz. pumpkin puree: The main ingredient, providing the classic pumpkin flavor and beautiful color.
- 1 1/2 cups heavy cream: Used for making whipped cream, adding richness and a light finish.
- ¼ cup granulated sugar: Sweetens the whipped cream, making it a perfect topping for the bars.
- 1 ½ teaspoon vanilla bean paste: Enhances the flavor of the whipped cream with a delightful vanilla taste.
How to Cook Pumpkin Pie Bars
Making Pumpkin Pie Bars is a delightful experience that fills your kitchen with mouthwatering aromas. The process is straightforward, allowing you to dive right into the fun of baking. Follow these steps closely, and you’ll have the perfect bars to share with friends and family in no time!
- Preheat your oven to 375 degrees F. This step is crucial as it ensures the crust bakes evenly. Prepare a 9-inch square pan by lining it with parchment paper for easy removal later.
- In a large bowl, combine graham cracker crumbs and melted butter. Stir them together until the crumbs are well coated and the mixture resembles wet sand. This consistency will help the crust hold together when pressed into the pan.
- Press the crumb mixture into the bottom of the prepared pan. Use the back of a measuring cup or your fingers to pack it tightly and evenly across the bottom. Bake in the preheated oven for about 10 minutes until lightly golden. This step slightly toasts the crumbs and enhances the flavor.
- While the crust is baking, prepare the filling. In another large bowl, whisk together brown sugar, granulated sugar, cinnamon, kosher salt, all-spice, ginger, and cardamom. Ensure everything is well combined before adding the next ingredients.
- Add in the eggs and vanilla extract. Whisk until the mixture is smooth, creating a lovely base for the filling.
- Pour in the milk and pumpkin puree. Whisk again until all ingredients are well combined and the filling is a consistent, creamy texture. The vibrant orange color of the pumpkin should be prominent.
- Carefully remove the crust from the oven after 10 minutes. Pour the pumpkin filling over the hot crust, spreading it evenly with a spatula.
- Return the pan to the oven and bake for an additional 40 minutes. Keep an eye on it; it’s done when the center no longer jiggles when you tap the side of the pan. A slight browning around the edges is also a good sign.
- Once baked, remove the pan from the oven and let it cool for about 15 minutes. This cooling stage is important as it allows the filling to set properly.
- Transfer the pan to the refrigerator and let it chill for at least 2 hours before slicing. This step makes cutting easier and improves the texture of the bars.
Change It Up
While Pumpkin Pie Bars are fabulous as is, there are several ways to customize them to suit your taste or occasion. Here are some suggestions:
- Storage: If you have leftovers, store them in an airtight container in the refrigerator for up to 5 days.
- Freezing: You can freeze these bars for up to 3 months. To do so, slice and wrap them tightly in plastic wrap and place them in a freezer-safe container.
- Pairing: Consider serving these Pumpkin Pie Bars with a scoop of vanilla ice cream or a dollop of whipped cream for an indulgent treat.
- Variations: Add chopped nuts to the filling for a crunchy texture, or try a chocolate drizzle on top for a sweet twist.
- Serving Suggestion: These bars are perfect for potlucks, holidays, or cozy nights in with loved ones.
Pairing Suggestions for Pumpkin Pie Bars
When it comes to serving Pumpkin Pie Bars, there are plenty of delightful options to enhance your experience:
- Serve with Whipped Cream: A dollop of fresh whipped cream on top adds a creamy, sweet contrast to the spiced filling.
- Accompany with Ice Cream: Vanilla or cinnamon ice cream pairs wonderfully, creating a decadent dessert.
- Pair with Coffee: Enjoy these bars with a warm cup of coffee or spiced chai for a cozy afternoon treat.
- Perfect for Thanksgiving: These bars make a fantastic addition to your Thanksgiving dessert table, sure to impress your guests.
- Store Properly: Keep any leftovers in the fridge, ideally in a sealed container, to maintain freshness.
FAQ
Conclusion
These Pumpkin Pie Bars are truly a delightful treat that captures the essence of fall and the joy of family gatherings. I encourage you to try making them for your next celebration or simply to indulge in a comforting dessert at home. With their creamy filling and buttery crust, they’re sure to become a favorite in your household, just as they are in mine.
Pumpkin Pie Bars
Equipment
- Mixing Bowl
- Baking Sheet
- Whisk
- Frying Pan
- Oven
Ingredients
- 1 ½ cup graham cracker crumbs
- 7 tablespoons butter, melted
- ¼ cup brown sugar
- 2/3 cups granulated sugar
- 1 ½ teaspoon cinnamon
- ¾ teaspoon kosher salt
- ¼ teaspoon all-spice
- ¼ teaspoon ginger
- ¼ teaspoon cardamom
- 2 large eggs
- 1 ½ teaspoons vanilla extract
- 1 cup fairlife whole milk
- 1 15 oz. pumpkin puree
- 1 1/2 cups heavy cream
- ¼ cup granulated sugar
- 1 ½ teaspoon vanilla bean paste
Instructions
- Heat oven to 375 degree F. Line a 9-inch square pan with parchment paper.
- In a large bowl, combine and mix together graham cracker crumbs and melted butter. Press mixture into pan. Bake at 375 degrees F and bake for 10 minutes.
- In the meantime, make the filling by whisking together brown sugar, granulated sugar, cinnamon, kosher salt, all-spice, ginger, and cardamom. Whisk in eggs and vanilla extract. Add milk and pumpkin puree and whisk to combine. Pour filling into crust. Bake for 40 minutes or until center no longer jiggles when side of pan is tapped.
- Remove from oven and let cool for 15 minutes. Transfer pan to refrigerator to set for 2 hours before slicing.
Notes
- Storage: If you have leftovers, store them in an airtight container in the refrigerator for up to 5 days.
- Freezing: You can freeze these bars for up to 3 months. To do so, slice and wrap them tightly in plastic wrap and place them in a freezer-safe container.
- Pairing: Consider serving these Pumpkin Pie Bars with a scoop of vanilla ice cream or a dollop of whipped cream for an indulgent treat.
- Variations: Add chopped nuts to the filling for a crunchy texture, or try a chocolate drizzle on top for a sweet twist.
- Serving Suggestion: These bars are perfect for potlucks, holidays, or cozy nights in with loved ones.