How to Truss a Chicken
When I first learned how to truss a chicken, I felt like a culinary magician. The moment I discovered the art of tying up the bird to achieve that perfectly cooked centerpiece, everything changed. Trussing not only ensures even cooking, but it also enhances the presentation. Imagine serving a beautifully shaped, golden-brown chicken, its juices locked in and flavors heightened. I remember the thrill of my family’s surprised faces when I pulled it out of the oven for the first time. They were impressed not just by the taste but by how I had transformed a simple chicken into a culinary masterpiece. The technique of trussing is simple yet transformative, making it a must-try for anyone who enjoys cooking. So, let’s dive into how to master this essential skill with the How to Truss a Chicken recipe!
Recipe Snapshot
3 mins
3 mins
0 mins
Medium
350 kcal
63 g
Keto, Paleo, Whole30
15 g
Kitchen twine
Why This How to Truss a Chicken Is So Good
Perfect Cooking Results
Trussing ensures that your chicken cooks evenly, which is crucial for achieving moist, flavorful meat. By binding the wings and legs close to the body, you prevent them from overcooking and drying out. This technique helps in retaining the natural juices, resulting in a succulent meal.
Beautiful Presentation
A trussed chicken looks much more appealing when served. The tight, compact shape it takes on during cooking allows for a lovely, uniform appearance. If you’re planning a dinner party, impress your guests with a stunning presentation that speaks volumes about your cooking skills.
Retained Flavor
By securing the chicken, the flavors stay locked in, enhancing the overall taste. The method of trussing keeps the seasoning close to the meat, allowing it to absorb all the delicious flavors you’ve added, whether it’s herbs, spices, or a simple salt and pepper rub.
Versatility
Once you learn how to truss a chicken, you can apply this technique to other birds as well. It’s not just for whole chickens; you can use it for turkeys or game hens, making it a versatile skill in your culinary repertoire.
Simple Yet Impressive
Trussing might sound complex, but it’s surprisingly easy to master. With just a bit of practice, you’ll be able to tie up your chicken like a pro in no time. It’s a simple technique that can elevate your cooking and impress anyone who sits at your table.
What to Buy for How to Truss a Chicken
Choosing the right ingredients is the first step to ensuring a successful trussing experience. The main ingredient here is, of course, the chicken itself. A good-quality whole chicken will make a significant difference in flavor and tenderness. Additionally, you need kitchen twine, which is essential for binding the bird. Using the right tools and ingredients can maximize your results and make the process enjoyable.
- Whole Chicken: Choose a bird that weighs between 4 to 5 pounds. This size is optimal for trussing, as it allows the chicken to cook evenly while retaining its moisture and flavor. The meat should be firm and fresh, with no signs of discoloration.
- Kitchen Twine: Unbleached cotton kitchen twine is best, as it’s strong enough to hold the chicken together without burning during cooking. It’s essential for achieving the perfect truss, so don’t skip this ingredient!
Making This How to Truss a Chicken
Now that you have your ingredients ready, let’s get into the steps to truss your chicken properly. This method might seem a bit daunting at first, but with practice, you’ll be able to do it smoothly. Just follow these steps carefully and soon you’ll be preparing perfectly trussed chickens for every occasion.
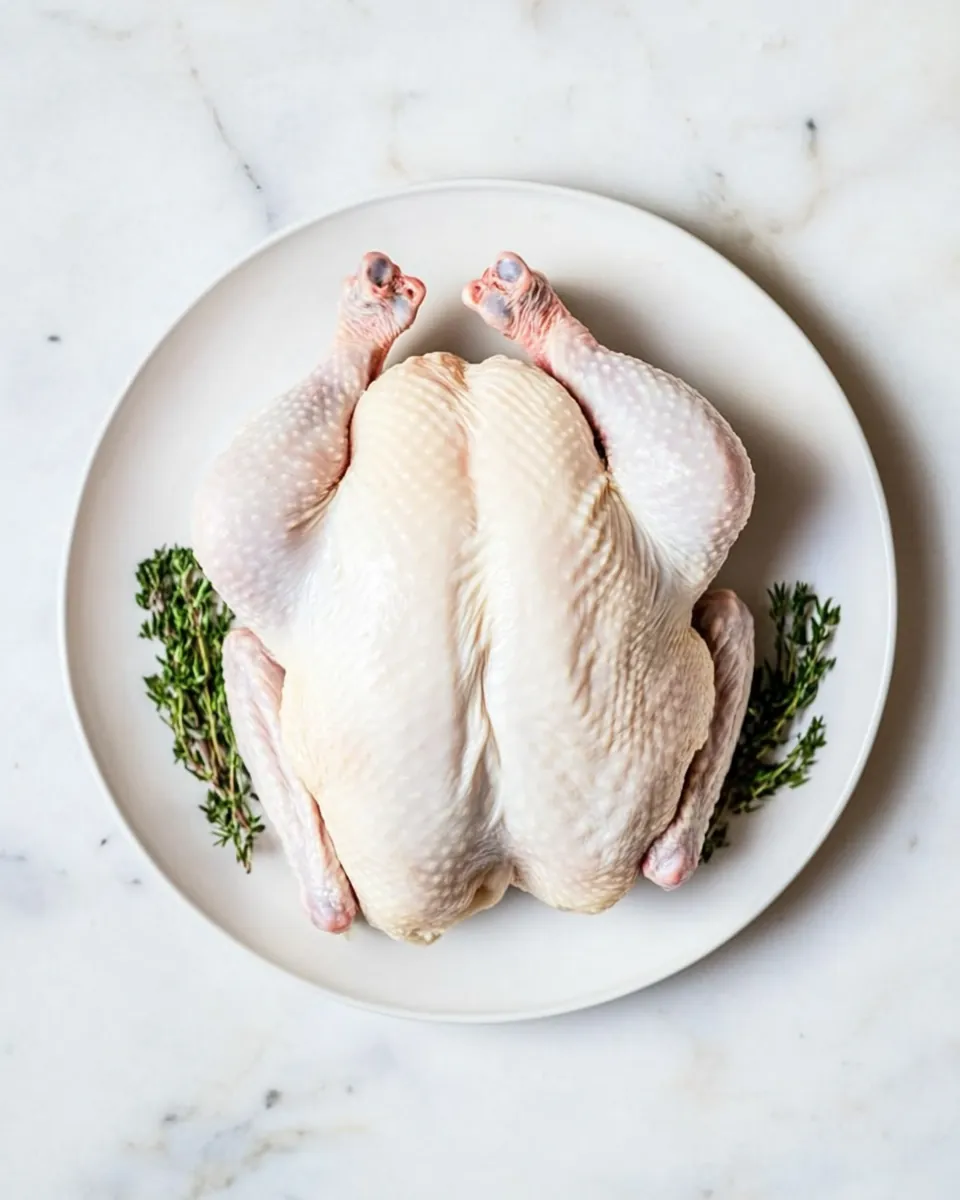
- Begin by cutting a length of kitchen twine about 3 feet long. It’s essential to have enough length to work with, so don’t skimp on this step.
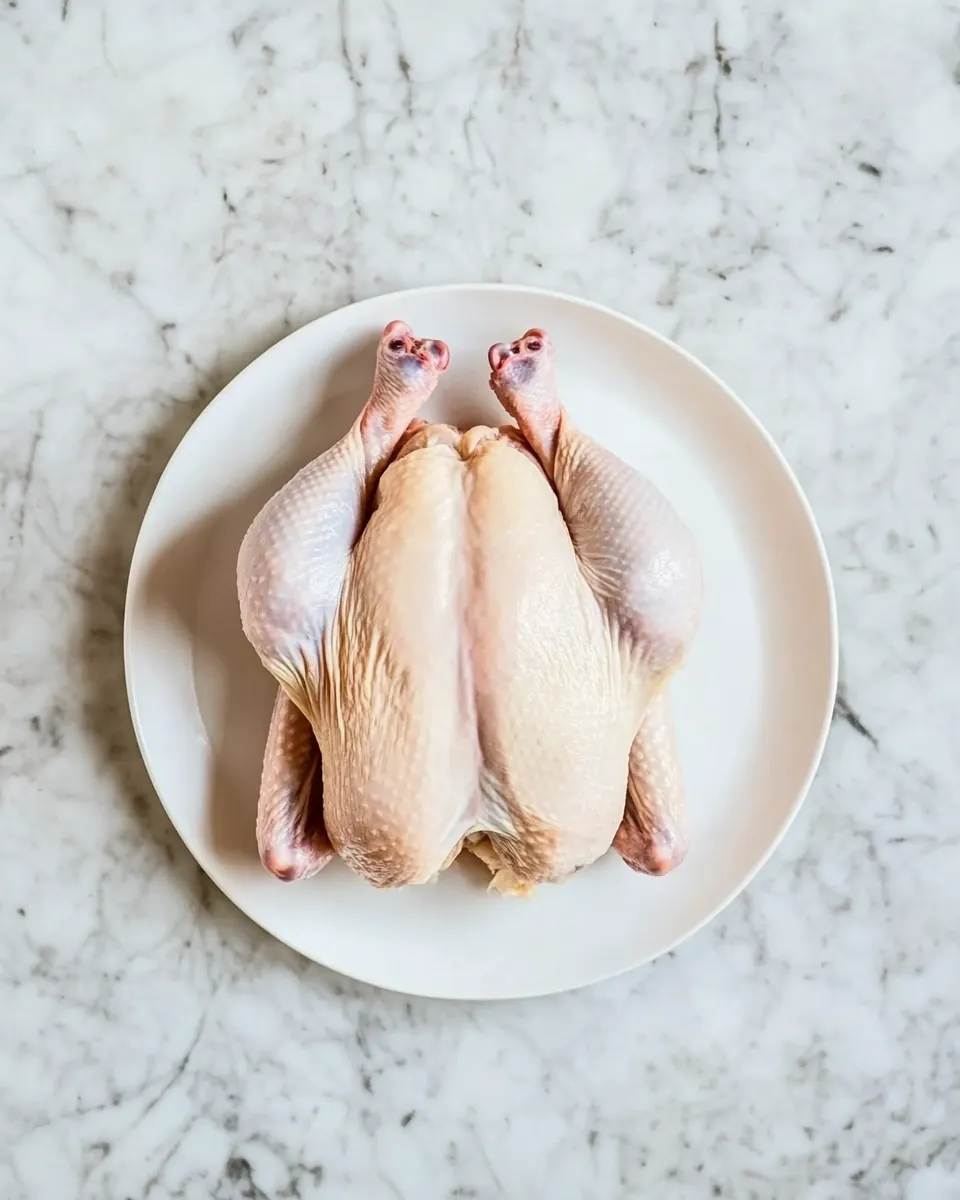
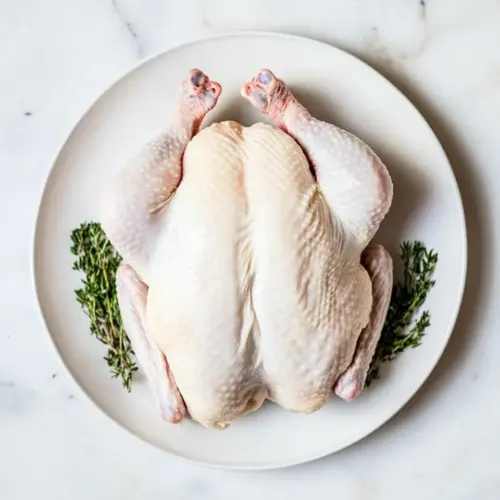
- Place the chicken breast-side up on your cutting board. Ensure it’s clean and ready for the trussing process.
- Run the center of the string under the neck area of the bird, right at the front. This will be your starting point for securing the chicken.
- Bring the string up towards the wings and legs. At this stage, it’s important to keep the string taut to ensure the wings are pushed tightly against the body.
- Use your thumbs to tuck the wings in as you wrap the string around the chicken. This helps in creating a compact shape that will cook evenly.
- The string should follow the contours of the chicken breast as you move around. Look for a snug fit to keep everything in place.
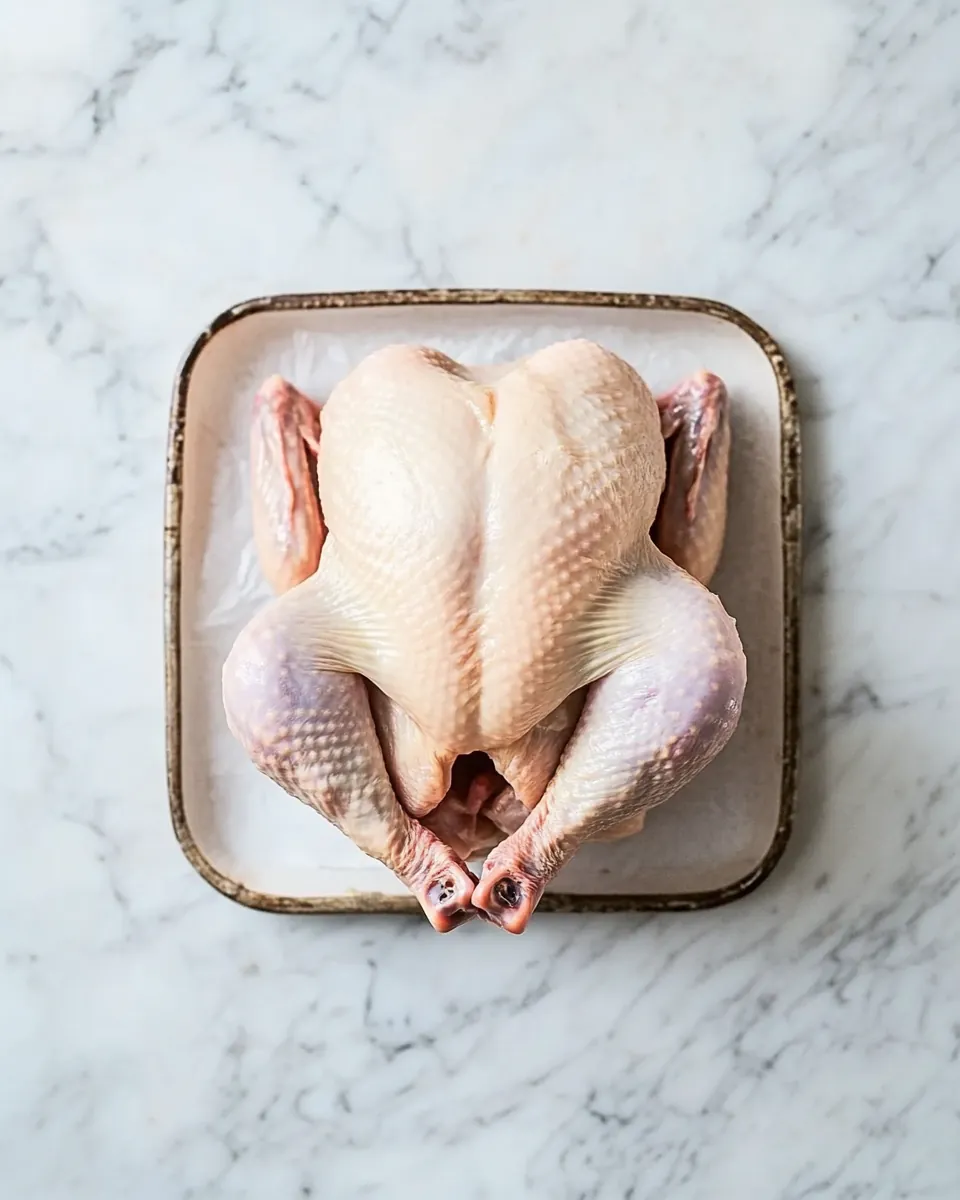
- Bring the string around between the leg and breast, and give it one overhand knot. This knot should be tight but not too solid; you’ll want to be able to adjust it later if needed.
- As you pull the knot tight, you should notice the wings being pinned securely against the body. This is the key to a well-trussed chicken.
- Next, bring the ends of the string down between the chicken’s legs. Cross the legs at the ankles above or behind the breast’s point.
- Make sure your previous knot is still tight as you prepare to secure the legs. This ensures they remain close to the body during cooking.
- Separate the strings and loop them around the outside of the chicken’s ankles, tying a square knot to finish it off. This will cinch the legs together effectively.
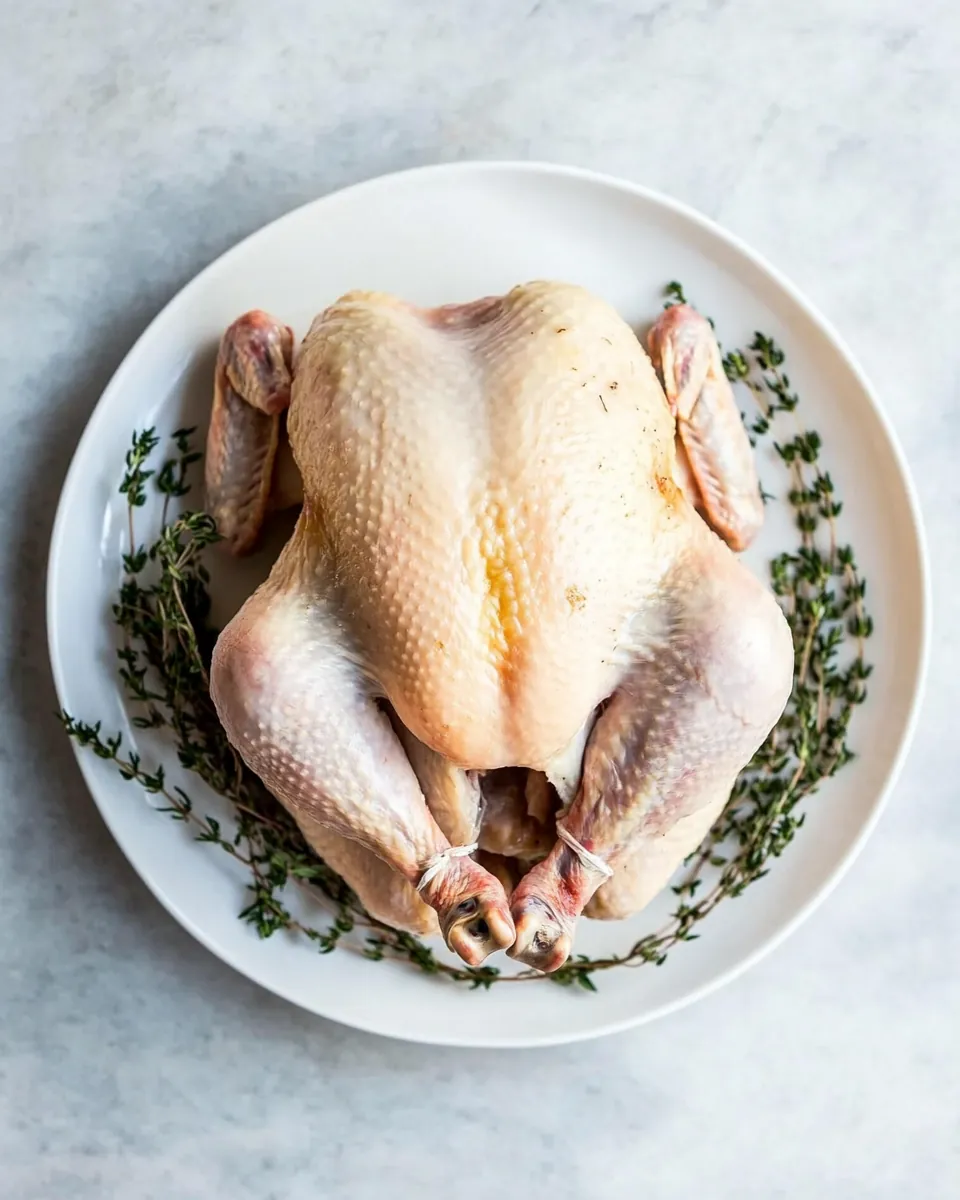
- Snip any extra ends of string and discard them. Your chicken is now perfectly trussed and ready for roasting!
Things Worth Knowing
- Trussing helps the chicken maintain its shape during cooking, leading to a more appealing presentation.
- Using kitchen twine made of cotton is crucial as it withstands high temperatures and does not impart any flavor to the meat.
- Make sure to keep the string tight, but avoid tying knots that are too solid, as this will make adjustments difficult.
- Practice makes perfect! The more you truss, the easier it will become.
Tips and Tricks about How to Truss a Chicken
Trussing might seem simple, but there are a few tips and tricks to make the process even smoother. Here are some helpful pointers to ensure your chicken turns out perfect every time.
- Storage: Store any leftover chicken covered in the refrigerator for up to 4 days. It’s safe and delicious to enjoy the next day!
- Freezing: You can freeze trussed raw chicken if you prefer to prepare ahead. Just ensure it’s well wrapped to avoid freezer burn.
- Cooking Method: Roast your trussed chicken in the oven for the best results. The even cooking will make a noticeable difference in flavor and texture.
- Variations: Feel free to experiment with herbs and spices when seasoning before trussing. This will enhance the flavor profile of the meat.
- Timing: A perfectly trussed chicken will typically take longer to cook than one that isn’t, so adjust your cooking time accordingly.
Pairing Suggestions for How to Truss a Chicken
When it comes to serving a trussed chicken, there are countless opportunities to pair it with delicious sides and accompaniments. Here are some of my favorite ideas:
- Roasted Vegetables: Pair your trussed chicken with seasonal roasted vegetables for a colorful and nutritious side. Carrots, potatoes, and Brussels sprouts make excellent choices.
- Salads: A fresh garden salad or a Caesar salad can provide a refreshing contrast to the rich flavors of the chicken.
- Grains: Serving the chicken with hearty grains like quinoa or rice can help soak up the savory juices, enhancing every bite.
- Occasions: A trussed chicken is perfect for dinner parties, family gatherings, or even special occasions like holidays. Its impressive appearance is sure to wow your guests!
- Storage Tips: Remember to store leftover chicken covered in the fridge for up to four days. It’s fantastic for sandwiches or salads the next day!
FAQ
Conclusion
The art of trussing a chicken elevates your cooking game, making your dish not only taste better but also look stunning when served. By mastering this simple technique, you’ll impress your family and guests with beautifully cooked chicken that’s juicy and flavorful. So, roll up your sleeves, grab that kitchen twine, and give it a try! You might just find that trussing becomes a regular part of your cooking routine, adding a touch of elegance to every meal.
How to Truss a Chicken
Equipment
- Kitchen Twine
Ingredients
- 1 whole chicken Whole Chicken 4 to 5 pounds.
- 1 piece Kitchen Twine Unbleached cotton, strong enough for trussing.
Instructions
- Begin by cutting a length of kitchen twine about 3 feet long. It’s essential to have enough length to work with, so don’t skimp on this step.
- Place the chicken breast-side up on your cutting board. Ensure it’s clean and ready for the trussing process.
- Run the center of the string under the neck area of the bird, right at the front. This will be your starting point for securing the chicken.
- Bring the string up towards the wings and legs. At this stage, it's important to keep the string taut to ensure the wings are pushed tightly against the body.
- Use your thumbs to tuck the wings in as you wrap the string around the chicken. This helps in creating a compact shape that will cook evenly.
- The string should follow the contours of the chicken breast as you move around. Look for a snug fit to keep everything in place.
- Bring the string around between the leg and breast, and give it one overhand knot. This knot should be tight but not too solid; you’ll want to be able to adjust it later if needed.
- As you pull the knot tight, you should notice the wings being pinned securely against the body. This is the key to a well-trussed chicken.
- Next, bring the ends of the string down between the chicken’s legs. Cross the legs at the ankles above or behind the breast's point.
- Make sure your previous knot is still tight as you prepare to secure the legs. This ensures they remain close to the body during cooking.
- Separate the strings and loop them around the outside of the chicken's ankles, tying a square knot to finish it off. This will cinch the legs together effectively.
- Snip any extra ends of string and discard them. Your chicken is now perfectly trussed and ready for roasting!
Notes
- Twine: Seek out unbleached cotton kitchen twine, also known as butcher’s twine, which is strong enough to hold a chicken together but won’t burn.
- Chicken: Any kind of bird you like can be trussed. Pre-brined, dry-brined, broilers, fryers, roasters, and natural chickens all benefit from trussing before roasting.
- Yield: 1 whole chicken will yield about 3 cups of cooked chicken.
- Storage: Store leftover chicken covered in the refrigerator for up to 4 days.