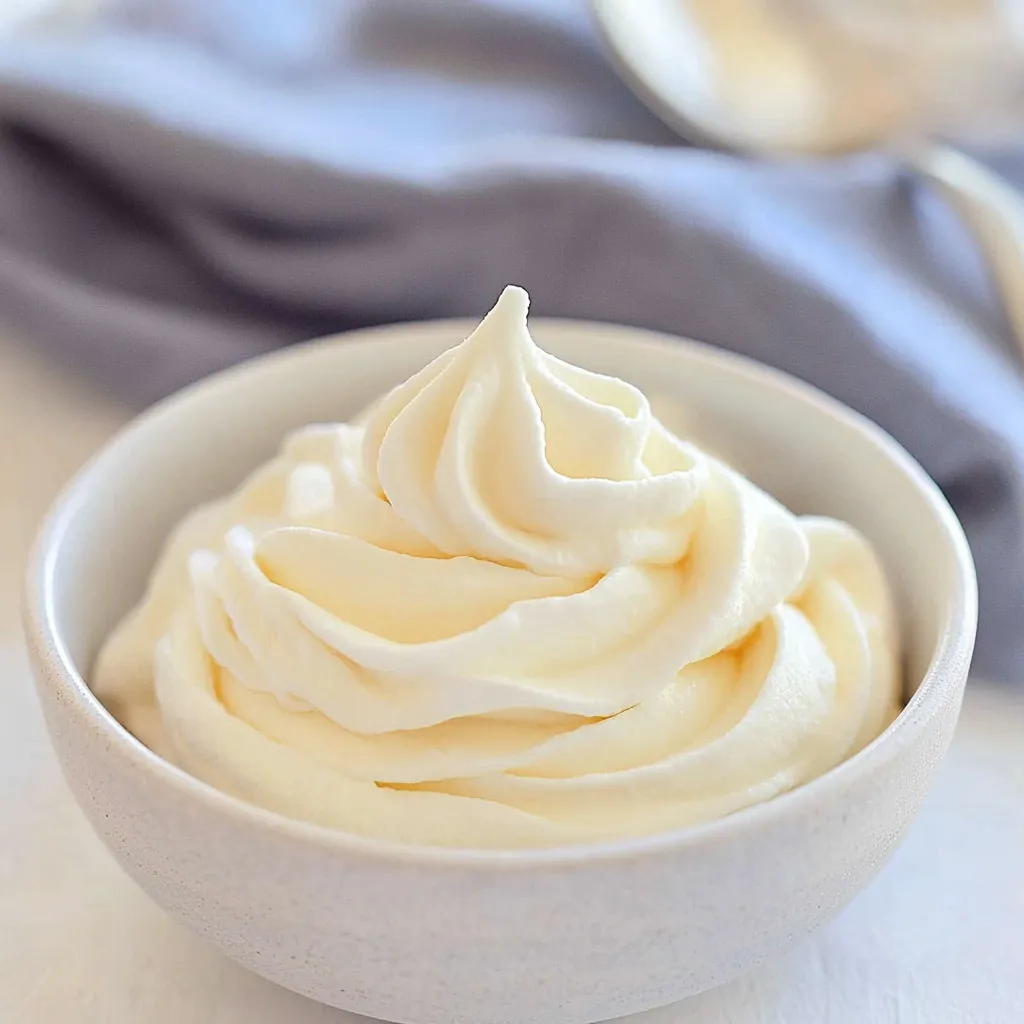
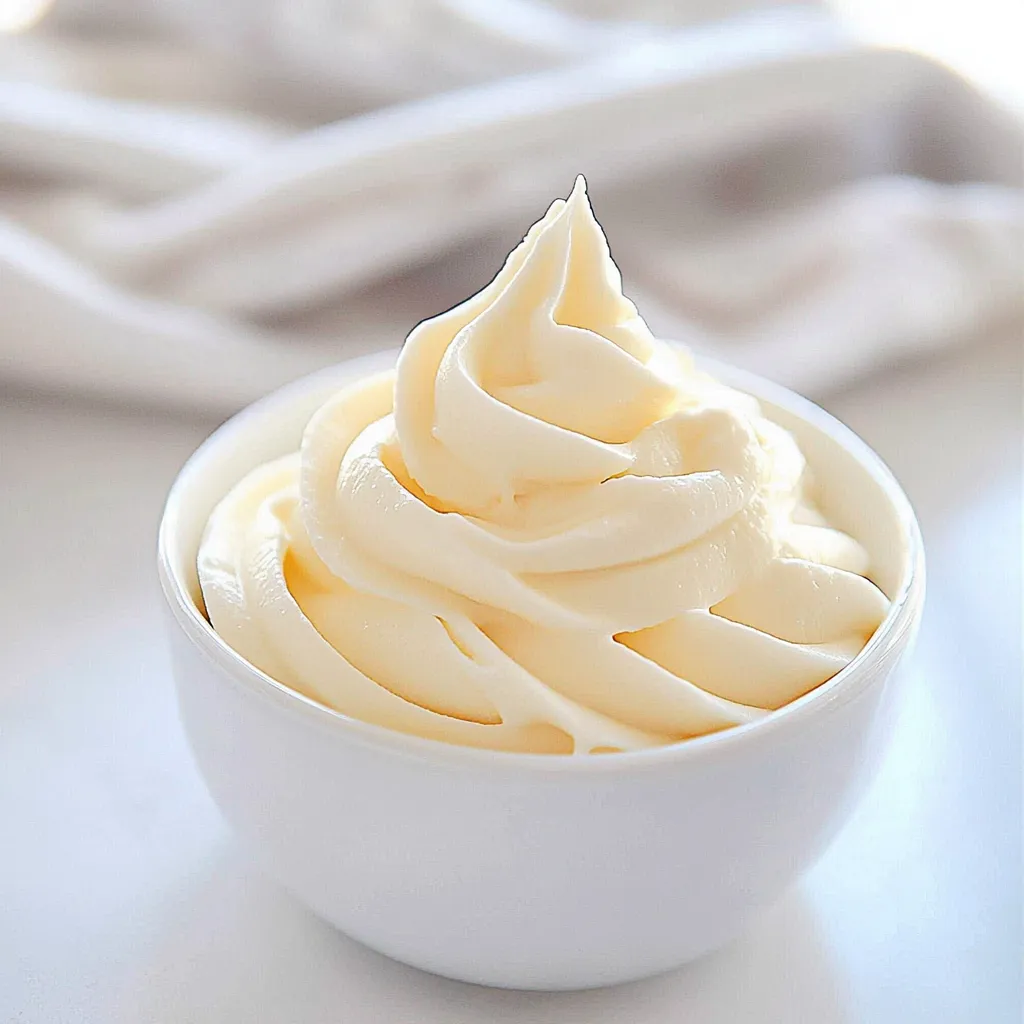
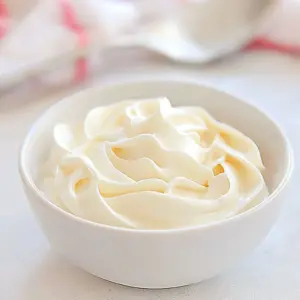
Homemade Whipped Cream
There’s something truly magical about making your own Homemade Whipped Cream. I still remember the first time I made it. It was a warm summer afternoon, and I was preparing a dessert for a family gathering. As I poured the heavy cream into the bowl, my excitement grew. The simple act of whipping the cream transformed it into something light, fluffy, and utterly delicious. The moment my family tasted it, I knew I had created something special. It was a hit! From that day on, I’ve always preferred my own Homemade Whipped Cream over any store-bought version. It’s not just about taste; it’s about the experience of creating something beautiful and satisfying with your own hands.
Recipe Snapshot
10 mins
10 mins
0 mins
Medium
100 kcal
0.5 g
Gluten-Free, Low FODMAP
5 g
Whisk, Mixing Bowl
What Sets This Homemade Whipped Cream Apart
Freshness Matters
One of the key reasons I love making Homemade Whipped Cream is the freshness. There’s a noticeable difference between freshly whipped cream and the stuff you find in the canister. When you whip your own, you control the ingredients and ensure there are no preservatives or artificial flavors. You can taste the difference!
Customization
With Homemade Whipped Cream, the sky is the limit when it comes to flavor. I love adding a dash of cinnamon or a hint of lemon zest to give it a unique twist. You can easily adapt it to fit your favorite desserts by experimenting with different flavors.
Perfect Texture
When you make Homemade Whipped Cream, you get to master the texture. I always aim for that perfect balance of airy and creamy. It holds its shape beautifully, making it the ideal topping for pies, cakes, or even pancakes. You just can’t beat that homemade touch!
Quick and Easy
Some might think that making Homemade Whipped Cream is a daunting task, but it’s surprisingly quick and easy! In just a few minutes, you can whip up something that will impress everyone. It’s a simple process that doesn’t require any special skills or tools.
Healthier Option
Many store-bought options contain unhealthy additives and excess sugar. When you make your own Homemade Whipped Cream, you can control the amount of sugar and even use alternatives if you prefer. It’s a guilt-free indulgence that lets you enjoy dessert without compromise.
Endless Uses
What I love most about Homemade Whipped Cream is its versatility. It can be used in a wide range of desserts, from cakes and pies to fruit salads and hot chocolate. It’s the perfect finishing touch that elevates any dish.
Shopping List for Homemade Whipped Cream
When it comes to making Homemade Whipped Cream, the ingredients are incredibly simple yet fundamental. The beauty lies in their purity and how they work together to create that luscious texture. You only need a few key players to whip up this delightful topping.
- Heavy cream: The star of the show! This luscious cream is higher in fat than regular cream, which gives your whipped cream its rich texture and stability.
- Powdered sugar: This sweetener blends effortlessly into the cream, providing just the right amount of sweetness without any grittiness.
- Vanilla extract: This adds a lovely depth of flavor, enhancing the overall taste and making the whipped cream irresistible.
How to Make Homemade Whipped Cream

Making Homemade Whipped Cream is a fun and rewarding process. With just a few steps, you’ll have a delicious topping ready to elevate your desserts. Let’s dive into the steps!
- Start by pouring 1 cup (240ml) of heavy cream into the bowl of a stand mixer fitted with the whisk attachment. If you don’t have a stand mixer, a hand mixer works just as well!
- Add ½ cup (57g) of powdered sugar to the cream. This sweetener is perfect as it dissolves quickly, ensuring a smooth texture.
- Include ½ teaspoon of vanilla extract for that essential flavor boost. It’s this little addition that makes a big difference!
- Turn the mixer to medium speed and whip the mixture. At this point, you’ll notice the cream starting to froth up. Keep an eye on it!
- After around 2 to 3 minutes, you’ll see the cream beginning to thicken. This is your cue to increase the mixer speed to medium-high.
- Continue whipping for another 30 seconds to 1 minute. Watch as it transforms into a billowy cloud of deliciousness!
- When the cream looks thick and holds peaks, it’s ready. You can check this by lifting the whisk out of the bowl. The whipped cream should form distinct trails behind the whisk.
- If you turn the whisk upside down, the cream should hold its shape and not droop off. If it’s still too loose, keep whipping for a few more seconds.
- Now, it’s time to serve! Top your favorite fruit or pie with the freshly whipped cream, or store it in the refrigerator for later.
- Remember, Homemade Whipped Cream can be kept in the refrigerator for up to 2 days. Just give it a brisk whisk before serving if it separates.
Things Worth Knowing
- Use cold cream: Ensure your heavy cream is very cold before whipping. This helps it to whip up faster and achieve a better volume.
- Don’t over-whip: Stop whipping as soon as you see stiff peaks forming. Over-whipping can turn the cream into butter!
- Variations: Feel free to experiment with adding flavors like cocoa powder, espresso powder, or even citrus zest for a unique twist.
- Storing: Store any leftover whipped cream in an airtight container in the fridge. If it loses its fluffiness, re-whip it for a few seconds.
Recipe Notes about Homemade Whipped Cream
Making Homemade Whipped Cream is straightforward, but here are some helpful tips to enhance your experience:
- Storage: Keep your whipped cream in an airtight container in the refrigerator. It will last for up to 2 days.
- Freezing: You can freeze Homemade Whipped Cream in an airtight container for up to 2 months. Just thaw it in the refrigerator overnight before using.
- Whipping tools: You can use a stand mixer, hand mixer, or even whisk it by hand if you’re feeling energetic!
- Make ahead: Prepare your whipped cream up to 2 days in advance, then give it a quick whisk before serving.
- Flavoring options: Consider flavoring your whipped cream with spices or citrus zest for a twist. It’s versatile!
Serving Ideas for Homemade Whipped Cream
- Top your favorite desserts: Use Homemade Whipped Cream on pies, cakes, or brownies for an indulgent touch.
- Enhance fruit salads: A dollop of whipped cream makes fresh fruit even more appealing and delicious.
- Add to hot drinks: It’s perfect for topping off hot chocolate or coffee for an extra treat on cold days.
- Use in breakfast dishes: Pair it with pancakes, waffles, or French toast for a delightful morning surprise.
- Festive occasions: Serve it during celebrations to elevate the dessert table, especially during holidays or family gatherings.
- Seasonal flavors: Adjust the flavors to match the season, such as pumpkin spice in the fall or mint in the winter.
FAQ
Conclusion
Making Homemade Whipped Cream is a delightful experience that brings a touch of magic to any dessert. It’s not only easy to prepare but also customizable to suit your taste. I encourage you to give it a try; you won’t regret it! Your desserts will never be the same once you add this fluffy, sweet topping. Enjoy the smiles on your family and friends’ faces when they taste your delicious creations!
Homemade Whipped Cream
Equipment
- Whisk
- Mixing Bowl
Ingredients
- 1 cup Heavy cream
- ½ cup Powdered sugar
- ½ teaspoon Vanilla extract
Instructions
- Start by pouring 1 cup (240ml) of heavy cream into the bowl of a stand mixer fitted with the whisk attachment. If you don’t have a stand mixer, a hand mixer works just as well!
- Add ½ cup (57g) of powdered sugar to the cream. This sweetener is perfect as it dissolves quickly, ensuring a smooth texture.
- Include ½ teaspoon of vanilla extract for that essential flavor boost. It’s this little addition that makes a big difference!
- Turn the mixer to medium speed and whip the mixture. At this point, you’ll notice the cream starting to froth up. Keep an eye on it!
- After around 2 to 3 minutes, you’ll see the cream beginning to thicken. This is your cue to increase the mixer speed to medium-high.
- Continue whipping for another 30 seconds to 1 minute. Watch as it transforms into a billowy cloud of deliciousness!
- When the cream looks thick and holds peaks, it’s ready. You can check this by lifting the whisk out of the bowl. The whipped cream should form distinct trails behind the whisk.
- If you turn the whisk upside down, the cream should hold its shape and not droop off. If it’s still too loose, keep whipping for a few more seconds.
- Now, it’s time to serve! Top your favorite fruit or pie with the freshly whipped cream, or store it in the refrigerator for later.
- Remember, Homemade Whipped Cream can be kept in the refrigerator for up to 2 days. Just give it a brisk whisk before serving if it separates.
Notes
- Storage: Keep your whipped cream in an airtight container in the refrigerator. It will last for up to 2 days.
- Freezing: You can freeze Homemade Whipped Cream in an airtight container for up to 2 months. Just thaw it in the refrigerator overnight before using.
- Whipping tools: You can use a stand mixer, hand mixer, or even whisk it by hand if you’re feeling energetic!
- Make ahead: Prepare your whipped cream up to 2 days in advance, then give it a quick whisk before serving.
- Flavoring options: Consider flavoring your whipped cream with spices or citrus zest for a twist. It’s versatile!