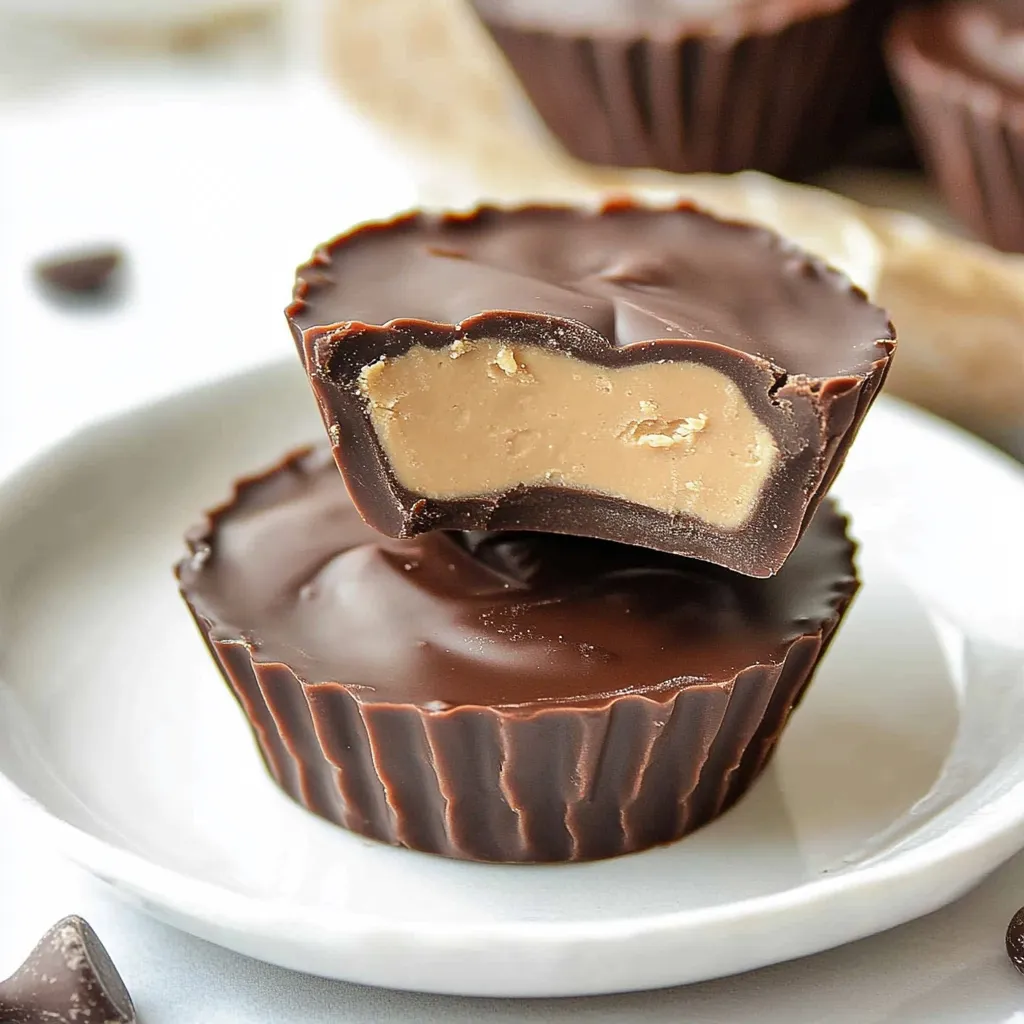
Homemade Giant Reese’s Peanut Butter Cups
There’s nothing quite like sinking your teeth into a delicious homemade treat, and my favorite has to be the Homemade Giant Reese’s Peanut Butter Cups. Growing up, I adored those store-bought versions, but little did I know how easy it was to create my own at home. The first time I made these was during a cozy weekend when I felt like indulging my sweet tooth. It was a rainy day, perfect for baking and experimenting in the kitchen. I gathered all the ingredients, excited to recreate this childhood favorite. As the rich smell of melting chocolate filled my kitchen, I couldn’t help but reminisce about those childhood memories. This recipe quickly became a staple for family gatherings and parties, and I’ve been amazed at how easy it is to impress friends and family with these homemade delights.
Recipe Snapshot
30 mins
25 mins
5 mins
Medium
220 kcal
3 g
Gluten-Free, Low FODMAP
15 g
Silicone Muffin Tins
Why We Love This Homemade Giant Reese’s Peanut Butter Cups
It’s Personal
What I love most about the Homemade Giant Reese’s Peanut Butter Cups is the personal touch you can add. You can adjust the sweetness or even explore different chocolate varieties, making it truly yours.
Fun for Everyone
This is not only a recipe—it’s an event! Making these giant treats is a fun activity for kids and adults alike. Everyone loves to get involved, whether it’s mixing the ingredients or shaping the patties.
Perfect for Gifting
These homemade cups make for an amazing gift. Just package them in a beautiful box, and you have a heartfelt present that anyone would love to receive.
Simple Yet Elegant
Despite being a simple recipe, the Homemade Giant Reese’s Peanut Butter Cups look fancy. The layers of chocolate and peanut butter create a stunning visual that’s perfect for special occasions.
Endless Possibilities
The beauty of this recipe lies in its versatility. You can add different flavors or even mix in your favorite nuts to customize these cups to your liking.
Budget-Friendly
Who doesn’t love a delicious treat that doesn’t break the bank? This recipe is not only easy but also economical, making it perfect for a sweet treat any day of the week.
Key Ingredients for Homemade Giant Reese’s Peanut Butter Cups
The ingredients for the Homemade Giant Reese’s Peanut Butter Cups are simple yet effective. The key players include creamy peanut butter, which provides that rich flavor we love, and chocolate that gives it a sweet touch. Together, they create a delightful balance that is simply irresistible.
- Pineut Butter: The star of our recipe, peanut butter offers that creamy texture and nutty flavor that complements the chocolate perfectly.
- Butter: Used to create a smooth mixture, butter adds richness and helps bind the ingredients together.
- Powdered Sugar: This ingredient provides sweetness and ensures the filling has a smooth, creamy texture.
- Vanilla Extract: While not a strong flavor, the hint of vanilla enhances the overall taste of the peanut butter filling.
- Chocolate: Rich dark or milk chocolate forms the outer layer, making the cups a decadent treat.
- More Butter: Extra butter is added to the chocolate to ensure a beautiful, shiny finish when melted.
How to Make Homemade Giant Reese’s Peanut Butter Cups

Making the Homemade Giant Reese’s Peanut Butter Cups is a fun and rewarding process. Let’s dive into the steps that will guide you through creating these delicious treats!
In a medium bowl, use a mixer to combine peanut butter and 1/4 cup butter. Mix until the combination is smooth and creamy. You should aim for a texture that is easy to spread and holds its shape well.
Add powdered sugar and vanilla to the mixture. Continue mixing until everything is well combined and smooth. The consistency should be thick but manageable for shaping.
Use your hands to shape 1 tablespoon of the peanut butter mixture into a patty. This is the fun part! Repeat this step with the remaining peanut butter mixture, ensuring each patty is uniform in size.
Place the patties on a cookie sheet lined with waxed paper. Refrigerate for about 30 minutes. This will help them firm up, making them easier to work with later.
Melt the chocolate in a double boiler, or in the microwave in 30-second increments. Be cautious not to overheat it. The chocolate should be completely melted and smooth.
Add 2 tablespoons butter to the melted chocolate, stirring until it melts and incorporates fully. This gives the chocolate a nice glossy finish, perfect for coating.
Spoon about 2 teaspoons of the melted chocolate into the bottom of a cupcake liner. This forms the base layer for your peanut butter cups.
Carefully place a chilled peanut butter patty on top of the chocolate. Ensure that it’s centered to create an even layer.
Spoon just enough chocolate on top to cover the patty. You want a nice thick layer that ensures the peanut butter is completely encased.
Repeat this process with the remaining chocolate and peanut butter patties until everything is used up. Make sure to leave a bit of chocolate for the final layer.
Allow the peanut butter cups to set for a couple of hours before removing the cupcake liners. Patience is key here to achieve the best results.
Things Worth Knowing
- Quality Matters: Using high-quality chocolate will significantly elevate the taste of your Homemade Giant Reese’s Peanut Butter Cups.
- Chill Time: Make sure to refrigerate long enough. This will ensure the layers set properly and hold together as you bite into them.
- Even Sizing: Aim for uniformity in your peanut butter patties to ensure even melting and coating.
- Experiment: Feel free to try different nuts or flavors! You can add crushed nuts or even a hint of sea salt for a gourmet twist.
Helpful Notes about Homemade Giant Reese’s Peanut Butter Cups
If you want to ensure the best results while making your Homemade Giant Reese’s Peanut Butter Cups, here are some helpful notes:
- Storage: These treats can be stored in an airtight container in the fridge for up to two weeks. They’ll stay fresh and delicious!
- Freezing: If you want to prepare in advance, you can freeze these peanut butter cups for up to three months. Just make sure to wrap them well!
- Pairing: These delicious cups go well with a glass of milk or a scoop of ice cream for a decadent dessert.
- Serving Occasion: Ideal for parties, movie nights, or just an indulgent treat any time of the year!
Serve This Homemade Giant Reese’s Peanut Butter Cups With
There are so many ways to enjoy your Homemade Giant Reese’s Peanut Butter Cups. Here are some ideas on how to serve them:
- With a Glass of Milk: Pairing these cups with a chilled glass of milk is a classic combination that enhances the chocolate flavor.
- Ice Cream Sundae: Top a scoop of vanilla ice cream with crushed peanut butter cups for an over-the-top dessert experience.
- Coffee Break: Enjoy these cups as a sweet treat during your coffee break for a delightful pick-me-up.
- Birthday Parties: These homemade treats are perfect for kids’ birthday parties, offering a unique twist to traditional desserts.
- Picnics: Pack them up for a picnic or outdoor adventure. They’re easy to transport and sure to be a hit!
- Seasonal Celebrations: Great for any celebration, from Halloween to Christmas, they can be customized for any occasion!
FAQ
Conclusion
The Homemade Giant Reese’s Peanut Butter Cups truly bring a nostalgic twist to a beloved classic. With their creamy peanut butter filling and smooth chocolate coating, they’re perfect for satisfying any sweet craving. I encourage you to try making these delightful treats; you’ll love how easy they are to whip up. Not only will you impress yourself, but you’ll also create something delicious to share with friends and family!
Homemade Giant Reese’s Peanut Butter Cups
Equipment
- Silicone Muffin Tins
Ingredients
- 1 cup Peanut Butter
- 1/4 cup Butter
- 1 3/4 cups Powdered Sugar
- 1 teaspoon Vanilla Extract
- 16 ounces Chocolate
- 2 tablespoons Butter
Instructions
- In a medium bowl, use a mixer to combine the peanut butter and 1/4 cup butter.
- Add the powdered sugar and vanilla, and continue mixing until combined and smooth.
- Use your hands to shape 1 tablespoon of the peanut butter mixture into a patty. Repeat with the remaining peanut butter mixture.
- Place the patties on a cookie sheet lined with waxed paper and refrigerate for about 30 minutes.
- Melt the chocolate in a double boiler, or in the microwave in 30-second increments.
- Add 2 tablespoons butter to the chocolate, and stir until the butter has melted and the mixture is smooth.
- Spoon about 2 teaspoons of chocolate into the bottom of a cupcake liner.
- Place a chilled peanut butter patty on top of the chocolate.
- Spoon just enough chocolate on top to cover the patty.
- Repeat with the remaining chocolate and peanut butter patties.
- Allow the peanut butter cups to set for a couple of hours before removing the cupcake liner.
Notes
- Storage: These treats can be stored in an airtight container in the fridge for up to two weeks. They’ll stay fresh and delicious!
- Freezing: If you want to prepare in advance, you can freeze these peanut butter cups for up to three months. Just make sure to wrap them well!
- Pairing: These delicious cups go well with a glass of milk or a scoop of ice cream for a decadent dessert.
- Serving Occasion: Ideal for parties, movie nights, or just an indulgent treat any time of the year!