Homemade Apple Pie
There’s something truly magical about the aroma of a freshly baked Homemade Apple Pie wafting through the kitchen. I still remember the first time I helped my grandmother make this classic dessert during the fall. The bright colors of the apples, the buttery crust, and the warm spices mingling together created a symphony of flavors that felt like a hug from the inside out. When my friends come over for dinner, I love treating them to a slice of this pie, reminiscing about the cozy family gatherings spent around the table. Each bite takes me back to those cherished moments, and I know it will do the same for you!
Recipe Snapshot
1 hr 55 mins
45 mins
70 mins
Hard
270 kcal
2 g
Gluten-Free, Low FODMAP
12 g
9-inch glass or stainless steel pie dish
Why This Homemade Apple Pie Works
It’s All About the Flavor
What sets this Homemade Apple Pie apart is the blend of apples used. I like to mix varieties like Pink Lady, Gala, and Honeycrisp to achieve a harmonious balance of tartness and sweetness. Each variety contributes its unique character, making every bite a delightful surprise.
A Perfect Crust
The crust is the foundation of any pie, and in this recipe, it’s a buttery, flaky masterpiece! I like to chill the butter, which helps create that wonderful texture. Plus, the secret addition of crème fraîche adds a subtle richness that elevates it to the next level.
Simple Yet Impressive
While some might shy away from making pie, this recipe is surprisingly straightforward. You don’t need to be a professional baker to achieve a stunning Homemade Apple Pie. The instructions guide you step-by-step, and soon you’ll have a pie worthy of any holiday table.
Make-Ahead Capability
One of the best aspects of this recipe is how you can prep the pie in advance, making it perfect for those busy holiday gatherings. You can assemble the pie a day ahead and freeze it, so it’s ready to bake when you are!
Comfort Food at Its Best
There’s nothing more comforting than a warm slice of Homemade Apple Pie topped with a scoop of vanilla ice cream or a dollop of whipped cream. It’s a dish that brings people together, sparking joy and conversation around the table.
Ingredients You’ll Need for Homemade Apple Pie
The ingredients for this Homemade Apple Pie are simple yet incredibly effective. Each one plays a vital role in creating the perfect pie, from the crisp apples to the rich butter and the hint of cinnamon. These staples work together harmoniously to create a sweet and tangy filling nestled in a buttery crust. Let’s take a closer look at each ingredient.
- 2 1/2 cups all-purpose flour: The base for your pie crust, giving it structure and flakiness.
- 2 tablespoons white granulated sugar: Adds sweetness to the crust.
- 1 1/2 teaspoons kosher salt: Essential for balancing the flavors.
- 1 cup unsalted butter, cold and straight from the fridge: The star of the crust, creating a rich and tender texture.
- 3/4 cup very cold water, divided: Helps bring the dough together without warming the butter.
- 1/2 small lemon, juiced (about 1 1/2 tablespoons): Brightens the flavor of the apples and prevents browning.
- 3-4 whole medium to large apples (Pink Lady, Gala, and Honeycrisp are my favorites), peeled, halved, cored, and thinly sliced: The main filling, each adds unique flavor.
- 1/4 cup all-purpose flour: Thickens the apple filling.
- 1/2 cup light brown sugar: Adds a deeper sweetness to the filling.
- 1 1/2 teaspoons ground cinnamon: The warm spice that defines the flavor profile.
- 1 teaspoon pure vanilla extract or 1/2 teaspoon vanilla paste: Enhances the overall flavor of the pie.
- 1/2 teaspoon kosher salt: Balances sweetness in the filling.
- 2 tablespoons crème fraîche or sour cream: Adds a creamy texture to the apple mixture.
- 1 large egg, beaten (for egg wash): Gives the crust a beautiful golden sheen.
- 1 tablespoon turbinado sugar, for topping (optional): Adds a delightful crunch on top.
How to Prepare Homemade Apple Pie
Making a Homemade Apple Pie is an enjoyable process that brings the warmth of baking into your kitchen. Follow these steps closely to achieve the best results. You’ll soon find yourself smiling as the pie bakes and fills your home with its incredible scent.
- In a large bowl, mix together the 2 1/2 cups of all-purpose flour, 2 tablespoons of white granulated sugar, and 1 1/2 teaspoons of kosher salt. This forms the base of your crust and ensures the flavors are evenly distributed.
- Using a box grater, grate the cold butter into the flour mixture. This allows for small bits of butter to be evenly distributed, which will create a flaky crust.
- Transfer the bowl to the freezer for 10 minutes to chill. It’s important that the mixture stays cold so that the butter remains solid while baking.
- After 10 minutes, take the mixture out and use your hands to break the butter bits into the flour until they resemble the size of small peas. You want a crumbly texture that still has some larger pieces of butter.
- Slowly add in half of the recommended water and mix until combined. You want the mixture to start coming together, but it will still look shaggy at this point.
- From here, add one tablespoon of water at a time until the dough forms a cohesive mass. Too much water will make the crust tough, so add it gradually.
- Flour your counter and dump the dough onto it. Knead it a few times until it holds together well. Aim for a smooth texture but don’t overwork it.
- Divide the dough into two discs and wrap each in plastic wrap. Transfer them to the refrigerator to chill for at least one hour, ideally overnight for best results.
- While the dough chills, peel your apples if you prefer. Halve them, remove the cores, and slice them thinly into 1/4-inch pieces. This ensures even cooking and a nice texture.
- In a large bowl, squeeze the lemon juice over the sliced apples, ensuring to catch any seeds. This will enhance the flavor and keep the apples from browning.
- Add the 1/4 cup of all-purpose flour, 1/2 cup of light brown sugar, 1 1/2 teaspoons of ground cinnamon, 1 teaspoon of vanilla extract, and 1/2 teaspoon of kosher salt to the apples. Toss gently until the apples are thoroughly coated.
- Next, add 2 tablespoons of crème fraîche to the apples and toss until evenly distributed. This will add a rich creaminess.
- Remove the first disc of dough from the refrigerator and let it come to room temperature for about 5 minutes. Flour your work surface and rolling pin generously.
- Roll out the first disc to a 13-inch round. Wrap it around your rolling pin and unroll it over a 9-inch pie dish. Gently fit the dough into the bottom and up the sides of the dish.
- Trim the excess dough, leaving about a 1/2-inch overhang. Recombine the scraps for the lattice design later. Chill the pie shell while you roll out the second disc.
- Repeat the rolling process with the second disc and cut it into 3-inch strips for the lattice top. Reroll the scraps as needed.
- Fill the pie shell with the apple filling, ensuring it’s evenly distributed.
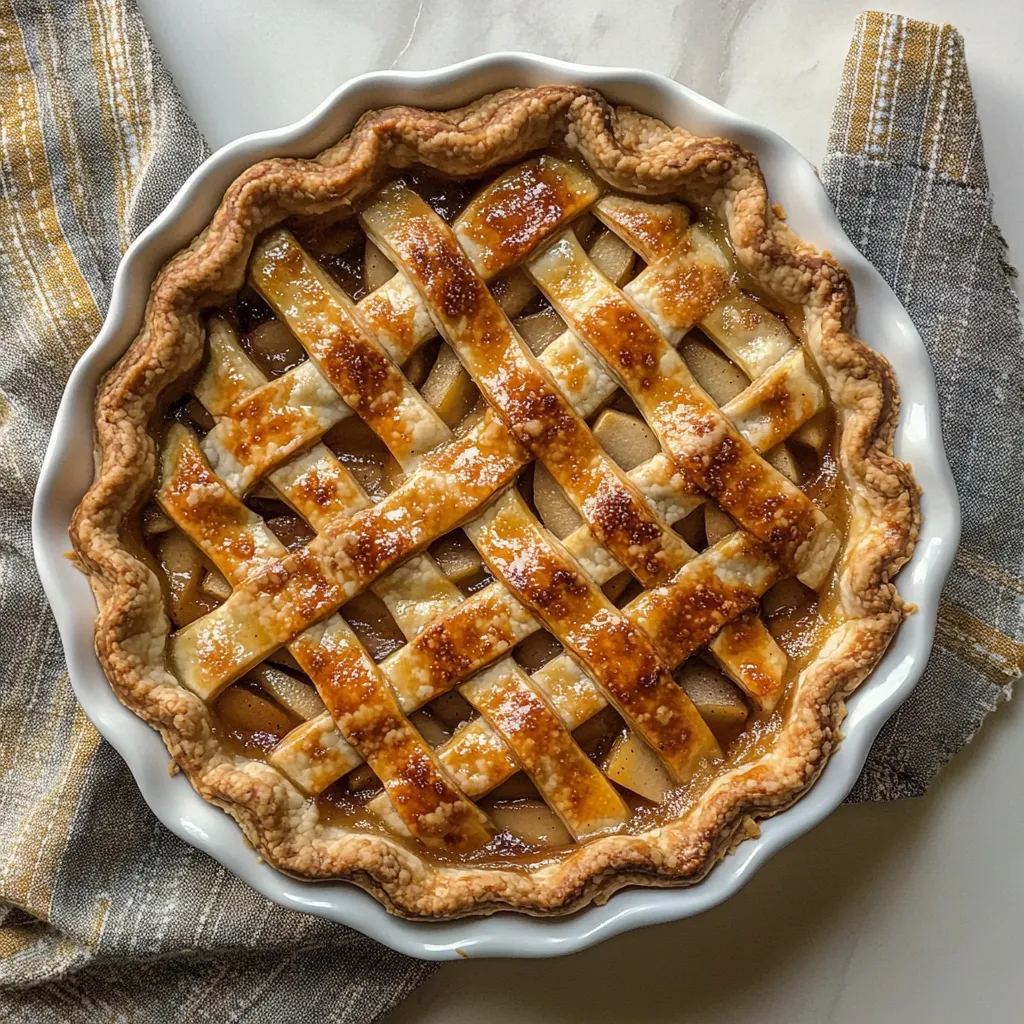
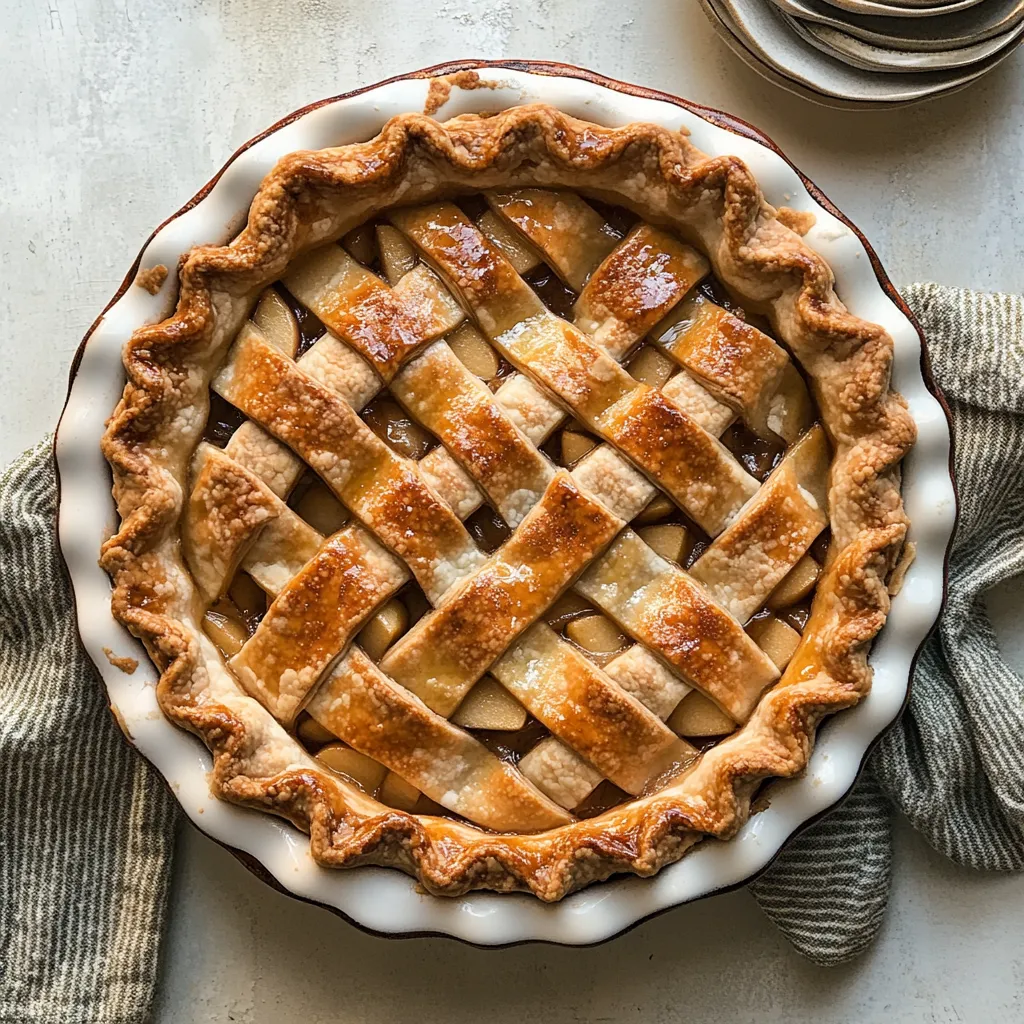
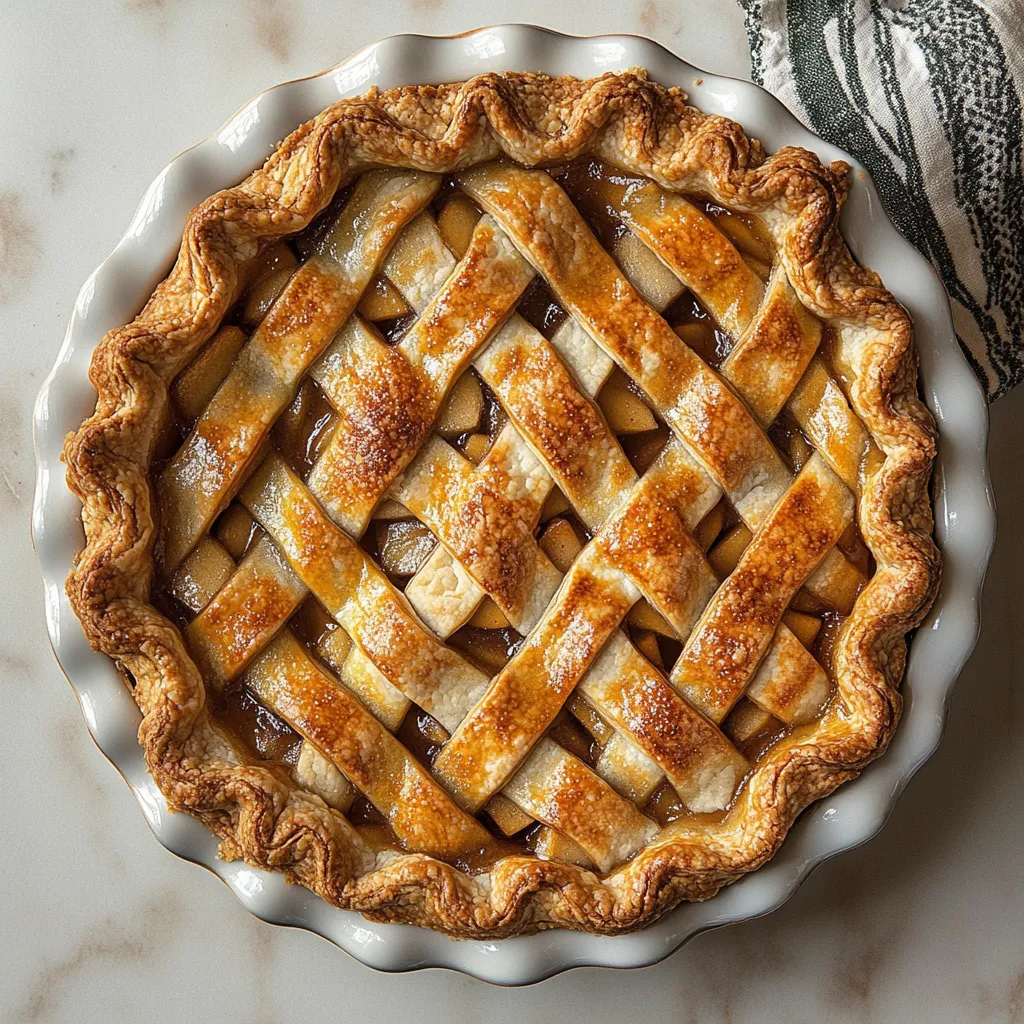
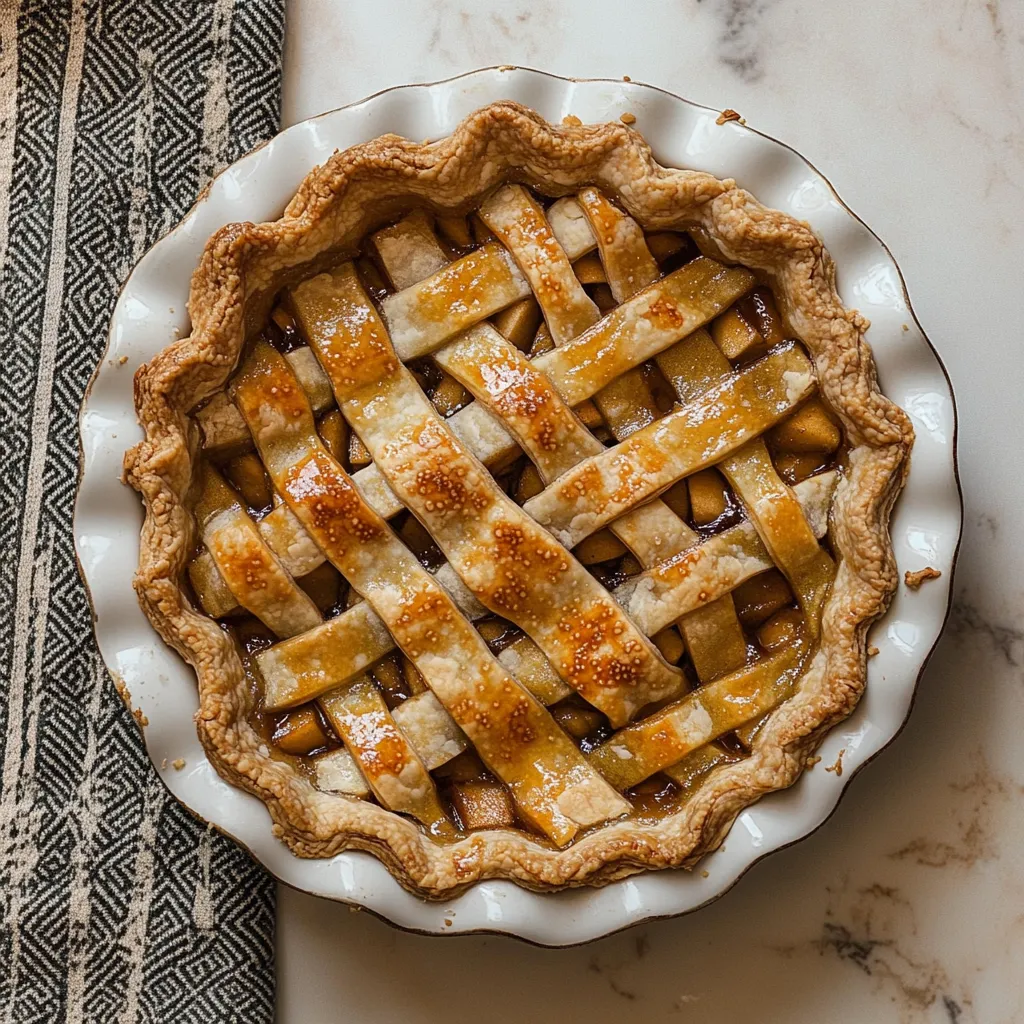
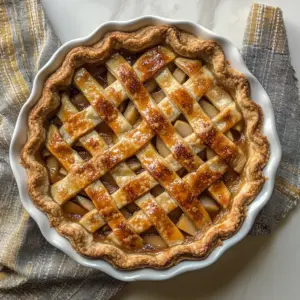
- Lay out five strips of dough on top of the filling, leaving about 1/2-inch spaces between them. Then lay the remaining strips perpendicular, which will help you see how to weave them.
- Carefully fold back every other strip of dough and layer the opposite strips on top, weaving them under and over each other. This lattice will create a beautiful pattern.
- Once assembled, trim the edges of the strips, leaving about a 1-inch overhang. Tuck the edges under for a clean finish. Create a crimped edge for a decorative touch.
- Chill the pie in the freezer for 30 minutes. Meanwhile, preheat your oven to 400 degrees F.
- Brush the entire pie with the beaten egg for an egg wash and sprinkle with turbinado sugar for a crunchy topping.
- Transfer the pie to a baking sheet and bake for 20 to 25 minutes until the edges are lightly browned. Then reduce the temperature to 350 degrees F and bake for another 40 to 45 minutes, until it’s deeply golden brown.
- Keep an eye on it – if the crust gets too dark, cover it with foil.
- Let the pie cool for at least two hours to firm up before slicing. Serve with a scoop of ice cream or a dollop of whipped cream to take it over the top!
Things Worth Knowing
- Temperature matters: Make sure your ingredients are cold. Chilling the butter and water is key to a flaky crust.
- Apple variety: Mixing different types of apples creates a complex flavor profile. Don’t be afraid to experiment!
- Let it rest: Allowing the pie to cool properly before slicing helps the filling set, preventing a runny slice.
- Use a baking sheet: Placing your pie on a baking sheet while baking catches any potential drips, preventing a messy oven.
Recipe Variations about Homemade Apple Pie
There are so many fun ways to put a twist on the classic Homemade Apple Pie. Here are some variations to try and keep things exciting!
- Spiced Apple Pie: Add a touch of nutmeg or allspice to the filling for an extra layer of warmth.
- Caramel Apple Pie: Drizzle caramel sauce over the apple filling before covering with the crust for a sweet twist.
- Nutty Crust: Incorporate finely chopped nuts into the crust for added texture and flavor.
- Cheddar Crust: If you’re feeling adventurous, try adding sharp cheddar cheese to your pie crust for a unique flavor.
- Apple Berry Pie: Mix in berries like blueberries or raspberries with the apples for a fruity twist.
Pairing Suggestions for Homemade Apple Pie
To truly enjoy your Homemade Apple Pie, consider these delightful pairing suggestions that complement its sweet, spiced flavors.
- Pair with Ice Cream: Serve warm slices with a scoop of vanilla ice cream for a classic combination that melts in your mouth.
- Whipped Cream: A dollop of freshly whipped cream on top adds a light and airy texture.
- Cheese: A slice of sharp cheddar cheese pairs beautifully with the sweetness of the pie.
- Coffee: A cup of freshly brewed coffee enhances the experience, providing a comforting balance.
- Seasonal Fruits: Serve alongside other seasonal fruits for a colorful and nutritious plate.
- Perfect for Gatherings: This pie is ideal for holiday gatherings like Thanksgiving or cozy family dinners during fall.
FAQ
Conclusion
A Homemade Apple Pie is not just a dessert; it’s an experience that brings warmth and nostalgia to any gathering. The combination of tender apples, a flaky crust, and warm spices creates a dish that feels like home. I encourage you to try this recipe and create new memories around the table with family and friends. You might just find it becomes a cherished tradition in your home.
Homemade Apple Pie
Equipment
- 9-inch glass or stainless steel pie dish
Ingredients
- 2 1/2 cups cups all-purpose flour
- 2 tablespoons tablespoons white granulated sugar
- 1 1/2 teaspoons teaspoons kosher salt
- 1 cup cup unsalted butter cold and straight from the fridge
- 3/4 cup cups very cold water divided
- 1/2 small lemon juiced (about 1 1/2 tablespoons)
- 3-4 whole medium to large apples (pink lady, gala and honeycrisp are my favorites), peeled, halved, cored and thinly sliced
- 1/4 cup cup all-purpose flour
- 1/2 cup cup light brown sugar
- 1 1/2 teaspoons teaspoons ground cinnamon
- 1 teaspoon teaspoon pure vanilla extract or 1/2 teaspoon vanilla paste
- 1/2 teaspoon teaspoons kosher salt
- 2 tablespoons tablespoons crème fraîche or sour cream
- 1 large egg beaten (for egg wash)
- 1 tablespoon tablespoon turbinado sugar for topping (optional)
Instructions
- In a large bowl, mix together the 2 1/2 cups of all-purpose flour, 2 tablespoons of white granulated sugar, and 1 1/2 teaspoons of kosher salt. This forms the base of your crust and ensures the flavors are evenly distributed.
- Using a box grater, grate the cold butter into the flour mixture. This allows for small bits of butter to be evenly distributed, which will create a flaky crust.
- Transfer the bowl to the freezer for 10 minutes to chill. It’s important that the mixture stays cold so that the butter remains solid while baking.
- After 10 minutes, take the mixture out and use your hands to break the butter bits into the flour until they resemble the size of small peas. You want a crumbly texture that still has some larger pieces of butter.
- Slowly add in half of the recommended water and mix until combined. You want the mixture to start coming together, but it will still look shaggy at this point.
- From here, add one tablespoon of water at a time until the dough forms a cohesive mass. Too much water will make the crust tough, so add it gradually.
- Flour your counter and dump the dough onto it. Knead it a few times until it holds together well. Aim for a smooth texture but don’t overwork it.
- Divide the dough into two discs and wrap each in plastic wrap. Transfer them to the refrigerator to chill for at least one hour, ideally overnight for best results.
- While the dough chills, peel your apples if you prefer. Halve them, remove the cores, and slice them thinly into 1/4-inch pieces. This ensures even cooking and a nice texture.
- In a large bowl, squeeze the lemon juice over the sliced apples, ensuring to catch any seeds. This will enhance the flavor and keep the apples from browning.
- Add the 1/4 cup of all-purpose flour, 1/2 cup of light brown sugar, 1 1/2 teaspoons of ground cinnamon, 1 teaspoon of vanilla extract, and 1/2 teaspoon of kosher salt to the apples. Toss gently until the apples are thoroughly coated.
- Next, add 2 tablespoons of crème fraîche to the apples and toss until evenly distributed. This will add a rich creaminess.
- Remove the first disc of dough from the refrigerator and let it come to room temperature for about 5 minutes. Flour your work surface and rolling pin generously.
- Roll out the first disc to a 13-inch round. Wrap it around your rolling pin and unroll it over a 9-inch pie dish. Gently fit the dough into the bottom and up the sides of the dish.
- Trim the excess dough, leaving about a 1/2-inch overhang. Recombine the scraps for the lattice design later. Chill the pie shell while you roll out the second disc.
- Repeat the rolling process with the second disc and cut it into 3-inch strips for the lattice top. Reroll the scraps as needed.
- Fill the pie shell with the apple filling, ensuring it’s evenly distributed.
- Lay out five strips of dough on top of the filling, leaving about 1/2-inch spaces between them. Then lay the remaining strips perpendicular, which will help you see how to weave them.
- Carefully fold back every other strip of dough and layer the opposite strips on top, weaving them under and over each other. This lattice will create a beautiful pattern.
- Once assembled, trim the edges of the strips, leaving about a 1-inch overhang. Tuck the edges under for a clean finish. Create a crimped edge for a decorative touch.
- Chill the pie in the freezer for 30 minutes. Meanwhile, preheat your oven to 400 degrees F.
- Brush the entire pie with the beaten egg for an egg wash and sprinkle with turbinado sugar for a crunchy topping.
- Transfer the pie to a baking sheet and bake for 20 to 25 minutes until the edges are lightly browned. Then reduce the temperature to 350 degrees F and bake for another 40 to 45 minutes, until it’s deeply golden brown.
- Keep an eye on it – if the crust gets too dark, cover it with foil.
- Let the pie cool for at least two hours to firm up before slicing. Serve with a scoop of ice cream or a dollop of whipped cream to take it over the top!
Notes
- Make the dough ahead: You can make your pie dough ahead of time and freeze it for up to 3 months.
- Make the pie ahead: Assemble this entire pie and stick it in the freezer overnight and then bake it off the next day. It’ll work very well.
- To store a baked pie: Cover lightly with a clean kitchen towel and store on the kitchen counter. The fridge can make the crust soggy due to moisture.