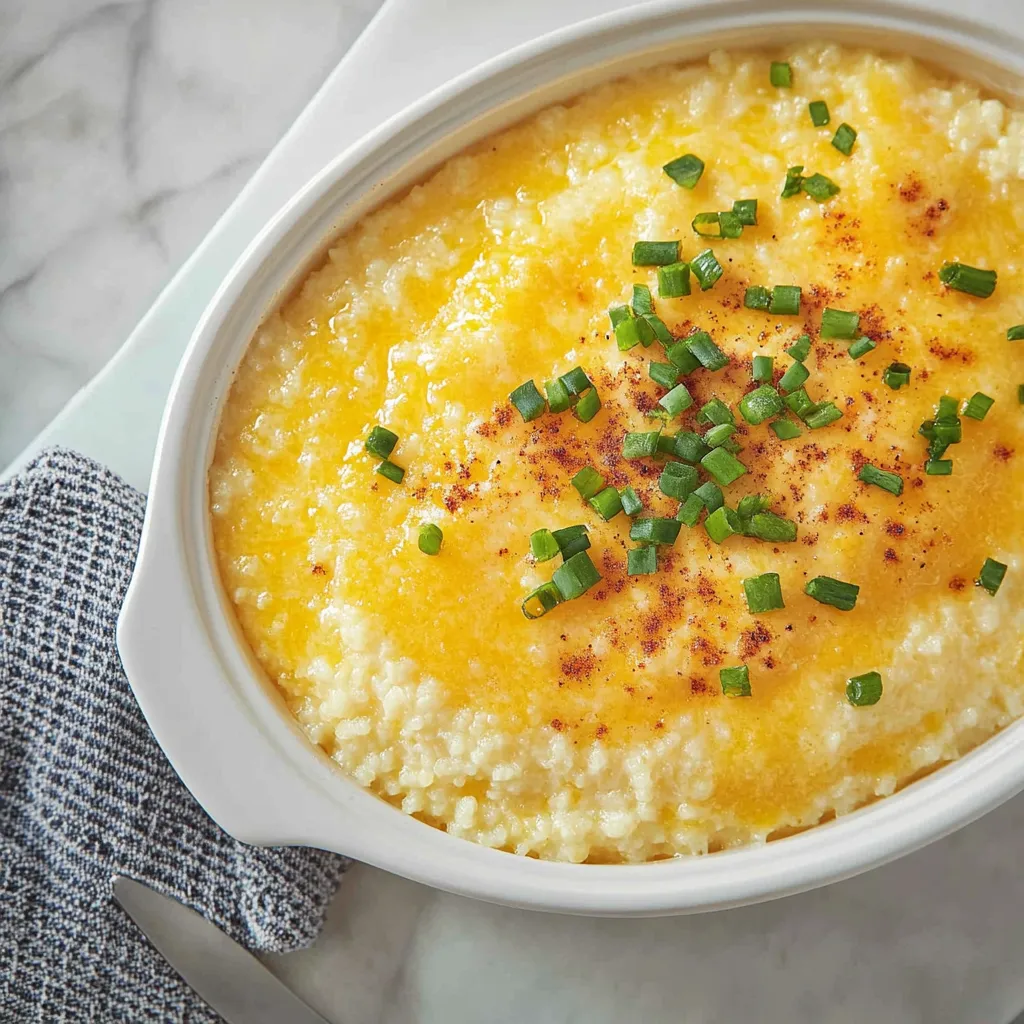
Cheese Grits
The first time I made Cheese Grits, I was transported back to my grandmother’s cozy kitchen. She had a knack for making every meal feel special, and her creamy grits were no exception. I can still recall the aroma of melting cheese wafting through the air, promising a dish that was both comforting and indulgent. It was a cold winter evening, and the warmth of the grits paired perfectly with a family gathering around the table. We laughed, shared stories, and enjoyed every creamy bite of these delightful grits. Now, whenever I prepare Cheese Grits, I’m reminded of those cherished moments and the love that goes into every spoonful.
Recipe Snapshot
1 hr 25 mins
10 mins
75 mins
Medium
350 kcal
12 g
Keto, Gluten-Free
20 g
Mixing Bowl, Baking Sheet, Large Pot, Wooden Spoon, Whisk, Frying Pan, Oven, Saucepan
Why Try This Cheese Grits
Comforting and Versatile
One of the things I love most about Cheese Grits is their versatility. Whether you serve them as a side dish, a breakfast treat, or even as a main course topped with sautéed veggies, they never fail to impress. Their creamy texture can elevate any meal, making them a staple in my kitchen.
Perfect for Gatherings
There’s something magical about sharing Cheese Grits with friends and family. They are an instant crowd-pleaser, perfect for gatherings, brunches, or even potlucks. Everyone loves them, and they’re a great way to bring people together around the dinner table.
Easy to Make
Don’t let the rich flavor fool you; Cheese Grits are surprisingly easy to make. With just a few simple ingredients like grits, water, and cheese, you can whip up a batch in no time. It’s a recipe that even beginners can master, making it a go-to for anyone looking to impress.
Perfectly Creamy
The secret to the perfect Cheese Grits lies in the creaminess. By using quality ingredients like whole milk and a combination of cheeses, you create a dish that is rich and satisfying. The texture should be smooth and velvety, making every bite a delight.
Customization Opportunities
Another reason Cheese Grits stand out is the room for customization. You can easily adjust the flavor by trying different cheeses or adding spices. Want a little kick? Add some cayenne pepper or your favorite hot sauce. The possibilities are endless!
A Comfort Food Classic
Ultimately, Cheese Grits is a comfort food classic that warms both the body and soul. Each spoonful is like a warm hug, reminding you of home and family. They’re a dish that brings happiness and satisfaction every time, making them a forever favorite.
What to Buy for Cheese Grits

When it comes to making Cheese Grits, the ingredients you choose play a crucial role in achieving that perfect creamy texture and flavor. The combination of grits, cheese, and butter creates a delightful dish that can complement various meals. Each ingredient has its unique character, and together they harmonize beautifully.
- 4 cups water: The base of the grits, essential for cooking.
- 1 cup quick cooking grits: The star of the dish, providing that creamy texture.
- 1 teaspoon kosher salt: Enhances the flavor of the grits.
- 1/4 cup butter: Adds richness and creaminess to the dish.
- 5.2 ounces garlic cheese: I use Boursin garlic and herb cheese, which adds amazing flavor.
- 2 cups shredded cheddar cheese, divided: Provides that gooey, cheesy goodness.
- 2 large eggs, whisked: Helps to bind the mixture together.
- 3/4 cup whole milk: Contributes to the creamy texture of the grits.
Cooking Method for Cheese Grits
Cooking Cheese Grits is a rewarding experience that fills your kitchen with delightful aromas. Follow these steps closely to ensure your grits turn out perfectly creamy and flavorful.
- Preheat your oven to 350°F. This will ensure a consistent temperature for baking the grits. A well-preheated oven is essential for even cooking.
- Bring the water to a boil in a large saucepan. Make sure to keep an eye on it as it heats up. Once it starts bubbling, you can add the grits and salt.
- Reduce the heat to a simmer. This is where the magic happens. Cover the pot and let the grits cook for about 5 minutes. You want to stir occasionally to prevent sticking.
- Once thickened, remove the grits from the heat. It should be creamy and luscious. Add in the butter, garlic cheese, and 1 cup of cheddar cheese. Stir well until everything is melted and combined.
- In a separate bowl, mix the eggs and milk. This combination adds richness. Once mixed, add it to the grits mixture, stirring briskly until fully combined.
- Pour the mixture into a buttered 11 x 7 inch casserole dish. Make sure the dish is coated evenly to prevent sticking. The cheese will help create a delicious crust.
- Top with the remaining 1 cup of cheddar cheese. This will create a golden, bubbly topping that is irresistible.
- Bake for 1 hour. During this time, the Cheese Grits will become golden and bubbly. Keep an eye on it towards the end to avoid over-baking.
- Once done, remove from the oven and let it sit for a few minutes. This helps it set, making serving a breeze.
- Serve warm and enjoy the creamy, cheesy goodness!
Things Worth Knowing
- Quality Matters: Using high-quality cheese, such as freshly shredded cheddar, can significantly enhance the flavor and texture of your Cheese Grits.
- Grits Variations: You can experiment with different types of grits, like stone-ground, for a coarser texture that adds a rustic touch to your dish.
- Temperature Control: Maintaining the right temperature while cooking the grits ensures a smooth consistency. Avoid boiling them too vigorously.
- Resting Time: Allowing the dish to rest after baking helps it firm up, making it easier to serve and enjoy.
How to Switch It Up
Looking to add a twist to your Cheese Grits? Here are some fun ways to customize this dish and make it your own:
- Add Veggies: Incorporate sautéed spinach, mushrooms, or peppers for a nutritious boost and added flavor.
- Change the Cheese: Experiment with different cheeses like pepper jack for a spicy kick or gouda for a smoky flavor.
- Mix in Proteins: For a heartier meal, add cooked shrimp or chicken to the grits before baking.
- Herbs and Spices: Try adding fresh herbs like chives or thyme to elevate the flavor profile.
- Make it Spicy: Incorporate jalapeños or hot sauce to give your Cheese Grits a spicy twist.
- Serve it Differently: Use Cheese Grits as a base for a breakfast bowl topped with eggs and avocado for a different meal experience.
Serve This Cheese Grits With
When it comes to serving Cheese Grits, the options are endless. Here are some delightful pairings to enhance your meal:
- Fried Chicken: The crispy texture of fried chicken pairs beautifully with the creamy grits.
- Grilled Vegetables: Roasted or grilled veggies add a healthy and colorful touch to your plate.
- BBQ Shrimp: Serve Cheese Grits as a base for succulent BBQ shrimp for a delicious Southern-inspired meal.
- Salad: A fresh garden salad can lighten up your meal and balance the richness of the grits.
- Seasonal Pairings: In winter, serve with hearty greens; in summer, try fresh tomatoes or corn on the side.
- Breakfast Delight: Top with a fried egg and avocado for a delightful breakfast option.
FAQ
Conclusion
In conclusion, Cheese Grits is a dish that truly embodies comfort food. It’s creamy, cheesy, and incredibly versatile, making it a staple for any gathering or cozy meal at home. I encourage you to try making it for your next dinner; you won’t regret it! From the first spoonful to the last, these grits will surely become a beloved favorite in your kitchen.

Cheese Grits
Equipment
- Mixing Bowl
- Baking Sheet
- Large Pot
- Wooden Spoon
- Whisk
- Frying Pan
- Oven
- Saucepan
Ingredients
- 4 cups water
- 1 cup quick cooking grits
- 1 teaspoon kosher salt
- 1/4 cup butter
- 5.2 ounces garlic cheese I use Boursin garlic and herb cheese.
- 2 cups shredded cheddar cheese divided
- 2 large eggs whisked
- 3/4 cup whole milk
Instructions
- Preheat your oven to 350°F. This will ensure a consistent temperature for baking the grits. A well-preheated oven is essential for even cooking.
- Bring the water to a boil in a large saucepan. Make sure to keep an eye on it as it heats up. Once it starts bubbling, you can add the grits and salt.
- Reduce the heat to a simmer. This is where the magic happens. Cover the pot and let the grits cook for about 5 minutes. You want to stir occasionally to prevent sticking.
- Once thickened, remove the grits from the heat. It should be creamy and luscious. Add in the butter, garlic cheese, and 1 cup of cheddar cheese. Stir well until everything is melted and combined.
- In a separate bowl, mix the eggs and milk. This combination adds richness. Once mixed, add it to the grits mixture, stirring briskly until fully combined.
- Pour the mixture into a buttered 11 x 7 inch casserole dish. Make sure the dish is coated evenly to prevent sticking. The cheese will help create a delicious crust.
- Top with the remaining 1 cup of cheddar cheese. This will create a golden, bubbly topping that is irresistible.
- Bake for 1 hour. During this time, the Cheese Grits will become golden and bubbly. Keep an eye on it towards the end to avoid over-baking.
- Once done, remove from the oven and let it sit for a few minutes. This helps it set, making serving a breeze.
- Serve warm and enjoy the creamy, cheesy goodness!
Notes
- Shred Your Own Cheese: Freshly grated cheddar melts better and tastes fresher than pre-shredded cheese.
- Let It Rest: After baking, let the casserole sit for 5-10 minutes. This helps it set and makes serving a breeze.
- Prep Ahead: Assemble the casserole up to a day in advance, cover it, and store it in the refrigerator. When ready to bake, let it sit at room temperature for 15-20 minutes before popping it in the oven.
- To Freeze: Store leftover grits in an airtight container and freeze for up to 3 months. Reheat in the oven or microwave until warmed through.