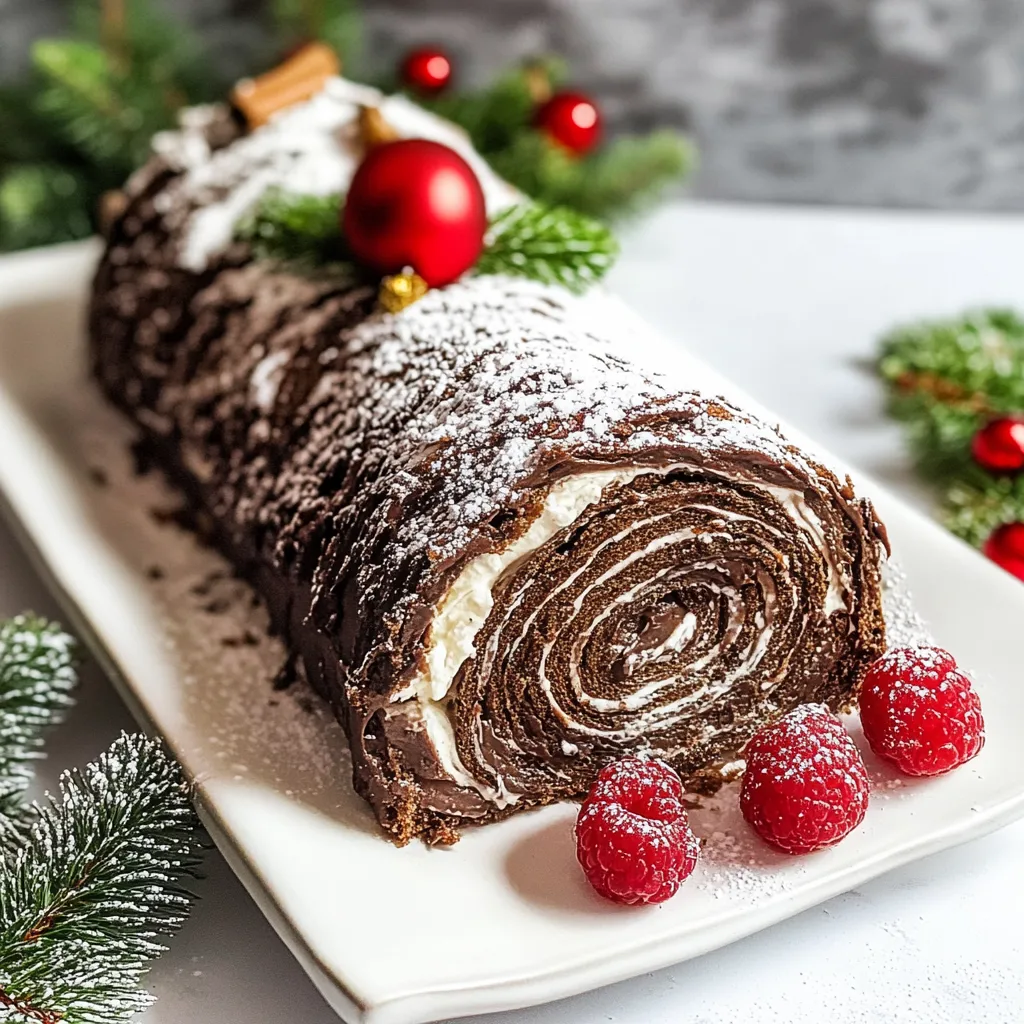
Yule Log Recipe
Every year, as the holidays approach, I find myself dreaming of my grandmother’s famous Yule Log Recipe. It wasn’t just a dessert; it was a celebration wrapped in chocolatey goodness that brought the whole family together. I can still remember the scent of baking cake wafting through her cozy kitchen as we gathered around the table, eagerly waiting for the first slice. The Yule Log isn’t just a dish; it’s a sweet tradition that evokes memories of laughter, warmth, and a sprinkle of holiday magic. From its rich layers of chocolate to the creamy filling, it’s a dessert that never fails to impress and satisfy. As I prepare to make my own version this year, I can’t help but feel excited to share this delightful experience with my loved ones, just like my grandmother did. Whether it’s for Christmas dinner or a festive gathering, this Yule Log is sure to make any occasion feel extra special.
Recipe Snapshot
40 mins
30 mins
10 mins
Medium
350 kcal
5 g
Gluten-Free, Low FODMAP
15 g
Mixing Bowl, Baking Sheet, Large Pot, Wooden Spoon, Whisk, Frying Pan, Oven
Why Try This Yule Log Recipe
It’s a Holiday Tradition
One of the reasons I love making the Yule Log Recipe is that it’s steeped in tradition. Originating from Europe, this delightful dessert symbolizes the warmth of the holiday season, making it a must-have on our festive table. The act of rolling the cake not only creates a visually appealing log but also adds a sense of fun to the baking process, making it a family affair.
Decadent Flavor Combinations
The combination of rich chocolate and creamy filling makes this dessert irresistible. The balance of flavors, from the deep cocoa to the sweet mascarpone, creates a taste experience that is hard to beat. Each bite is a delightful blend of textures – the lightness of the sponge cake against the luscious filling provides a perfect contrast, leaving you reaching for another slice.
Versatility for Any Occasion
Although primarily associated with Christmas, the Yule Log Recipe is versatile enough for any winter celebration. Whether it’s a New Year’s gathering or a simple family dinner, this cake can be dressed up or down to fit the occasion. I love decorating mine with powdered sugar to resemble snow, adding a festive touch without much effort.
Make Ahead Convenience
Another fantastic aspect of this recipe is its make-ahead convenience. You can prepare the sponge and filling a day or two in advance, making it an ideal choice for busy holiday schedules. This allows me to enjoy the party instead of being stuck in the kitchen, which is always a win!
A Showstopper Dessert
Let’s face it, a Yule Log is not only delicious but also impressive. The elegant appearance of this cake creates an inviting centerpiece that will surely wow your guests. Watching them take that first slice is always a joyous moment, and I love hearing their delighted reactions as they savor each bite.
Perfect for Sharing
Finally, sharing this dessert with friends and family enhances the experience. The Yule Log is perfect for dividing among a crowd, making it a great addition to potlucks or holiday parties. There’s something special about gathering around the dessert table, indulging in sweet treats while reminiscing about shared memories.
Main Ingredients for Yule Log Recipe
Creating a delicious Yule Log Recipe revolves around a few key ingredients that work harmoniously together. Each component plays a crucial role in developing the rich flavors and textures that make this dessert spectacular. From the fluffy sponge cake to the creamy filling, these ingredients are the stars of the show!
- Butter – The foundation of the filling, providing a rich creaminess.
- Powdered Sugar – Sweetness that perfectly complements the other flavors.
- Cocoa Powder – Adds a deep chocolate flavor to both the filling and the cake.
- Salt – Enhances sweetness and balances flavors.
- Milk – Keeps the filling creamy and smooth.
- Mascarpone Cheese – Adds a luxurious creaminess to the filling.
- Eggs – Provide structure and fluffiness to the cake.
- Sugar – Essential for sweetness and texture in the cake.
- Heavy Whipping Cream – Used in the ganache for a silky finish.
- Semi-sweet Chocolate Chips – Forms the decadent ganache that coats the log.
- All-purpose Flour – Essential for the structure of the sponge cake.
The Method for Yule Log Recipe
Making a Yule Log Recipe can seem daunting at first, but I assure you it’s a rewarding experience! The process is all about creating the perfect sponge cake and filling, then assembling them into a beautiful roll. Follow these steps carefully, and you’ll have a stunning dessert that dazzles.
- To start, prepare the filling by beating butter in a large bowl until light and fluffy. This is crucial for achieving a creamy texture. Once fluffy, add powdered sugar, cocoa powder, salt, milk, and a touch of vanilla. Mix until everything is well combined. Increase the mixer speed to high and beat until the mixture is light, fluffy, and smooth. Finally, fold in mascarpone cheese gently with a rubber spatula, then cover and refrigerate the filling until you’re ready to use it.
- Next, preheat your oven to 400°F. Prepare a 13 x 18 baking sheet by spraying it with cooking spray and lining it with parchment paper. This will ensure the cake doesn’t stick. Spray the parchment with cooking spray as well, then set it aside.
- In a small bowl, whisk together cocoa powder, salt, and flour. This dry mixture will help to evenly distribute the cocoa flavor throughout the cake.
- In a large bowl or stand mixer, beat the eggs and sugar together until they transform into a light, fluffy, and pale mixture, which should take about 5 to 8 minutes. It’s essential to achieve this texture as it contributes to the cake’s lightness.
- Once the egg mixture is ready, gently add in vanilla and half of the cocoa powder mixture, mixing until just combined. Then, fold in the remaining cocoa powder mixture, ensuring not to overmix to retain the airiness.
- Now, pour the cake batter into the prepared pan, spreading it evenly. Gently tap the pan on the counter to eliminate large air bubbles. Bake the cake for 8 to 10 minutes, or until a toothpick inserted in the center comes out clean and the edges pull away from the sides.
- While the cake is baking, dust a clean kitchen towel with powdered sugar. When the cake is done, carefully invert it onto the towel, remove the parchment paper, and sprinkle more powdered sugar on top. Roll the cake up into a spiral, starting from one long edge, wrapping the towel inside. Allow it to cool for 15 to 20 minutes.
- Once the cake has cooled, gently unroll it. Spread the filling evenly across the cake, saving about half a cup for later. Carefully roll the cake back up, ensuring not to roll too tightly, so the filling doesn’t squish out. Wrap the rolled cake in plastic wrap and refrigerate for at least two hours to firm up.
- After chilling, trim both ends of the log to reveal the spiral pattern. Make a diagonal cut about 3 inches from one end of the cake and attach this cut piece on one side with the remaining filling, filling in any gaps.
- Now let’s make the ganache. Heat the heavy cream in a microwave-safe bowl until it reaches a boiling point, which should take about 2 minutes. Pour the heated cream over the semi-sweet chocolate chips in a separate bowl and let it sit for a minute. Stir until the ganache is smooth and the chocolate is fully melted.
- Allow the ganache to cool for 10 to 15 minutes until it slightly thickens. Then, spoon it over the Yule Log, ensuring to cover every surface except for the cut ends. Refrigerate for an additional 15 minutes, then create a swirl pattern in the ganache to mimic tree bark using the back of a spoon. Lastly, refrigerate for at least one hour until set.
- When ready to serve, transfer the Yule Log to a serving platter and sprinkle with a final dusting of powdered sugar for that snowy finish.
Things Worth Knowing
- Tip for Rolling: When rolling the cake, be gentle. If you roll too tightly, the filling may ooze out, ruining the presentation.
- Cooling Time: Allow the cake to cool completely before unrolling to avoid cracking.
- Chilling is Key: Refrigerating the rolled cake ensures it holds its shape and makes slicing easier.
- Decorating Options: Get creative! Add berries, chocolate shavings, or edible glitter for a festive touch.
Substitutions and Tips
When making the Yule Log Recipe, there are several tips and substitutions to keep in mind for the best results. Here are a few to enhance your baking experience:
- Storage: Store any leftover Yule Log in an airtight container in the fridge to maintain its freshness.
- Freezing: You can freeze the rolled Yule Log for up to three months. Just ensure it’s well-wrapped to prevent freezer burn.
- Variations: Consider adding flavored liqueurs or extracts to the filling for a unique twist.
- Serving: Pair with fresh fruit or whipped cream for a delightful contrast in flavors.
- Presentation: Dust with cocoa powder or edible glitter for an elegant finish.
What to Serve With Yule Log Recipe
Serving a Yule Log Recipe is all about creating a festive atmosphere. Here are some ideas to consider:
- With Coffee or Tea: This dessert pairs beautifully with a warm cup of coffee or tea, enhancing the chocolate flavor.
- Seasonal Fruit: Fresh berries or citrus fruits can provide a refreshing contrast to the rich chocolate.
- After a Holiday Meal: Serve as a delightful ending to your Christmas feast.
- For New Year’s Celebrations: It’s a perfect centerpiece for any New Year’s gathering, bringing a touch of elegance to the table.
- Storage Tips: Ensure any leftovers are stored in the refrigerator to keep them fresh.
FAQ
Conclusion
The Yule Log Recipe is truly special with its rich chocolate flavor and festive presentation. It’s a dessert that not only satisfies your sweet tooth but also brings people together during the holiday season. I encourage you to give this delightful log a try and share it with your loved ones. You’ll create wonderful memories while enjoying every delicious bite!
Yule Log Recipe
Equipment
- Mixing Bowl
- Baking Sheet
- Large Pot
- Wooden Spoon
- Whisk
- Frying Pan
- Oven
Ingredients
- ½ cup Butter softened
- 1⅔ cups Powdered Sugar
- 1½ tablespoons Cocoa Powder
- pinch Salt
- 2 tablespoons Milk
- 1 teaspoon Vanilla extract
- ⅓ cup Mascarpone Cheese
- ½ cup Cocoa Powder
- ½ teaspoon Salt
- 2 tablespoons All-purpose Flour
- 5 large Eggs at room temperature
- ⅔ cup Sugar
- 1 teaspoon Vanilla extract
- ¼ cup Powdered Sugar
- ¾ cup Heavy Whipping Cream
- 1 cup Semi-sweet Chocolate Chips
Instructions
- To start, prepare the filling by beating butter in a large bowl until light and fluffy. This is crucial for achieving a creamy texture. Once fluffy, add powdered sugar, cocoa powder, salt, milk, and a touch of vanilla. Mix until everything is well combined. Increase the mixer speed to high and beat until the mixture is light, fluffy, and smooth. Finally, fold in mascarpone cheese gently with a rubber spatula, then cover and refrigerate the filling until you’re ready to use it.
- Next, preheat your oven to 400°F. Prepare a 13 x 18 baking sheet by spraying it with cooking spray and lining it with parchment paper. This will ensure the cake doesn’t stick. Spray the parchment with cooking spray as well, then set it aside.
- In a small bowl, whisk together cocoa powder, salt, and flour. This dry mixture will help to evenly distribute the cocoa flavor throughout the cake.
- In a large bowl or stand mixer, beat the eggs and sugar together until they transform into a light, fluffy, and pale mixture, which should take about 5 to 8 minutes. It’s essential to achieve this texture as it contributes to the cake’s lightness.
- Once the egg mixture is ready, gently add in vanilla and half of the cocoa powder mixture, mixing until just combined. Then, fold in the remaining cocoa powder mixture, ensuring not to overmix to retain the airiness.
- Now, pour the cake batter into the prepared pan, spreading it evenly. Gently tap the pan on the counter to eliminate large air bubbles. Bake the cake for 8 to 10 minutes, or until a toothpick inserted in the center comes out clean and the edges pull away from the sides.
- While the cake is baking, dust a clean kitchen towel with powdered sugar. When the cake is done, carefully invert it onto the towel, remove the parchment paper, and sprinkle more powdered sugar on top. Roll the cake up into a spiral, starting from one long edge, wrapping the towel inside. Allow it to cool for 15 to 20 minutes.
- Once the cake has cooled, gently unroll it. Spread the filling evenly across the cake, saving about half a cup for later. Carefully roll the cake back up, ensuring not to roll too tightly, so the filling doesn’t squish out. Wrap the rolled cake in plastic wrap and refrigerate for at least two hours to firm up.
- After chilling, trim both ends of the log to reveal the spiral pattern. Make a diagonal cut about 3 inches from one end of the cake and attach this cut piece on one side with the remaining filling, filling in any gaps.
- Now let’s make the ganache. Heat the heavy cream in a microwave-safe bowl until it reaches a boiling point, which should take about 2 minutes. Pour the heated cream over the semi-sweet chocolate chips in a separate bowl and let it sit for a minute. Stir until the ganache is smooth and the chocolate is fully melted.
- Allow the ganache to cool for 10 to 15 minutes until it slightly thickens. Then, spoon it over the Yule Log, ensuring to cover every surface except for the cut ends. Refrigerate for an additional 15 minutes, then create a swirl pattern in the ganache to mimic tree bark using the back of a spoon. Lastly, refrigerate for at least one hour until set.
- When ready to serve, transfer the Yule Log to a serving platter and sprinkle with a final dusting of powdered sugar for that snowy finish.
Notes
- Tip 1: The sponge cake and filling can be made 1-2 days in advance. Store the filling in an airtight container in the fridge.
- Tip 2: Once the cake has cooled in the towel, remove the towel, place a piece of wax paper over the top, and reroll it. Wrap it with plastic wrap until you’re ready to assemble.
- Tip 3: Apply the filling, roll the cake wrap, and store in the fridge for 1-2 days, or wrap in aluminum foil and keep in the freezer for up to 3 months.