Witch Finger Cookies
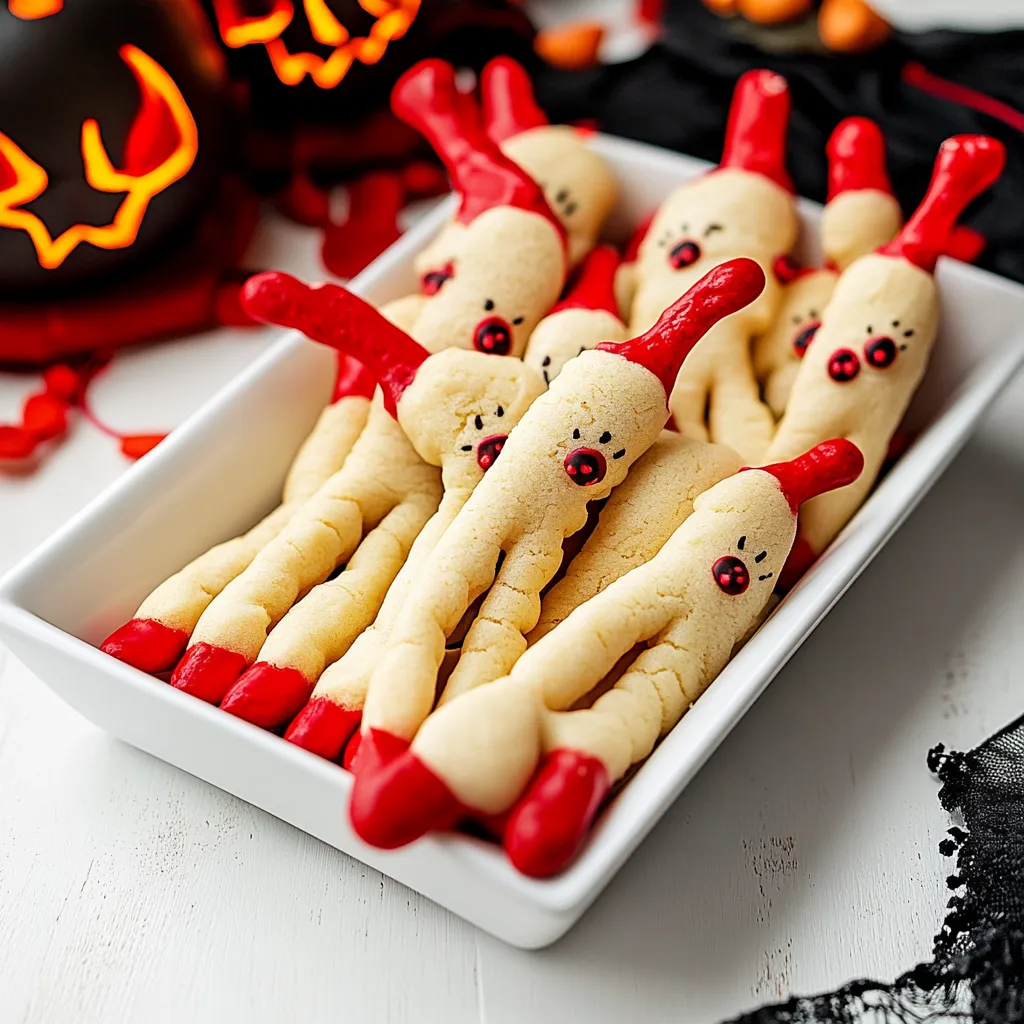
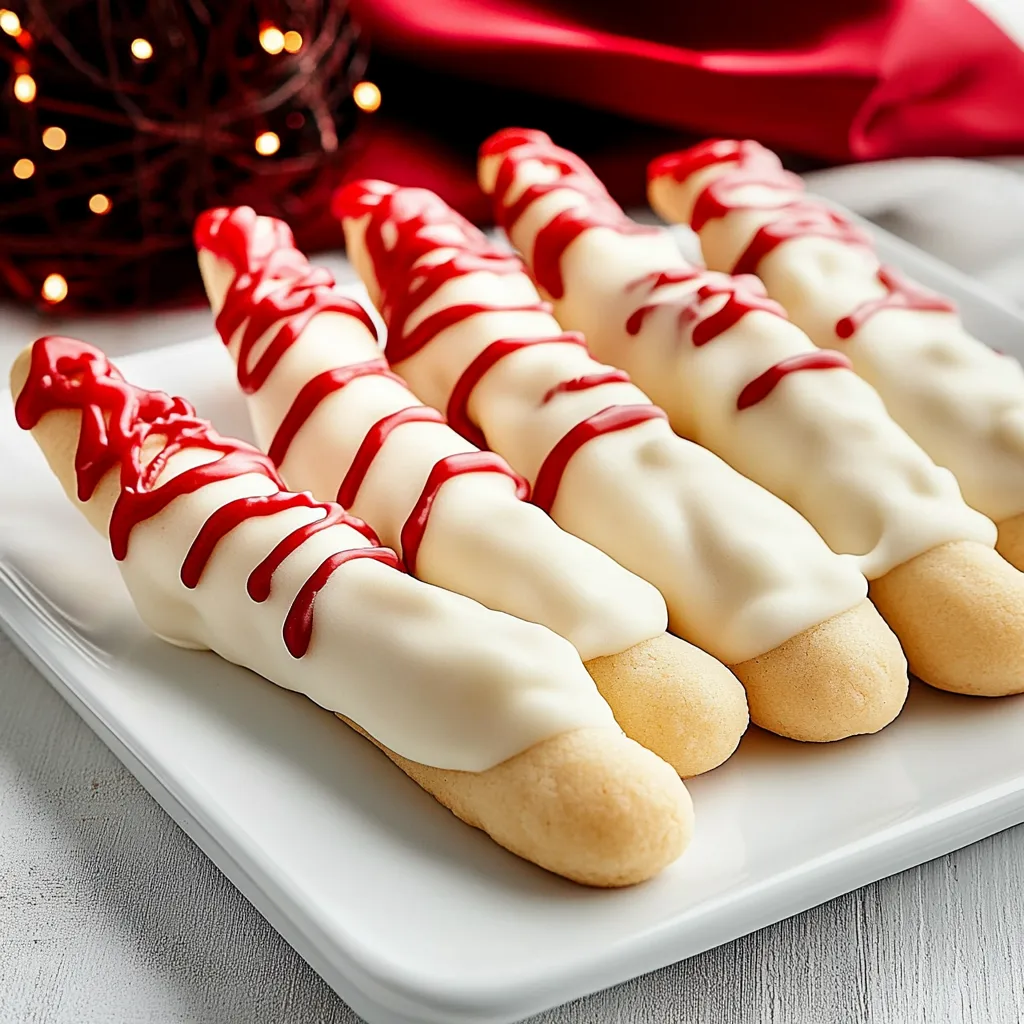
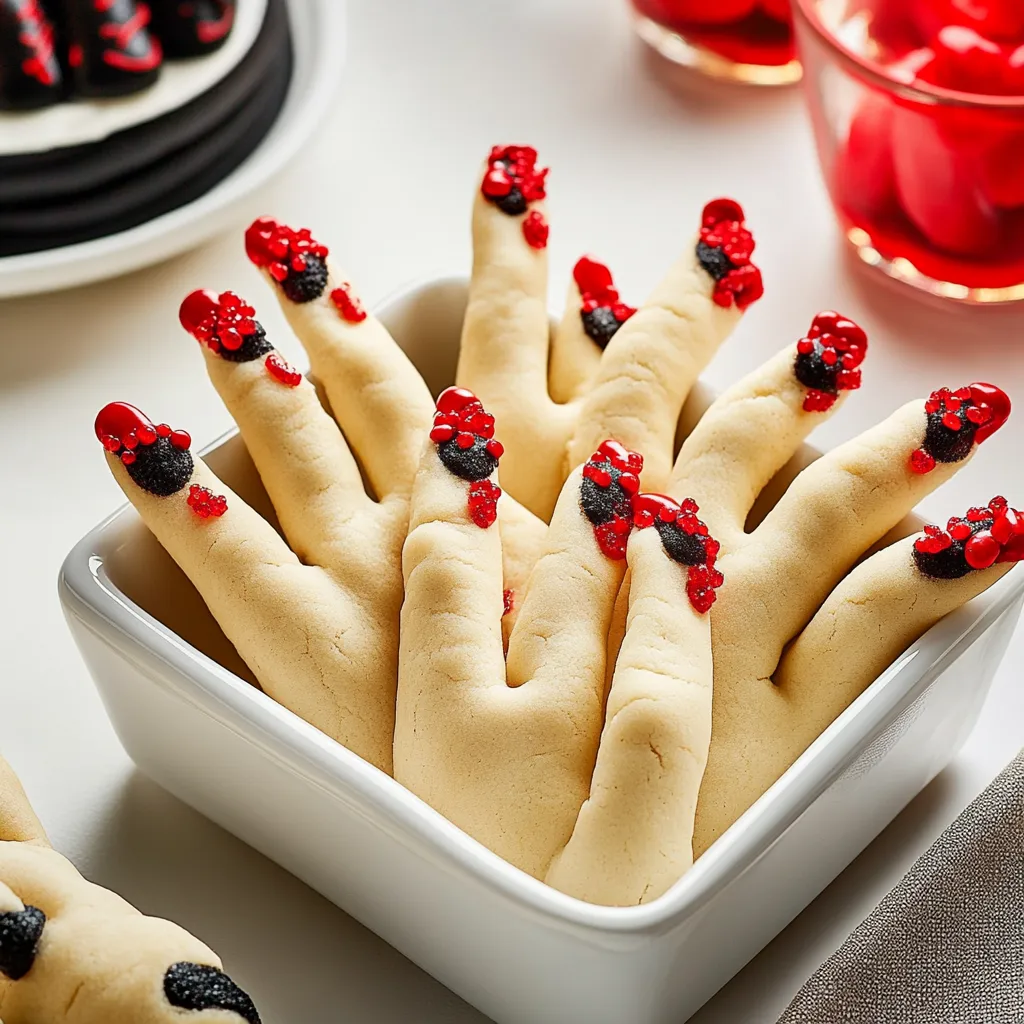
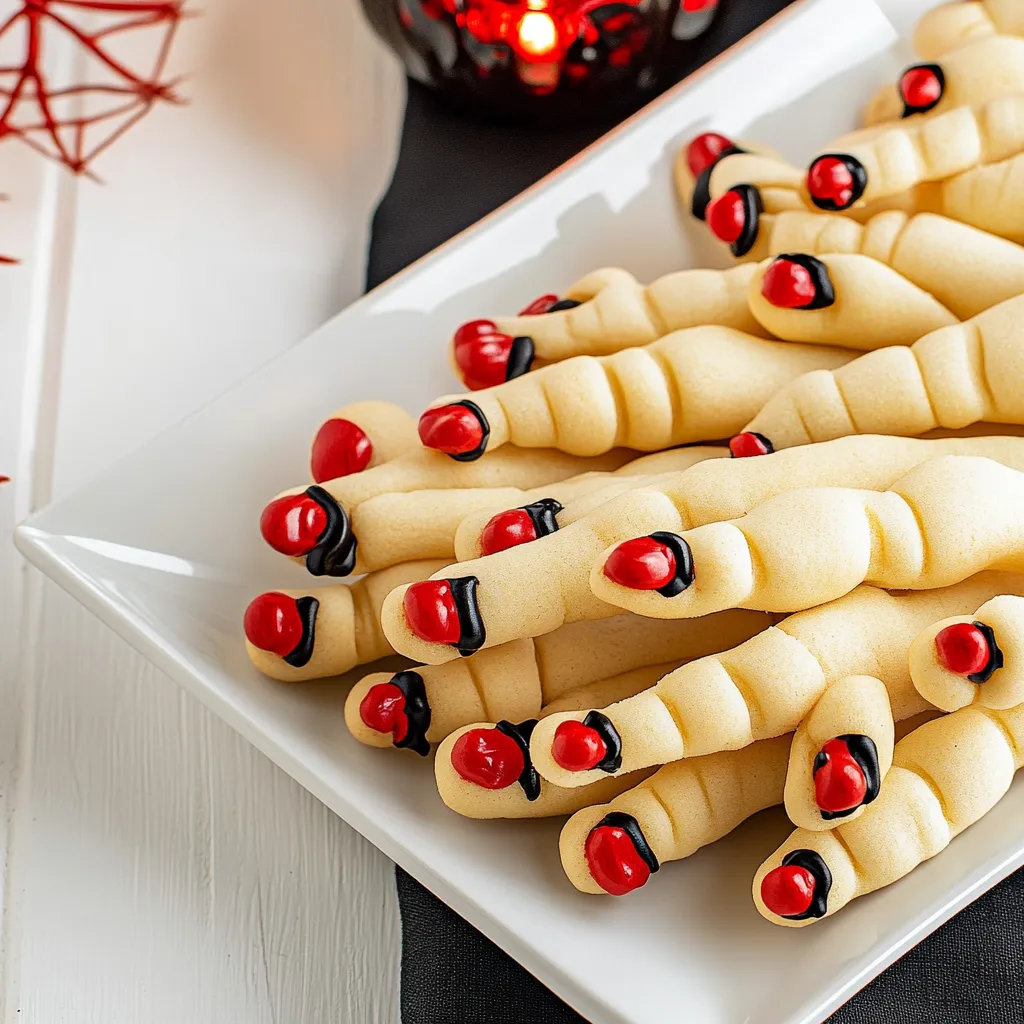
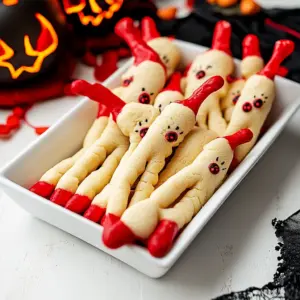
Every Halloween, I look forward to creating spooky treats, and there’s nothing I love more than making Witch Finger Cookies. These delightfully creepy cookies are always a hit at the Halloween party. I can still remember the first time I baked them, the anticipation in the kitchen as we shaped the dough into eerie fingers. My friends’ expressions when they saw these ghastly delights were priceless! Each cookie is made to look like a witch’s finger, complete with a blanched almond for the nail and a splash of red gel to add to the horror. It’s a fun, hands-on activity that brings everyone together, making it an essential part of our Halloween tradition. Plus, the buttery goodness of these cookies paired with the sweetness of the red gel and the crunch of the almond creates a flavor that’s simply irresistible, even among the spooky vibes. They also make a great conversation starter! Whether you’re hosting a Halloween gathering or just looking to get into the spirit of the season, these cookies are sure to be a crowd-pleaser.
Recipe Snapshot
1 hr 5 mins
45 mins
20 mins
Medium
110 kcal
1 g
Gluten-Free, Low FODMAP
6 g
Oven, Whisk, Mixing Bowl, Baking Sheet
Why This Witch Finger Cookies Is a Winner
They’re Perfectly Themed
Who doesn’t love a good Halloween treat? Witch Finger Cookies are the ultimate culinary creation for the spooky season. They perfectly capture the excitement of Halloween, and the fun of making them is just as great as eating them! You can incorporate the whole family in the preparation, making it a cherished memory.
Easy to Make
Despite their ghastly appearance, making Witch Finger Cookies is surprisingly simple! With just a few basic ingredients, you can whip up the dough in no time. It’s a straightforward recipe that allows even the youngest bakers to join in the fun.
Customizable Looks
You can get as creative as you want with the presentation of these cookies! From adding more “blood” with the red gel to making each finger look distinct with different cuts, the possibilities are endless. It’s a delightful way to express your artistic side!
Great for Parties
These cookies are not just treats; they’re an experience! When you bring a tray of Witch Finger Cookies to a party, you’re guaranteed to be the star of the show. The eerie look and the delicious taste make them a go-to for any Halloween gathering.
Perfect for Gifting
Want to share the Halloween spirit? Package these cookies beautifully and give them as gifts to friends or neighbors. The spooky aesthetic combined with delightful flavors is sure to bring smiles and screams of joy!
Memory Makers
Every time I prepare Witch Finger Cookies, it brings back fond memories of past Halloweens and adds to the excitement of the current year. They’re not just cookies; they’re a tradition that creates lasting memories.
What to Buy for Witch Finger Cookies
Making Witch Finger Cookies is an experience that starts with gathering the right ingredients. Each component plays a vital role in creating these deliciously spooky treats. The combination of ingredients works in harmony to create a uniquely flavored cookie, while the decorative elements bring them to life. Let’s explore what you’ll need for this frightfully fun recipe!
- 1 cup (2 sticks) salted butter at room temperature: The base of your cookies. It adds richness and a tender crumb.
- 1 cup powdered sugar: This sweetens the cookies and contributes to their soft texture.
- 1 large egg: This helps bind the ingredients and adds moisture.
- 1 teaspoon almond extract: This gives a lovely nutty flavor that complements the cookies beautifully.
- 1 teaspoon vanilla extract: Adds depth and enhances the sweetness of the cookies.
- 2⅔ cups all-purpose flour: The primary structure of your cookies, giving them their shape.
- 1 teaspoon salt: Balances the sweetness and brings out the flavors.
- ¾ cup whole blanched almonds: These serve as the creepy nails for each witch finger!
- 1 tube red decorator gel: The finishing touch, adding a horrifying yet delicious look to your cookies.
Making This Witch Finger Cookies
Creating Witch Finger Cookies is a fun process that blends baking with creativity. You’ll love how each step brings you closer to finishing these spooky delights! Here’s how to bring these cookies to life:
- Begin by gathering all your ingredients. In a large bowl, use an electric mixer to combine the butter, powdered sugar, egg, almond extract, and vanilla extract. Cream them together until the mixture is light and fluffy, about three to five minutes. This step is crucial as it incorporates air into the dough, giving your cookies a nice lift.
- In a separate bowl, whisk together the flour and salt. Gradually add this dry mixture to the wet ingredients while mixing on low speed. Beat just until moistened. It’s essential not to overmix at this stage; you want to keep the dough tender.
- Once combined, cover the dough with plastic wrap and refrigerate for about thirty minutes. Chilling the dough will make it easier to shape later on and prevent the cookies from spreading too much while baking.
- Preheat your oven to 325°F (163°C). Line two baking sheets with parchment paper or lightly grease them to prevent sticking. The right temperature is key to achieving a perfectly baked cookie!
- After the dough has chilled, take a quarter of it out of the refrigerator. Working with a heaping teaspoonful, roll the dough into a finger shape. Aim for about four inches in length. Press a blanched almond firmly into one end of each ‘finger’ to create a nail.
- Next, create a knuckle shape by gently squeezing the center of the dough. Use a small knife to make slashes in several places to replicate the look of knuckles. This adds to the spooky effect and makes each cookie unique!
- Arrange the shaped cookies on the prepared baking sheets, giving them enough space to spread. Bake them for twenty to twenty-five minutes, or until they are pale golden. They should not be overly brown.
- Once baked, let the cookies cool on the sheets for about three minutes. This allows them to set slightly before moving them. Be careful as they will be soft!
- After cooling briefly, lift the almond and squeeze some red decorator gel onto the nail bed before pressing the almond back in place. Ensure some gel oozes out for that eerie effect. If you’re feeling adventurous, you can also make additional slashes in the fingers and fill them with more gel to create a ‘bloody’ look.
- Finally, remove the cookies from the baking sheets and let them cool completely on wire racks. This will help the gel set properly.
Things Worth Knowing
- Chilling the dough: This step is crucial. It makes the dough easier to work with and helps prevent the cookies from spreading too much during baking.
- Using room temperature ingredients: Ensure that the butter is softened to room temperature to help achieve a smooth batter.
- Choosing the right almond: Whole blanched almonds work best for the nails as they mimic the look of fingernails perfectly.
- Decorating with gel: The red decorator gel can be applied generously for a dramatic effect, so don’t hold back!
Tips and Tricks about Witch Finger Cookies
Creating spooky Witch Finger Cookies is as much about the process as it is about the result. Here are some tips to ensure your cookies turn out perfectly:
- Storage: Keep your cookies in an airtight container at room temperature for up to one week to maintain freshness.
- Freezing: You can freeze the unbaked shaped cookies for up to three months. Just place them on a baking sheet, freeze until solid, then transfer to a freezer-safe bag. Bake from frozen, adding a few extra minutes to the baking time.
- Variations: Feel free to experiment with different extracts, like hazelnut or coconut, for different flavor profiles!
- Presentation: For a more dramatic look, you can use edible glitter or candy eyes to decorate your cookies.
- Serving occasions: These cookies are perfect for Halloween parties, school events, or any gathering where you want to add a spooky touch!
- Make-ahead: You can prepare the dough a day in advance. Just store it in the refrigerator until you’re ready to use it.
Pairing Suggestions for Witch Finger Cookies
When you’re serving Witch Finger Cookies, consider how to enhance the spooky experience. Here are some ideas:
- Pair with hot cider: A warm glass of cider complements the cookies beautifully, adding to the fall vibes.
- Spooky-themed party: Serve these cookies at a Halloween party along with other themed treats like pumpkin spice cupcakes or gummy worms.
- Ideal for school events: School Halloween parties are the perfect occasion to showcase your cookie-making skills!
- Great for gifting: Wrap them in themed packaging for a fun and spooky gift, perfect for friends and family.
- Seasonal decor: Create a spooky dessert table with Halloween decorations and serve these cookies as the centerpiece!
- Cool drink pairings: Consider serving with a chilled drink like blood orange soda for a refreshing contrast.
FAQ
Conclusion
Witch Finger Cookies are the perfect blend of creepy and delicious, making them a must-have for your Halloween festivities. Their unique appearance combined with buttery goodness creates a memorable treat. I encourage you to try making these cookies for your next gathering or simply for fun. Trust me, they will be a hit with everyone, and you’ll create lasting memories in the kitchen along the way.
Witch Finger Cookies
Equipment
- Oven
- Whisk
- Mixing Bowl
- Baking Sheet
Ingredients
- 1 cup Butter at room temperature
- 1 cup Powdered Sugar
- 1 large Egg
- 1 teaspoon Almond Extract
- 1 teaspoon Vanilla Extract
- 2⅔ cups All Purpose Flour
- 1 teaspoon Salt
- ¾ cup Whole Blanched Almonds
- 1 tube Red Decorator Gel
Instructions
- Begin by gathering all your ingredients. In a large bowl, use an electric mixer to combine the butter, powdered sugar, egg, almond extract, and vanilla extract. Cream them together until the mixture is light and fluffy, about three to five minutes. This step is crucial as it incorporates air into the dough, giving your cookies a nice lift.
- In a separate bowl, whisk together the flour and salt. Gradually add this dry mixture to the wet ingredients while mixing on low speed. Beat just until moistened. It’s essential not to overmix at this stage; you want to keep the dough tender.
- Once combined, cover the dough with plastic wrap and refrigerate for about thirty minutes. Chilling the dough will make it easier to shape later on and prevent the cookies from spreading too much while baking.
- Preheat your oven to 325°F (163°C). Line two baking sheets with parchment paper or lightly grease them to prevent sticking. The right temperature is key to achieving a perfectly baked cookie!
- After the dough has chilled, take a quarter of it out of the refrigerator. Working with a heaping teaspoonful, roll the dough into a finger shape. Aim for about four inches in length. Press a blanched almond firmly into one end of each 'finger' to create a nail.
- Next, create a knuckle shape by gently squeezing the center of the dough. Use a small knife to make slashes in several places to replicate the look of knuckles. This adds to the spooky effect and makes each cookie unique!
- Arrange the shaped cookies on the prepared baking sheets, giving them enough space to spread. Bake them for twenty to twenty-five minutes, or until they are pale golden. They should not be overly brown.
- Once baked, let the cookies cool on the sheets for about three minutes. This allows them to set slightly before moving them. Be careful as they will be soft!
- After cooling briefly, lift the almond and squeeze some red decorator gel onto the nail bed before pressing the almond back in place. Ensure some gel oozes out for that eerie effect. If you’re feeling adventurous, you can also make additional slashes in the fingers and fill them with more gel to create a 'bloody' look.
- Finally, remove the cookies from the baking sheets and let them cool completely on wire racks. This will help the gel set properly.
Notes
- Storage: Keep your cookies in an airtight container at room temperature for up to one week to maintain freshness.
- Freezing: You can freeze the unbaked shaped cookies for up to three months. Just place them on a baking sheet, freeze until solid, then transfer to a freezer-safe bag. Bake from frozen, adding a few extra minutes to the baking time.
- Variations: Feel free to experiment with different extracts, like hazelnut or coconut, for different flavor profiles!
- Presentation: For a more dramatic look, you can use edible glitter or candy eyes to decorate your cookies.
- Serving occasions: These cookies are perfect for Halloween parties, school events, or any gathering where you want to add a spooky touch!
- Make-ahead: You can prepare the dough a day in advance. Just store it in the refrigerator until you’re ready to use it.