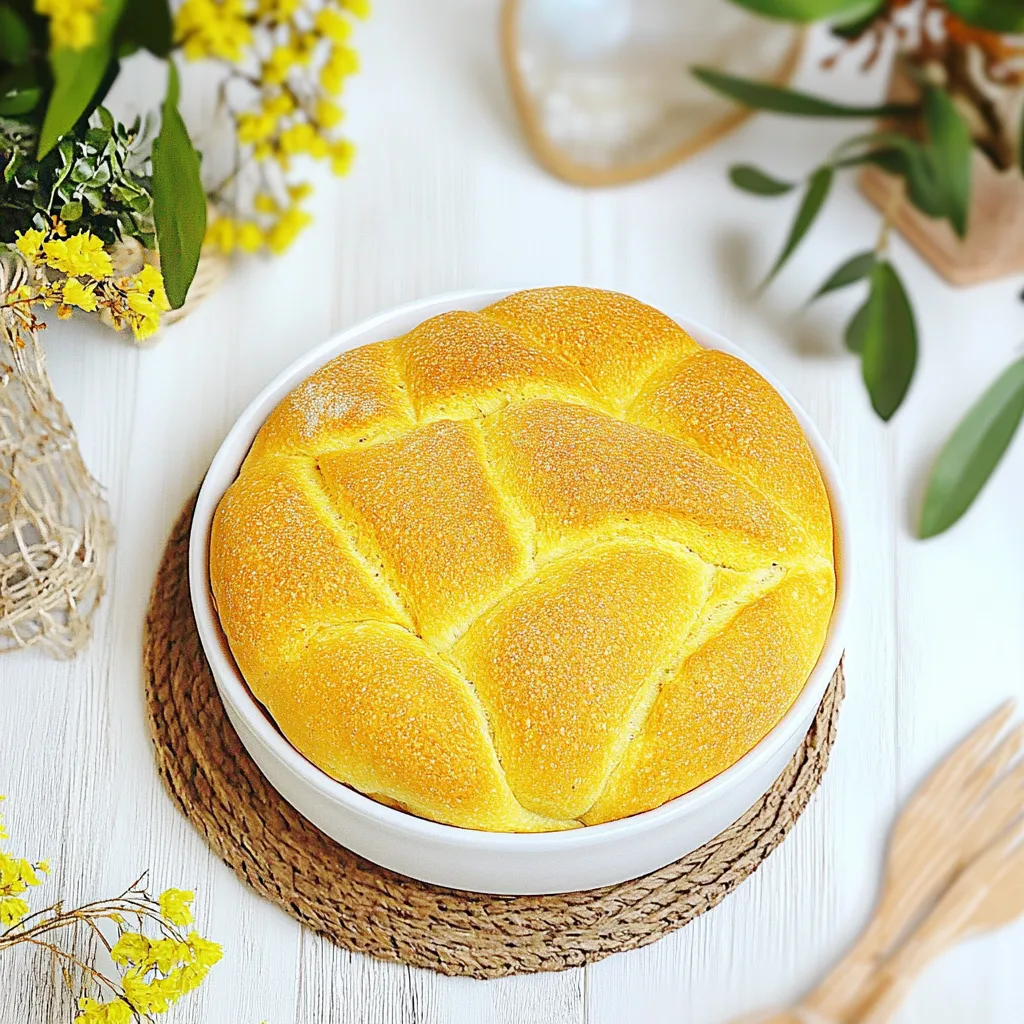
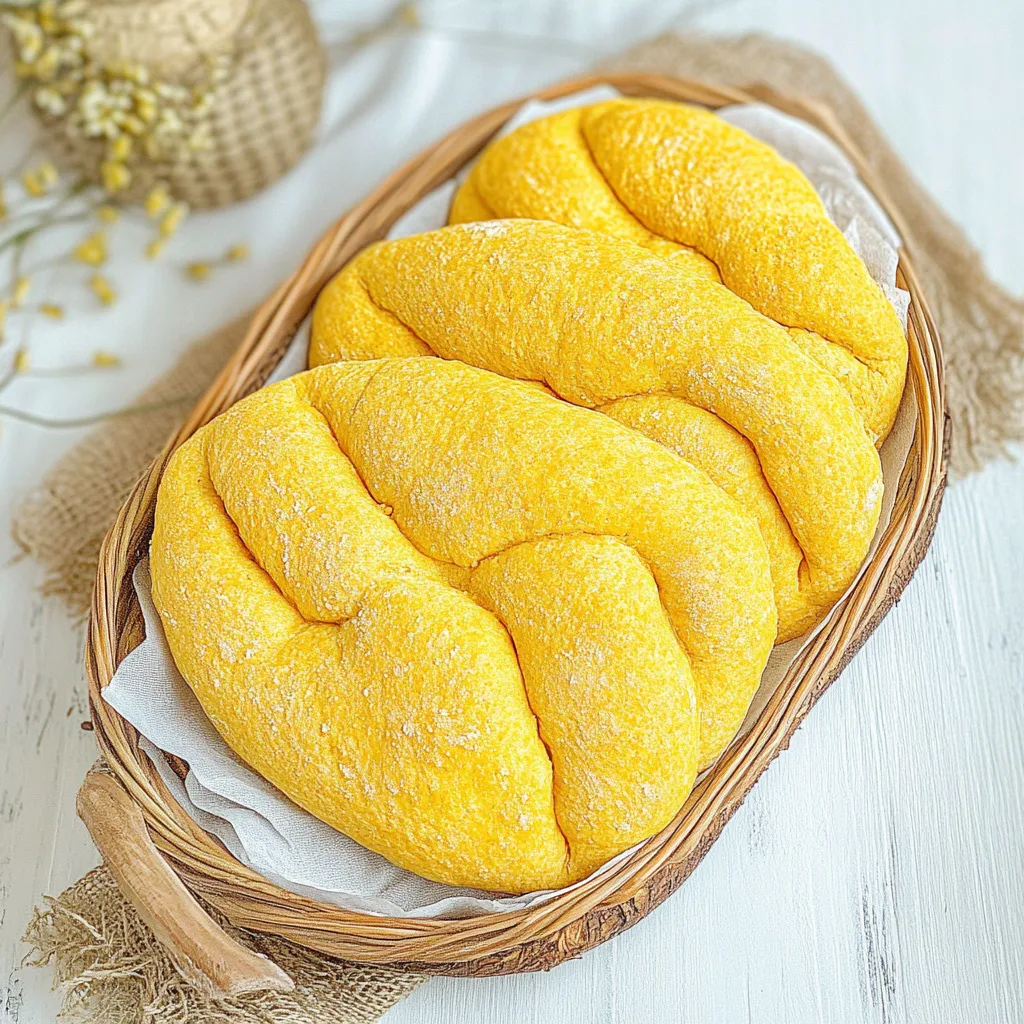
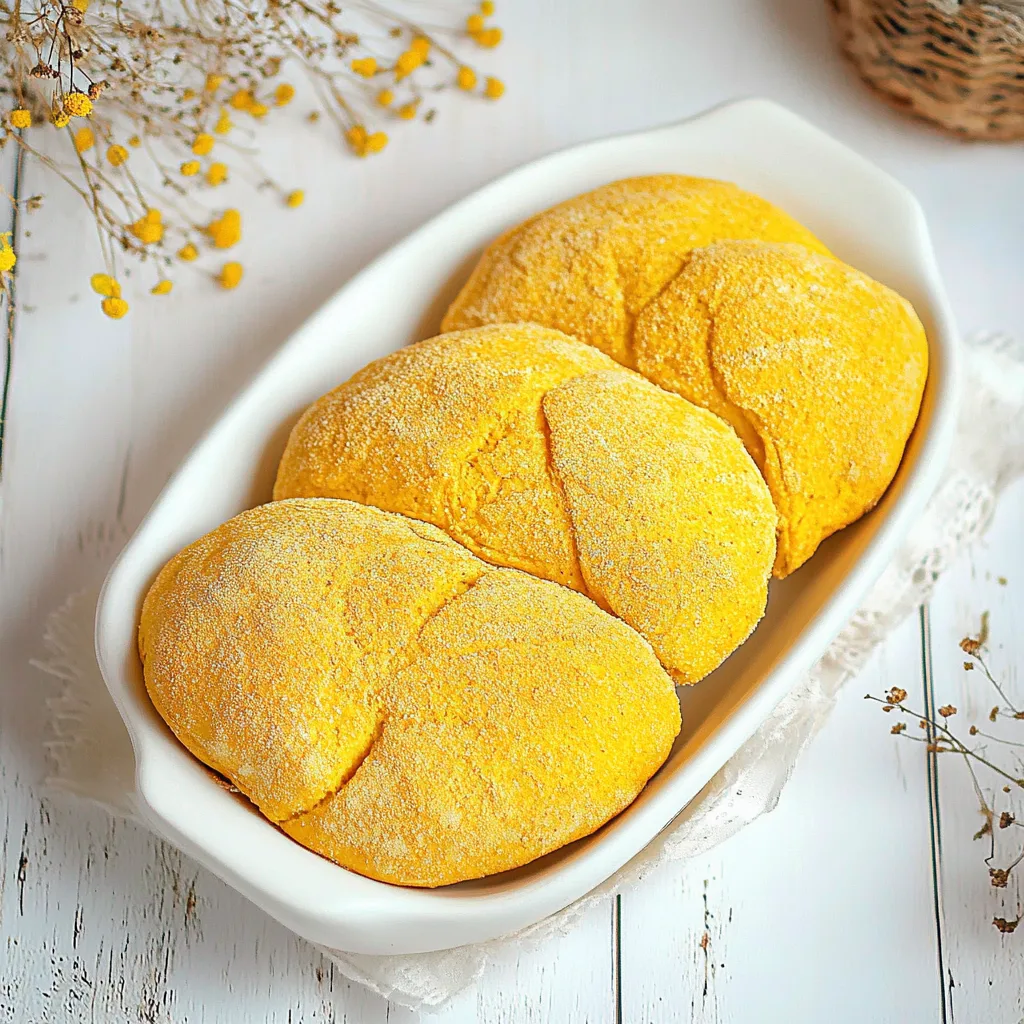
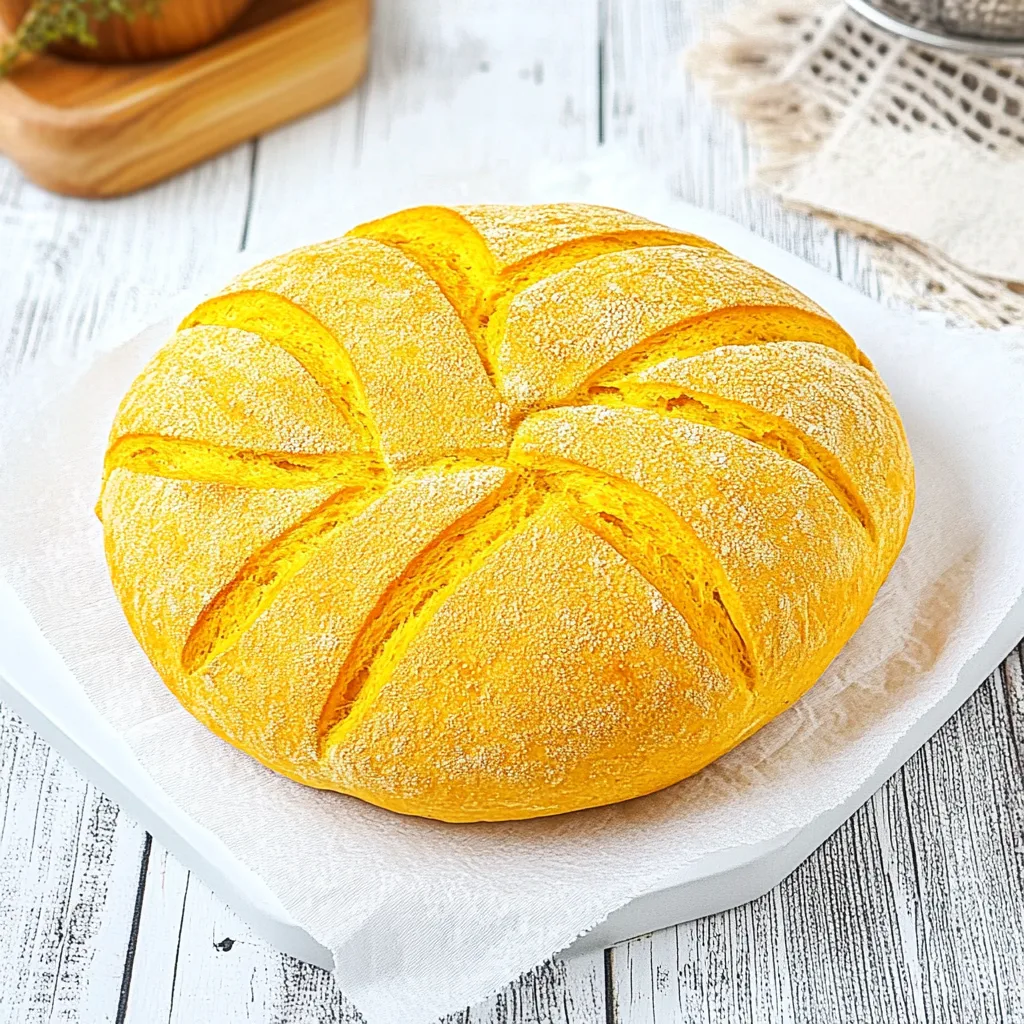
Telera
When I think of the comforting warmth of freshly baked bread, my mind instantly drifts to the Telera. This Dominican treasure, with its soft, fluffy interior and slightly crusty exterior, evokes memories of family gatherings and joyful celebrations. I remember the first time I tasted this delectable bread; it was a warm day, and the smell wafting from the kitchen was irresistible. We gathered around the table, ready to enjoy the baked goodness, with butter and honey ready for slathering. There’s something magical about breaking bread with loved ones, and the Telera has a special place in my heart for that reason. Making this bread was not only a culinary experience but also a delightful journey into my heritage, one that I love to share with you.
Recipe Snapshot
2 hr 50 mins
140 mins
30 mins
Hard
150 kcal
3 g
Gluten-Free, Low FODMAP
5 g
Frying Pan, Oven, Mixing Bowl, Baking Sheet
What You’ll Enjoy About This Telera
It’s All About the Texture
The Telera stands out for its unique texture. The outer crust is golden and slightly crisp, while the inside is fluffy and airy. This contrast makes each bite an experience in itself. The combination of all-purpose flour and the careful kneading process gives it that delightful chewiness that pairs perfectly with various fillings.
A Flavor Adventure
Using ingredients like aniseed adds a subtle depth of flavor to the Telera. It’s not something you find in every bread recipe, but this aromatic spice creates a unique taste that sets it apart. Each loaf carries hints of nostalgia, making it comforting yet exciting.
Perfect for Any Occasion
Whether it’s a family dinner, a holiday feast, or a simple breakfast, the Telera is incredibly versatile. You can enjoy it plain, with a spread of butter, or as a base for sandwiches. Its adaptability means you can serve it with almost any meal, making it a staple in many homes.
A Culinary Connection
Making Telera is a great way to bring family together in the kitchen. Everyone can get involved, from measuring ingredients to shaping the dough. It’s a wonderful opportunity to pass down traditions, share stories, and create lasting memories.
Health Benefits
Besides being delicious, the Telera offers some nutritional benefits. Using whole grain flour can add fiber to your diet, and you can even explore variations by incorporating healthier ingredients. This way, you can indulge in your love for bread without compromising on health!
Essential Ingredients for Telera
The key ingredients for Telera are simple yet essential. Each one plays a crucial role in creating that signature taste and texture. From the flour that provides the foundation to the sugar that enhances the flavor, the harmony of these components is what makes this bread so special. Here’s what you’ll need to bring this recipe to life.
- 2 cups all-purpose or bread flour, plus a bit extra to work: This is the backbone of the Telera, providing structure and texture.
- 2 teaspoons sugar, granulated, white: This enhances the flavor and helps in browning the crust.
- 1 teaspoon salt: Essential for flavor balance.
- 1 teaspoon instant yeast: This helps the dough rise and creates a fluffy interior.
- ¼ teaspoon bija (annato, achiote) powder, optional: Adds a hint of color and unique flavor.
- ¼ cup cold water: Hydrates the dough for the right consistency.
- 4 tablespoons cold milk: Contributes to the richness and moisture of the bread.
- 1 egg: Adds richness and helps with binding the ingredients together.
- ¼ cup salted butter, at room temperature: This adds flavor and creates a tender crumb.
- ¼ teaspoon ground sweet aniseed: Provides a wonderful aromatic quality.
Step by Step Instructions for Telera
Making Telera is a rewarding process that fills your kitchen with wonderful aromas. Follow these steps closely, and you’ll find yourself with freshly baked bread that’s perfect for any meal. Let’s dive into the details!
- In the bowl of a stand mixer, combine flour, salt, sugar, instant yeast, egg, water, and milk. Mix on low speed until the ingredients come together. This might take about two minutes. You want everything well combined and starting to form a dough.
- Once the mixture is combined, increase the speed to medium and knead for about five minutes. Watch for a smooth texture to develop; the dough should be elastic and slightly sticky. If it feels too dry, you can add a tablespoon of water.
- Now, add the butter to the mixer bowl and knead for an additional five minutes. You may need to scrape down the sides halfway through to ensure all ingredients mix well. The dough should become shiny and soft.
- Cover the bowl with a clean kitchen towel and let it rest for one minute. This short rest allows the gluten to relax, making it easier to shape later.
- After a minute, perform the gluten test. Moisten your fingers and stretch a small piece of dough. If it becomes translucent without breaking, it’s ready. If not, knead for another five minutes.
- Once ready, spread the dough out slightly and scatter the aniseed on top. Fold it a few times to incorporate the spice evenly throughout the dough.
- Form the dough into a ball and place it in a greased bowl. Cover it again and let it rest in the refrigerator for one hour. This step allows the dough to chill and develop more flavor.
- After an hour, remove the dough from the refrigerator. Lightly flour your countertop and place the dough on it. Using a rolling pin, stretch it into a rectangle, about half an inch thick.
- Next, roll the edges of the rectangle on the longer side to form two cylinders. One cylinder should be slightly larger than the other. This shape is traditional for the Telera.
- Place the rolled dough on a baking tray lined with parchment paper or a silicone liner. Position the opening of the cylinders facing down to prevent them from unrolling.
- Cover the dough with plastic wrap or a clean towel and let it rise for about 45 minutes to one hour, or until it has doubled in size. Keep an eye on it; the dough should look puffy.
- Preheat your oven to 400°F (200°C). After 10 minutes, reduce the temperature to 375°F (190°C).
- Using another baking sheet, carefully flip the dough so that the rolled side is facing up. Place it immediately into the oven.
- Bake for 20 to 30 minutes, until the Telera turns golden brown. For the perfect bake, check the internal temperature; it should be between 180°F to 190°F (82°C to 88°C).
- Once baked, remove from the oven and place it on a cooling rack. Allow it to cool completely before slicing. Waiting will ensure the interior sets beautifully, making it easier to cut.
Things Worth Knowing
- Consistency is Key: Ensure that your dough is not too dry. If using a dryer flour, you might need a bit more liquid.
- Temperature Control: When using an induction oven, remember to turn off the fan to avoid uneven baking.
- Resting Time Matters: Allowing the dough to rest at different stages is essential for the best texture and flavor.
- Proper Shape: The unique shape of the Telera contributes to its delightful texture. Be mindful during rolling.
Tips for Success
Achieving the ideal Telera takes practice, but these tips will help ensure success. Remember, every baker has their own little tricks, and these are some of mine that I’ve found to be incredibly beneficial.
- Storage: Keep your leftover Telera in a sealed plastic bag or container to maintain freshness. It can last for up to three days at room temperature.
- Freezing: You can freeze the loaves for longer storage. Wrap them tightly in plastic wrap and then in aluminum foil. Thaw them overnight in the refrigerator before using.
- Pairing: The Telera pairs well with a variety of spreads. Try serving it with butter, or use it as a base for sandwiches.
- Variations: Feel free to experiment with other spices or herbs to create a unique twist on the traditional recipe.
- Use Fresh Ingredients: Always opt for fresh yeast and other ingredients for the best flavor and texture.
- Patience: Baking is a science. Don’t rush the rising process or the cooling process to achieve the best results.
What to Serve With Telera
Serving Telera is all about versatility. This bread can complement a variety of meals and occasions, making it a fantastic addition to your dining table.
- Breakfast Options: Toast slices of Telera and top them with your favorite jam or honey for a delightful start to your day.
- Lunch Sandwiches: Use this bread to make delicious sandwiches. Fill them with fresh vegetables, cheeses, or even salads for a hearty meal.
- Dinner Side: Pair warm Telera with soups or stews. It’s perfect for soaking up delicious broth.
- Snack Time: Serve it with dips like hummus or spreads for a light snack.
- Festive Occasions: Telera is perfect for gatherings, be it a family dinner or a holiday feast. It brings everyone together!
- Seasonal Pairings: Enjoy Telera during special occasions or holidays; it adds a unique touch to your festive table.
FAQ
Conclusion
The Telera is not just a loaf of bread; it’s a connection to tradition and an invitation to gather around the table. Each bite tells a story of warmth and love, making it a staple in any kitchen. I encourage you to try this recipe and experience the joy of baking—there’s nothing quite like the aroma of fresh bread filling your home!

Telera
Equipment
- Frying Pan
- Oven
- Mixing Bowl
- Baking Sheet
Ingredients
- 2 cups all-purpose or bread flour plus a bit extra to work
- 2 teaspoons sugar granulated, white
- 1 teaspoon salt
- 1 teaspoon instant yeast
- ¼ teaspoon bija (annato, achiote) powder (optional)
- ¼ cup cold water
- 4 tablespoons cold milk
- 1 egg
- ¼ cup salted butter at room temperature
- ¼ teaspoon ground sweet aniseed
Instructions
- In the bowl of a stand mixer, combine flour, salt, sugar, instant yeast, egg, water, and milk. Mix on low speed until the ingredients come together. This might take about two minutes. You want everything well combined and starting to form a dough.
- Once the mixture is combined, increase the speed to medium and knead for about five minutes. Watch for a smooth texture to develop; the dough should be elastic and slightly sticky. If it feels too dry, you can add a tablespoon of water.
- Now, add the butter to the mixer bowl and knead for an additional five minutes. You may need to scrape down the sides halfway through to ensure all ingredients mix well. The dough should become shiny and soft.
- Cover the bowl with a clean kitchen towel and let it rest for one minute. This short rest allows the gluten to relax, making it easier to shape later.
- After a minute, perform the gluten test. Moisten your fingers and stretch a small piece of dough. If it becomes translucent without breaking, it’s ready. If not, knead for another five minutes.
- Once ready, spread the dough out slightly and scatter the aniseed on top. Fold it a few times to incorporate the spice evenly throughout the dough.
- Form the dough into a ball and place it in a greased bowl. Cover it again and let it rest in the refrigerator for one hour. This step allows the dough to chill and develop more flavor.
- After an hour, remove the dough from the refrigerator. Lightly flour your countertop and place the dough on it. Using a rolling pin, stretch it into a rectangle, about half an inch thick.
- Next, roll the edges of the rectangle on the longer side to form two cylinders. One cylinder should be slightly larger than the other. This shape is traditional for the Telera.
- Place the rolled dough on a baking tray lined with parchment paper or a silicone liner. Position the opening of the cylinders facing down to prevent them from unrolling.
- Cover the dough with plastic wrap or a clean towel and let it rise for about 45 minutes to one hour, or until it has doubled in size. Keep an eye on it; the dough should look puffy.
- Preheat your oven to 400°F (200°C). After 10 minutes, reduce the temperature to 375°F (190°C).
- Using another baking sheet, carefully flip the dough so that the rolled side is facing up. Place it immediately into the oven.
- Bake for 20 to 30 minutes, until the Telera turns golden brown. For the perfect bake, check the internal temperature; it should be between 180°F to 190°F (82°C to 88°C).
- Once baked, remove from the oven and place it on a cooling rack. Allow it to cool completely before slicing. Waiting will ensure the interior sets beautifully, making it easier to cut.
Notes
- Tip 1: If the dough feels too dry, you may need to add more liquid during the mixing process.
- Tip 2: Be patient during the resting and rising times for the best flavor and texture.
- Tip 3: If you have an induction oven, keep the fan off or lower the temperature.
- Tip 4: Kneading by hand may be harder, but incorporating the butter will ease the process later.
- Tip 5: Enjoy this bread fresh for the best taste, but it can be stored for a few days.