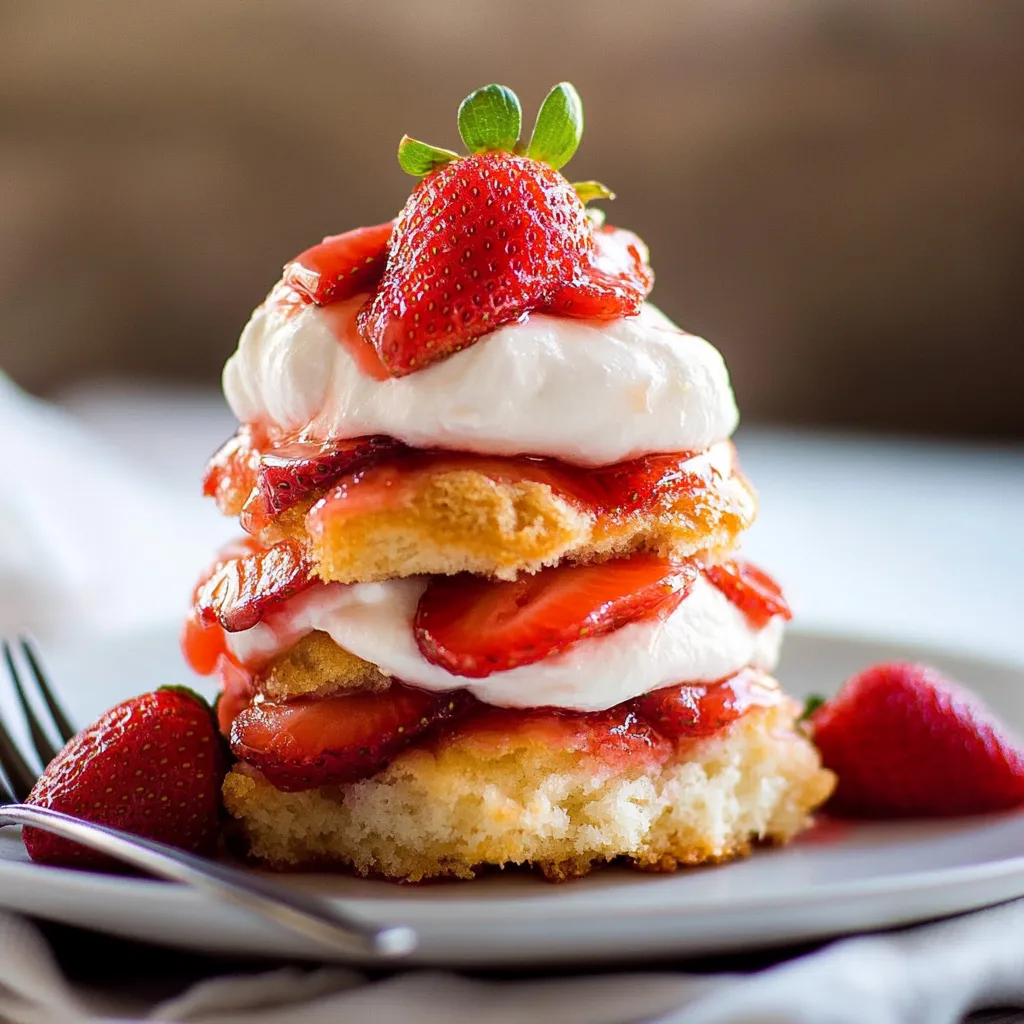
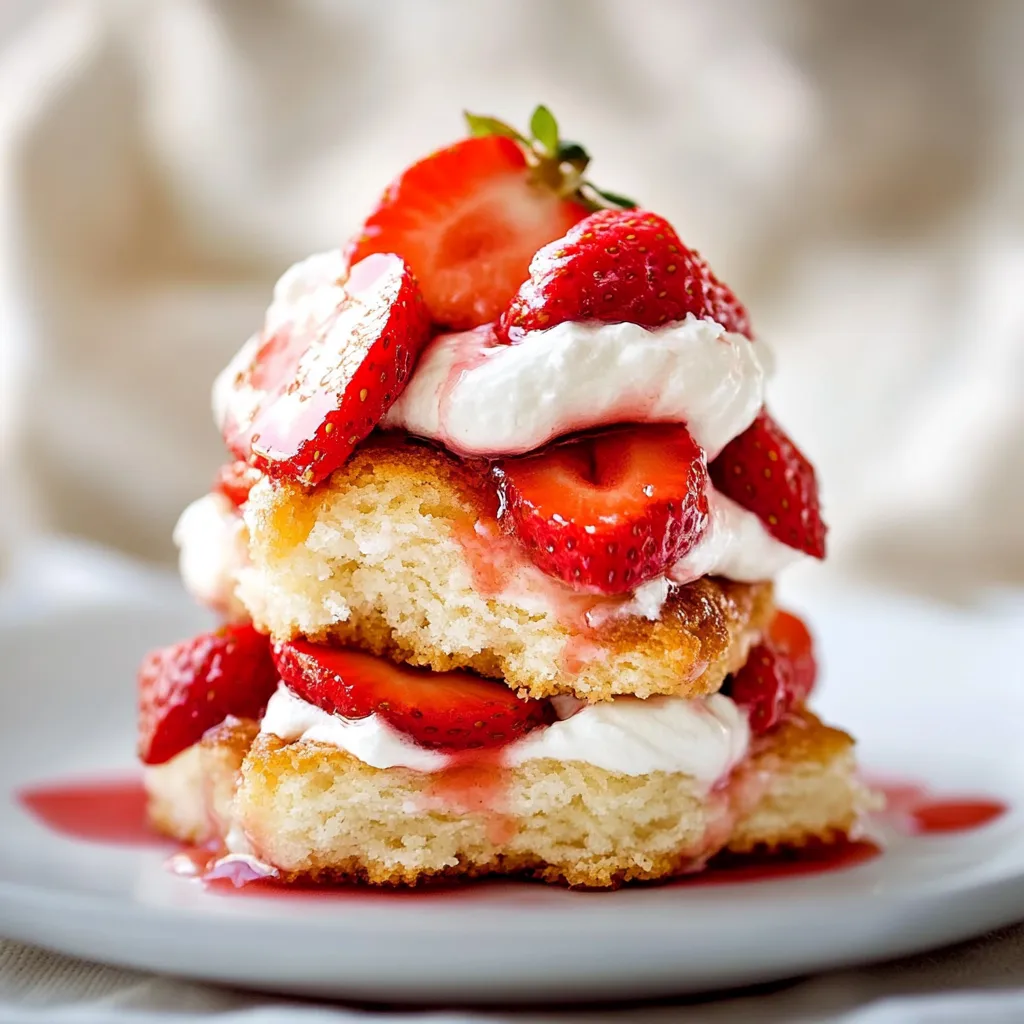
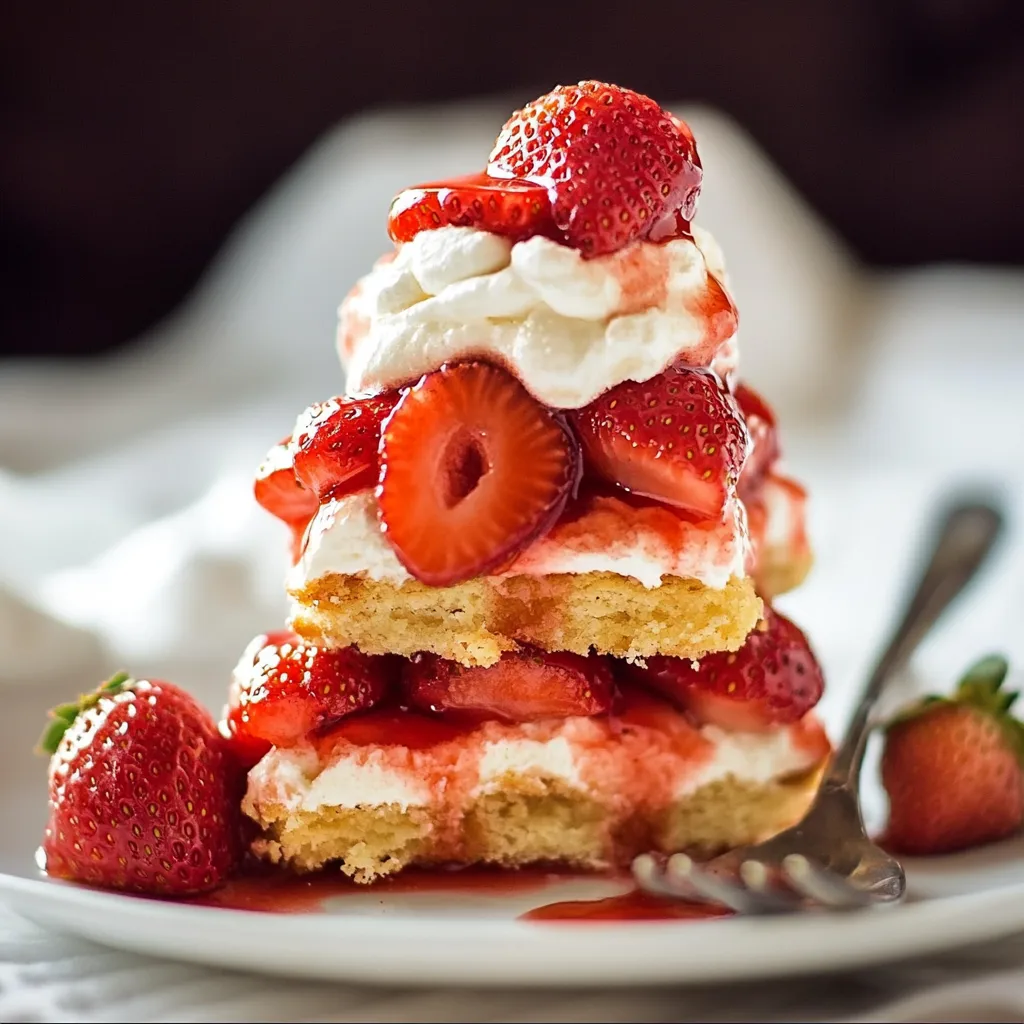
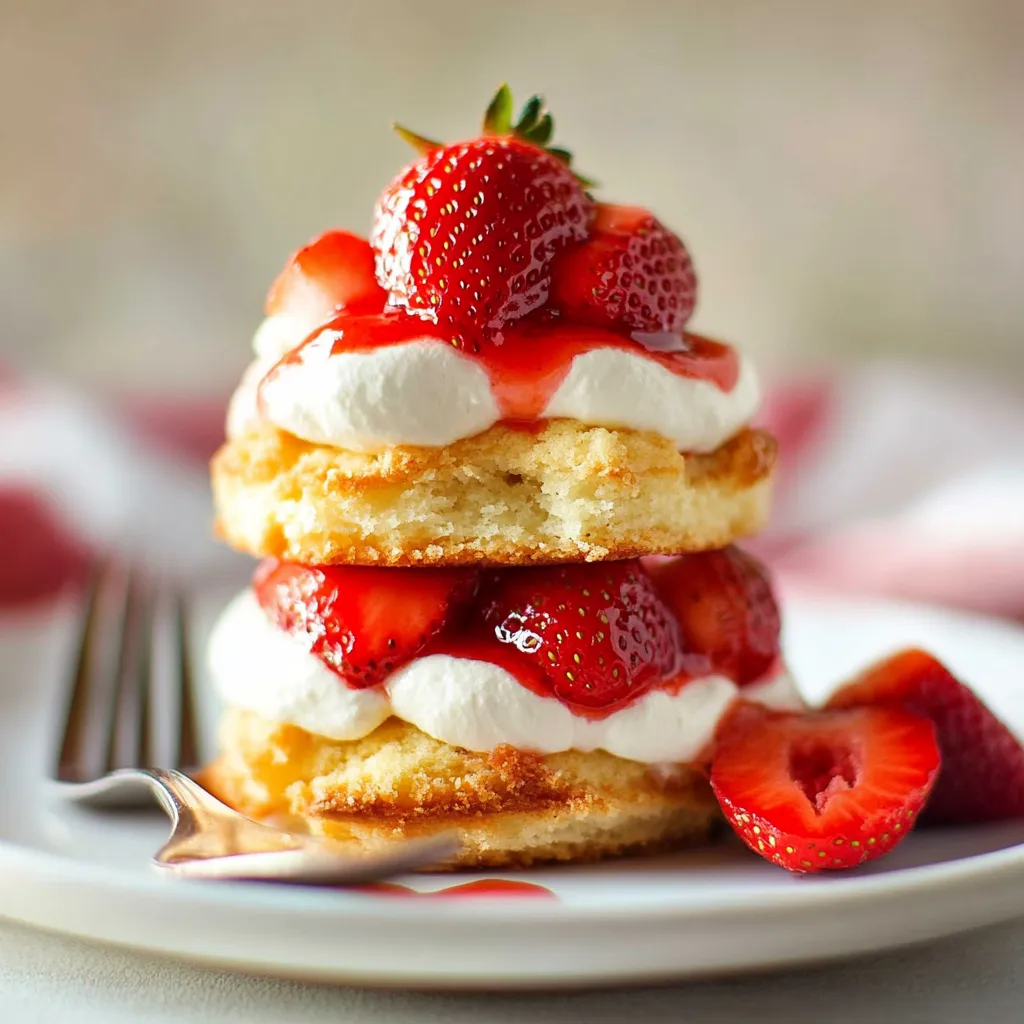
Strawberry Shortcake
There’s something magical about the first taste of Strawberry Shortcake in the spring. The vibrant reds of ripe strawberries paired with the fluffy, buttery biscuits creates a moment that melts away the winter chill. I remember my grandmother’s kitchen, filled with laughter and the sweet aroma of fresh strawberries. She would always say that the secret to a great shortcake is in the love you put into it. As the strawberries macerate in sugar, their juices blend into a sweet syrup that seeps into the soft layers of the freshly baked biscuits. Whenever I make Strawberry Shortcake, it’s a delightful reminder of those sunny afternoons spent baking with her. Whether it’s a family gathering or a simple dessert to enjoy at home, this classic treat never fails to bring joy and nostalgia. Let’s dive into how to create this delicious springtime delight!
Recipe Snapshot
30 mins
30 mins
0 mins
Medium
320 kcal
4 g
Gluten-Free, Low FODMAP
15 g
Mixing Bowl, Baking Sheet, Chef’s Knife, Wooden Spoon, Whisk, Oven, Food Processor, Cutting Board
What You’ll Enjoy About This Strawberry Shortcake
1. Freshness of Ingredients
Nothing beats the taste of freshly picked strawberries. When you use ripe, juicy strawberries, the flavor of your Strawberry Shortcake is elevated to a whole new level. The natural sweetness of fresh strawberries combined with the tartness creates a perfect balance that shines through in every bite.
2. Fluffy Biscuits
The biscuits in Strawberry Shortcake are what make it truly special. They should be light, fluffy, and buttery. The secret to achieving that perfect texture is to handle the dough gently and avoid overmixing. When baked, they rise beautifully and create a delightful contrast to the juicy strawberries.
3. Whipped Cream
Let’s talk about the whipped cream! A generous dollop of lightly sweetened whipped cream is essential for any Strawberry Shortcake. It adds a creamy richness that complements the strawberries and biscuits perfectly. Whipping the cream to medium-soft peaks ensures stability without being overly stiff.
4. Versatility
This dessert is incredibly versatile. You can serve it at picnics, barbecues, or as a sweet ending to a dinner party. It’s also adaptable! Feel free to experiment with different flavorings for the whipped cream or add other fruits like blueberries or raspberries to the mix.
5. Nostalgic Ties
For many, Strawberry Shortcake is a nostalgic dessert that brings back memories of childhood. It’s not just about the ingredients; it’s about the experiences shared over dessert. There’s something heartwarming about gathering with loved ones to enjoy a slice of this classic treat.
6. Seasonal Joy
Made with seasonal ingredients, Strawberry Shortcake celebrates the arrival of spring. It’s a way to enjoy the harvest of fresh strawberries and marks the beginning of the warm weather. Each bite is a reminder to cherish the simple pleasures in life.
Ingredient List for Strawberry Shortcake
The ingredients for Strawberry Shortcake are simple yet essential, coming together to create a timeless dessert. Each ingredient plays a crucial role in crafting the perfect balance of flavors and textures. The star, of course, is the strawberries, which provide that burst of flavor and vibrant color. The all-purpose flour, baking powder, and butter come together to create the fluffy biscuits that cradle the strawberries and whipped cream. Together, this combination creates a comforting dessert that’s perfect for any occasion.
- All-Purpose Flour: 2 cups, plus more to dust – The base for the biscuits, providing structure and texture.
- Baking Powder: 1 1/2 Tbsp – This leavening agent helps the biscuits rise and become fluffy.
- Granulated Sugar: 1 Tbsp + 1/4 cup for the strawberries – Adds sweetness to the biscuits and helps macerate the strawberries.
- Salt: 1 tsp – Enhances the flavors of the other ingredients.
- Unsalted Butter: 5 Tbsp, cold and diced – Adds richness and flavor to the biscuits.
- Heavy Whipping Cream: 1/2 cup, cold – Used in the biscuits for moisture and richness, and 1 cup for the whipped cream topping.
- Milk: 1/2 cup, cold – Provides moisture to the biscuit dough.
- Vanilla Extract: 1/2 tsp – Enhances the flavor of the whipped cream.
- Strawberries: 1 1/2 lbs, hulled and sliced – The star of the dessert, bringing freshness and sweetness.
- Sugar: 1 1/2 Tbsp for the whipped cream – Just the right amount to sweeten the cream without overpowering the strawberries.
Strawberry Shortcake Instructions
Making Strawberry Shortcake is a delightful process that brings the kitchen to life with sweet scents and vibrant colors. Follow these steps closely to achieve the best results. Trust me, once you start, you’ll be rewarded with a delicious dessert that brings smiles to everyone at the table.
- In a large mixing bowl, whisk together the dry ingredients: flour, baking powder, granulated sugar, and salt. This will ensure an even distribution of the leavening agent and sweetness. Once combined, sift the mixture to aerate it, making your biscuits light and fluffy.
- Add the cold, diced butter to the flour mixture. Using a pastry cutter or your fingers, cut the butter into the flour until it resembles coarse crumbs. This step is crucial as it creates a flaky texture in the biscuits.
- Next, in a separate bowl, stir together the milk, heavy whipping cream, and vanilla extract. Pour this liquid mixture over the flour mixture and gently fold together using a wooden spoon until a dough begins to form. You want to handle it with care to keep the biscuits tender.
- Turn the dough out onto a well-floured surface. Pat it into a rectangle shape. Remember, the goal is not to overwork the dough. Fold it in half, pat it down slightly into another rectangle, and fold it in half again. Pat down into a rectangle one more time before covering with a tea towel. Let it rest at room temperature for 30 minutes. This resting period allows the gluten to relax, ensuring a tender biscuit.
- Preheat your oven to 425˚F and line a baking sheet with parchment paper. After the dough has rested, gently pat it into a 5” x 10” rectangle that’s about 3/4” thick. Using a floured 2 1/2” round cutter, cut out 8 rounds of dough. Be sure to dip the cutter in flour each time to prevent sticking and push straight down without twisting.
- Transfer the biscuit rounds to the lined baking sheet, leaving about 1/2” space between each. Bake for 13 to 15 minutes or until they are golden on top. Your kitchen will smell amazing during this time!
- Once baked, cool the biscuits on a wire rack for 10 minutes to set. This cooling time is important to help them maintain their structure and not become soggy when assembled.
- While the biscuits cool, prepare the strawberries. Slice them and place them into a large bowl. Sprinkle with 1/4 cup of sugar and gently stir to combine. This will help draw out the natural juices of the strawberries. Cover and refrigerate until ready to serve.
- Now, it’s time to make the whipped cream. In a mixing bowl, beat together 1 cup of cold heavy whipping cream with 1 1/2 Tbsp of sugar and 1/2 tsp of vanilla extract on medium/high speed for about 2 minutes or until medium-soft peaks form. Be careful not to overwhip, as you want a smooth texture.
- To assemble, split your cooled biscuits in half. Spoon a generous amount of the macerated strawberries with some of the sauce onto the bottom half of the biscuit. Top it off with a generous dollop of the whipped cream before placing the biscuit top back on. Add more cream and strawberries on top for good measure. Enjoy your creation!
Things Worth Knowing
- Tip for Perfect Biscuits: Be sure to use cold butter and liquid ingredients. This helps to create layers in the biscuits, giving them a light and fluffy texture.
- Timing is Key: Allow the strawberries to sit with sugar for at least 30 minutes. This will enhance their flavor and ensure they release enough juice for the shortcake.
- Whipped Cream Consistency: Watch the whipping cream closely while beating. Stop as soon as you see medium peaks forming to avoid a grainy texture.
- Storage: If you have leftovers, store the components separately. This way, the biscuits stay fresh, and the strawberries and whipped cream don’t get soggy.
- Making Ahead: You can prepare the biscuits 2 to 3 days in advance. Store them in an airtight container at room temperature. The strawberries can also be prepared a day ahead.
Tips and Tricks about Strawberry Shortcake
Making the perfect Strawberry Shortcake can be simple with a few handy tips. These suggestions will help you create a dessert that impresses friends and family alike.
- Storage: To store leftovers, keep the components separate: biscuits, strawberries, and whipped cream. Store the biscuits in an airtight container to maintain their freshness.
- Freezing: You can freeze the baked biscuits for up to 3 months. Just make sure they are completely cooled before wrapping them tightly in plastic wrap.
- Pairing: Serve Strawberry Shortcake with a side of mint leaves for a refreshing touch or drizzle some chocolate sauce for an indulgent twist.
- Serving Style: For a fun presentation, layer the strawberries, biscuits, and cream in a glass for an impressive parfait-style dessert.
- Variations: Feel free to mix other berries like blueberries or raspberries into the strawberries for a mixed berry shortcake.
Serving This Strawberry Shortcake
Serving Strawberry Shortcake is as delightful as making it! Here are some tips on how to present and enjoy this delicious dessert:
- Occasions: Strawberry Shortcake is perfect for spring and summer gatherings, such as picnics, barbecues, and birthday parties. The vibrant colors and fresh flavors make it a favorite among guests.
- Plating: Serve the strawberries on the side for guests to add their own or layer them directly on the biscuits for a beautiful display.
- Condiments: Consider providing additional toppings like chopped nuts or a sprinkle of crushed cookies for added texture and flavor.
- Drinks Pairing: Pair your Strawberry Shortcake with a refreshing lemonade or iced tea for a complete springtime treat.
- Storage Advice: If you have any leftovers, store them in the refrigerator, but keep the components separate to maintain texture.
FAQ
Conclusion
Strawberry Shortcake is a beloved dessert that captures the essence of spring with its fresh strawberries and fluffy biscuits. It’s a treat that not only satisfies your sweet tooth but also evokes cherished memories of family and gatherings. I encourage you to try making this delightful dessert; share it with friends and family, and enjoy the smiles it brings. With its simple yet rich flavors, Strawberry Shortcake is sure to become a favorite in your home!

Strawberry Shortcake
Equipment
- Mixing Bowl
- Baking Sheet
- Chef's Knife
- Wooden Spoon
- Whisk
- Oven
- Food Processor
- Cutting Board
Ingredients
- 2 cups All-Purpose Flour Plus more to dust.
- 1.5 Tbsp Baking Powder
- 1 Tbsp Granulated Sugar
- 1 tsp Salt
- 5 Tbsp Unsalted Butter Cold, diced.
- 0.5 cup Heavy Whipping Cream Cold.
- 0.5 cup Milk Cold.
- 0.5 tsp Vanilla Extract
- 1.5 lbs Strawberries Hulled and sliced.
- 0.25 cup Granulated Sugar
- 1 cup Heavy Whipping Cream
- 1.5 Tbsp Granulated Sugar
- 0.5 tsp Vanilla Extract
Instructions
- In a large mixing bowl, whisk together the dry ingredients: flour, baking powder, granulated sugar, and salt. This will ensure an even distribution of the leavening agent and sweetness. Once combined, sift the mixture to aerate it, making your biscuits light and fluffy.
- Add the cold, diced butter to the flour mixture. Using a pastry cutter or your fingers, cut the butter into the flour until it resembles coarse crumbs. This step is crucial as it creates a flaky texture in the biscuits.
- Next, in a separate bowl, stir together the milk, heavy whipping cream, and vanilla extract. Pour this liquid mixture over the flour mixture and gently fold together using a wooden spoon until a dough begins to form. You want to handle it with care to keep the biscuits tender.
- Turn the dough out onto a well-floured surface. Pat it into a rectangle shape. Remember, the goal is not to overwork the dough. Fold it in half, pat it down slightly into another rectangle, and fold it in half again. Pat down into a rectangle one more time before covering with a tea towel. Let it rest at room temperature for 30 minutes. This resting period allows the gluten to relax, ensuring a tender biscuit.
- Preheat your oven to 425˚F and line a baking sheet with parchment paper. After the dough has rested, gently pat it into a 5” x 10” rectangle that’s about 3/4” thick. Using a floured 2 1/2” round cutter, cut out 8 rounds of dough. Be sure to dip the cutter in flour each time to prevent sticking and push straight down without twisting.
- Transfer the biscuit rounds to the lined baking sheet, leaving about 1/2” space between each. Bake for 13 to 15 minutes or until they are golden on top. Your kitchen will smell amazing during this time!
- Once baked, cool the biscuits on a wire rack for 10 minutes to set. This cooling time is important to help them maintain their structure and not become soggy when assembled.
- While the biscuits cool, prepare the strawberries. Slice them and place them into a large bowl. Sprinkle with 1/4 cup of sugar and gently stir to combine. This will help draw out the natural juices of the strawberries. Cover and refrigerate until ready to serve.
- Now, it’s time to make the whipped cream. In a mixing bowl, beat together 1 cup of cold heavy whipping cream with 1 1/2 Tbsp of sugar and 1/2 tsp of vanilla extract on medium/high speed for about 2 minutes or until medium-soft peaks form. Be careful not to overwhip, as you want a smooth texture.
- To assemble, split your cooled biscuits in half. Spoon a generous amount of the macerated strawberries with some of the sauce onto the bottom half of the biscuit. Top it off with a generous dollop of the whipped cream before placing the biscuit top back on. Add more cream and strawberries on top for good measure. Enjoy your creation!
Notes
- Tip 1: Make the biscuits 2-3 days ahead if stored in an airtight container on the counter.
- Tip 2: Strawberries can be mixed with sugar and stored in the fridge for 24 hours.
- Tip 3: You can make the whipped cream a few hours ahead by whipping the cream slightly less than soft peaks.