Strawberry Cheesecake Bars
When I think of sweet treats that bring back fond memories, the first thing that comes to mind is Strawberry Cheesecake Bars. These delightful bars have been a staple in my family gatherings, especially during springtime when fresh strawberries are at their peak. I remember the first time I made them; the kitchen was filled with the sweet aroma of baked crust and rich cream cheese, instantly making my heart race with excitement. Each bite is a perfect balance of creamy and fruity, with the tang of the cream cheese complementing the sweetness of the strawberry jam. It’s a recipe that never fails to impress friends and family alike, and it always sparks joy and laughter. Whether it’s a sunny picnic or a cozy gathering, these bars are the perfect ending to any meal, embodying both nostalgia and delight. I often find myself sneaking a piece before serving, and I can’t resist watching everyone’s faces light up as they take their first bite.
Recipe Snapshot
60 mins
20 mins
40 mins
Medium
250 kcal
3 g
Vegan, Gluten-Free, AIP
12 g
8×8-inch Pan
Why This Strawberry Cheesecake Bars Hits Different
A Perfect Balance of Flavors
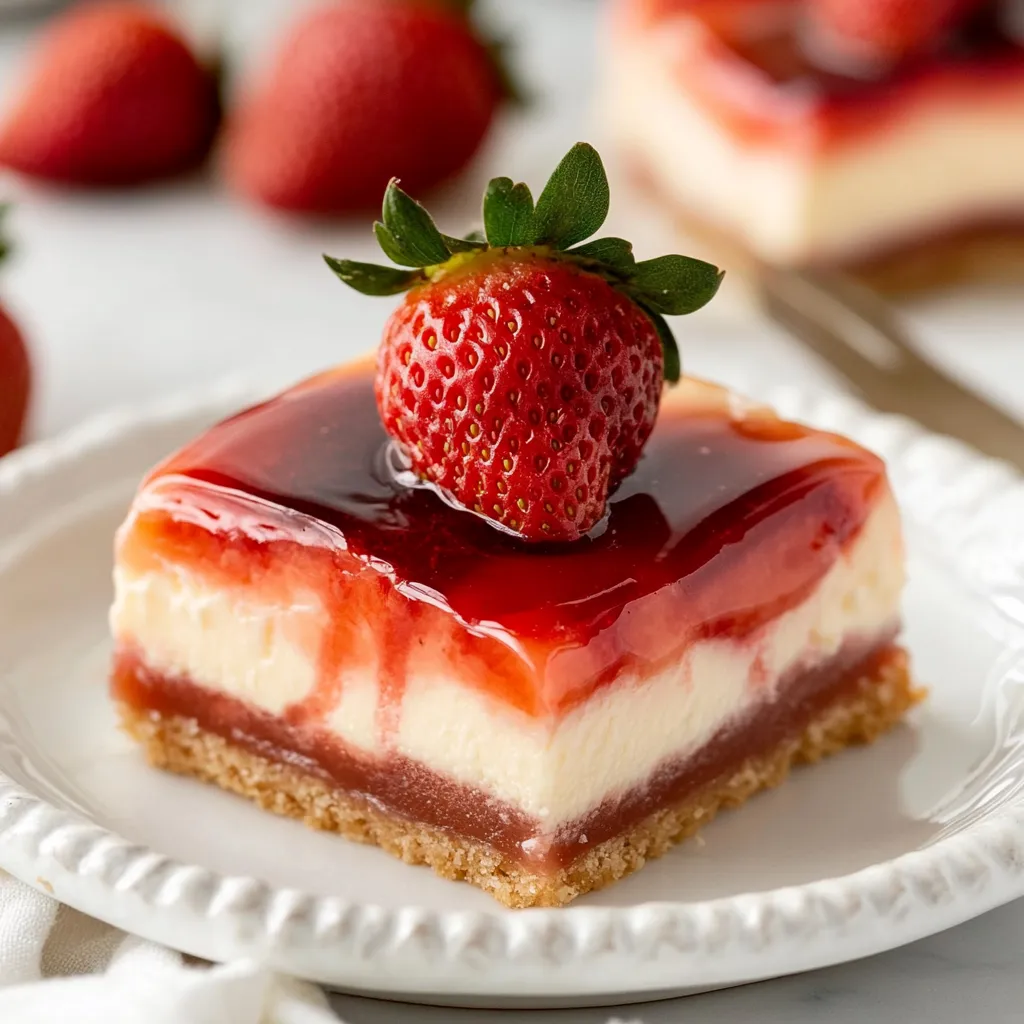
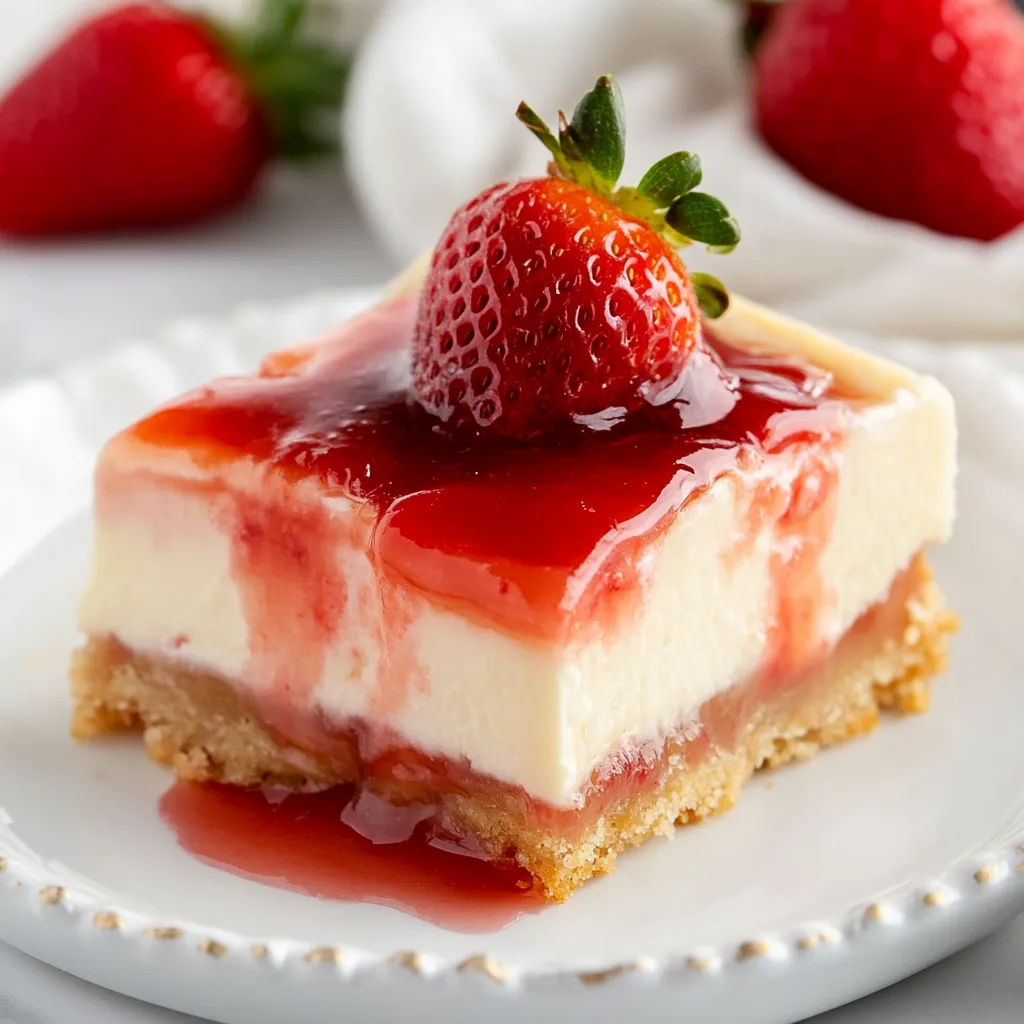
The beauty of Strawberry Cheesecake Bars lies in their ability to marry the richness of cream cheese with the freshness of strawberries. The creamy filling is balanced by the sweet and slightly tart strawberry jam, creating a symphony of flavors that dance on your palate. This delightful combination is not only delicious but also visually appealing, making it a showstopper for any dessert table.
Easy to Make
One of the reasons I adore these bars is how simple they are to prepare. With just a few key ingredients, you can create a dessert that looks and tastes gourmet without spending hours in the kitchen. The ease of making them allows anyone, from novice bakers to seasoned pros, to whip up a batch and share it with loved ones.
Perfect for Any Occasion
Whether it’s a picnic, potluck, or family gathering, these Strawberry Cheesecake Bars are versatile enough to fit any occasion. They can be served at dessert time or even as a sweet snack during the day. Their vibrant color and delicious flavor make them a favorite among both kids and adults.
Make-Ahead Convenience
Another reason to love these bars is their make-ahead convenience. You can prepare them a day in advance and let them chill in the refrigerator until it’s time to serve. This makes them an excellent option for busy days, letting you enjoy more time with family and friends instead of being stuck in the kitchen.
Variability to Suit Your Taste
The recipe is flexible, allowing you to experiment with different types of jams or even fresh fruit toppings. Want to switch it up? Try adding a layer of blueberries, raspberries, or even a swirl of chocolate for a unique twist. Your creativity can shine through while making this already beloved recipe even more personal.
Family Tradition
Finally, making Strawberry Cheesecake Bars has become a cherished family tradition in my home. Every spring, we gather together to bake, share stories, and enjoy the fruits of our labor. These bars are more than just a dessert; they are a way to connect with my loved ones, creating lasting memories that I will cherish forever.
What Goes Into Strawberry Cheesecake Bars
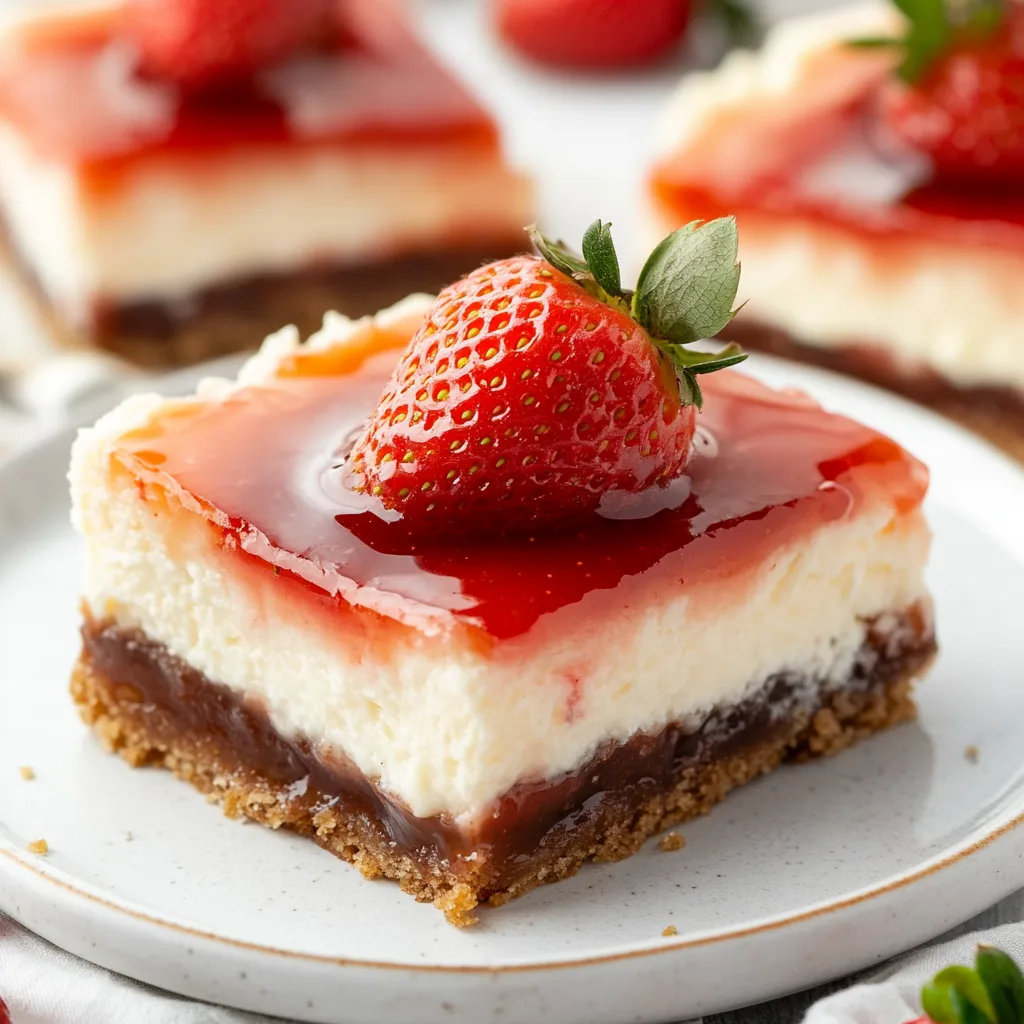
In crafting Strawberry Cheesecake Bars, the ingredients work together to create a delightful harmony of flavors and textures. The buttery crust serves as a foundation, while the rich cream cheese filling complements the fruity topping, making each bar a perfect bite of indulgence. The key players here include cream cheese, which provides that signature creamy texture, and strawberry jam, adding a sweet and tangy finish that ties everything together.
- Granulated sugar: Used to sweeten both the crust and the filling, it balances the tartness of the strawberries.
- All-purpose flour: Provides structure to the crust and helps bind the ingredients together.
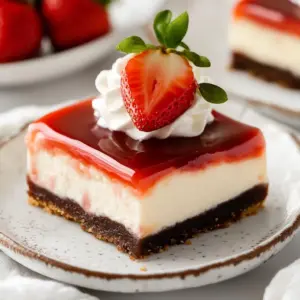
- Dutch-process cocoa powder: Adds a rich chocolate flavor to the crust, enhancing the overall taste.
- Salt: A pinch of salt elevates the sweetness and enhances the flavor profile of the bars.
- Unsalted butter: Melting the butter creates a rich, buttery crust that holds everything together.
- Cream cheese: The star of the show, this ingredient creates a creamy filling that is both luscious and satisfying.
- Vanilla extract: Adds depth of flavor to the filling, rounding out the sweet notes beautifully.
- White chocolate chips: Offers a touch of sweetness and creaminess, blending seamlessly with the cheesecake mixture.
- Eggs: Help set the filling, giving it that perfect smooth texture.
- Strawberry jam: The final touch, providing a burst of flavor and color on top.
Each ingredient plays a crucial role in creating these decadent Strawberry Cheesecake Bars, making them a delicious treat for any occasion.
How to Make Strawberry Cheesecake Bars
Making Strawberry Cheesecake Bars is truly an enjoyable process that fills your kitchen with irresistible aromas. First, you’ll prepare the crust, which is the foundation of the bars. Then, you’ll whip up the creamy filling that will make your taste buds sing. Finally, the strawberry jam ties it all together, creating a dessert that’s not only delicious but visually stunning.
- Preheat your oven to 350°F and line an 8-inch by 8-inch pan with parchment paper. This step ensures easy removal of your Strawberry Cheesecake Bars later on. You want the oven nice and hot so that the crust bakes evenly.
- In a large mixing bowl, mix together ½ cup granulated sugar, ½ cup all-purpose flour, ½ cup Dutch-process cocoa powder, and ⅛ teaspoon salt. Combine these dry ingredients well before adding the 6 tablespoons unsalted butter that you’ve melted. Stir the mixture until it’s well combined. It should be sticky but cohesive.
- Press the mixture firmly into the bottom of the prepared pan, making sure it’s evenly distributed. Bake for 10 minutes until the crust is set but still soft. When you take it out of the oven, let it cool for about 15 minutes while you prepare the cheesecake filling.
- Reduce the temperature of your oven to 325°F. In another large mixing bowl, beat 16 ounces of room temperature cream cheese with ¼ cup granulated sugar until the mixture is light and fluffy. It should appear smooth and creamy—this will be the filling for your bars.
- Add 1 teaspoon pure vanilla extract, a pinch of salt, and 6 ounces of melted white chocolate to the cream cheese mixture. Beat on low speed until everything is combined nicely. Be careful not to overmix, as we don’t want to incorporate too much air into the filling.
- One by one, add 2 large eggs, mixing on low speed after each addition. This method ensures that the eggs are incorporated without overworking the mixture. After you’ve added all the eggs, the filling should be smooth with no lumps.
- Pour the cheesecake filling over the cooled crust, spreading it evenly to the edges. You want a nice, even layer that will hold the strawberry jam on top.
- Scoop ¾ cup strawberry jam into a microwave-safe bowl and warm it for about 30 seconds until it’s just loose enough to spread. Pour the jam over the cheesecake layer and use a spatula to spread it out evenly.
- Return the pan to the oven and bake for 30 to 35 minutes, or until the center jiggles just slightly when you tap the pan. This means it’s perfectly set. Remove from the oven and let cool completely for about 2 hours.
- Once cooled, cover and refrigerate the bars for at least 2 hours before slicing. They’re even better if you let them chill overnight. Serve chilled and enjoy your delicious Strawberry Cheesecake Bars!
Things Worth Knowing
- Cooling Time: Allow the bars to cool completely before refrigerating. This helps set the cheesecake layer properly and enhances the texture.
- Using Room Temperature Ingredients: Make sure your cream cheese and eggs are at room temperature before mixing. This ensures a smoother filling without lumps.
- Do Not Overbake: Keep an eye on the bars while they bake. You want them to jiggle slightly in the center when done; overbaking can lead to a dry texture.
- Chill for Best Flavor: These bars taste even better after they’ve been chilled for a while. The flavors meld and become more pronounced.
Variations to Try
If you’re looking to put a twist on your Strawberry Cheesecake Bars, there are plenty of variations to consider. Here are some fun ideas to get you started:
- Use Different Fruits: While strawberry jam is delicious, try using raspberry or blueberry jam for a different flavor profile.
- Add Chocolate Chips: Mix in some semi-sweet chocolate chips to the cheesecake filling for an extra indulgence.
- Garnish with Fresh Fruit: Top your bars with fresh strawberries or other berries before serving for an extra pop of color and freshness.
- Switch Up the Jam: Experiment with different flavors of fruit preserves like apricot or peach for a unique twist.
- Make it Gluten-Free: Substitute the all-purpose flour with almond flour for a gluten-free version that maintains the delightful texture.
- Experiment with Flavors: Add a splash of lemon juice or zest to the cheesecake filling for a refreshing citrusy note.
- Layer in some Nuts: Add chopped nuts like pecans or walnuts to the crust for added crunch and flavor.
What to Serve Alongside Strawberry Cheesecake Bars
These Strawberry Cheesecake Bars are a perfect dessert on their own, but they can also be complemented by a variety of delightful accompaniments. Here are some ideas:
- Fresh Berries: Serve alongside a mix of fresh strawberries, blueberries, and raspberries for a refreshing contrast.
- Whipped Cream: A dollop of freshly whipped cream adds an extra layer of creaminess and sophistication to each bite.
- Iced Tea or Lemonade: These fruity, sweet drinks pair beautifully with the creamy texture of the bars, making for a lovely summer treat.
- Ice Cream: A scoop of vanilla ice cream is the perfect addition for those who enjoy a warm and cold contrast.
- Seasonal Fruits: This dessert is great during spring and summer, so consider adding slices of peaches or mangoes for a seasonal twist.
- Picnic Treat: If you’re heading to a picnic, these bars are easy to transport and serve, making them a perfect outdoor dessert option.
- Gift Them: Wrap a few bars in a cute box with a ribbon and share them as a sweet gift with friends and family.
FAQ
Conclusion
These Strawberry Cheesecake Bars are truly a delightful dessert that brings together creamy, sweet, and fruity flavors in every bite. With their easy preparation and versatility, they make the perfect treat for any occasion. I encourage you to give this recipe a try; your friends and family will be thrilled to taste such a delicious and beautiful dessert!
Strawberry Cheesecake Bars
Equipment
- 8×8-inch Pan
Ingredients
- ½ cup Granulated sugar
- ½ cup All-purpose flour or buckwheat flour for a gluten-free version
- ½ cup Dutch-process cocoa powder or Hershey's Special Dark cocoa powder
- ⅛ teaspoon Salt
- 6 tablespoons Unsalted butter melted
- 16 ounces Cream cheese room temperature
- ¼ cup Granulated sugar
- 1 teaspoon Pure vanilla extract
- pinch Salt
- 6 ounces White chocolate chips or chopped white chocolate, melted but not hot
- 2 large Eggs room temperature
- ¾ cup Strawberry jam see notes
Instructions
- Preheat your oven to 350°F and line an 8"x8" pan with parchment paper. This step ensures easy removal of your Strawberry Cheesecake Bars later on. You want the oven nice and hot so that the crust bakes evenly.
- In a large mixing bowl, mix together ½ cup granulated sugar, ½ cup all-purpose flour, ½ cup Dutch-process cocoa powder, and ⅛ teaspoon salt. Combine these dry ingredients well before adding the 6 tablespoons unsalted butter that you've melted. Stir the mixture until it's well combined. It should be sticky but cohesive.
- Press the mixture firmly into the bottom of the prepared pan, making sure it’s evenly distributed. Bake for 10 minutes until the crust is set but still soft. When you take it out of the oven, let it cool for about 15 minutes while you prepare the cheesecake filling.
- Reduce the temperature of your oven to 325°F. In another large mixing bowl, beat 16 ounces of room temperature cream cheese with ¼ cup granulated sugar until the mixture is light and fluffy. It should appear smooth and creamy—this will be the filling for your bars.
- Add 1 teaspoon pure vanilla extract, a pinch of salt, and 6 ounces of melted white chocolate to the cream cheese mixture. Beat on low speed until everything is combined nicely. Be careful not to overmix, as we don't want to incorporate too much air into the filling.
- One by one, add 2 large eggs, mixing on low speed after each addition. This method ensures that the eggs are incorporated without overworking the mixture. After you’ve added all the eggs, the filling should be smooth with no lumps.
- Pour the cheesecake filling over the cooled crust, spreading it evenly to the edges. You want a nice, even layer that will hold the strawberry jam on top.
- Scoop ¾ cup strawberry jam into a microwave-safe bowl and warm it for about 30 seconds until it's just loose enough to spread. Pour the jam over the cheesecake layer and use a spatula to spread it out evenly.
- Return the pan to the oven and bake for 30 to 35 minutes, or until the center jiggles just slightly when you tap the pan. This means it’s perfectly set. Remove from the oven and let cool completely for about 2 hours.
- Once cooled, cover and refrigerate the bars for at least 2 hours before slicing. They’re even better if you let them chill overnight. Serve chilled and enjoy your delicious Strawberry Cheesecake Bars!
Notes
- Tip 1: This crust recipe does not work in a regular pie pan – only as bars.
- Tip 2: If you want a super smooth topping, use seedless jam instead of regular strawberry preserves.