
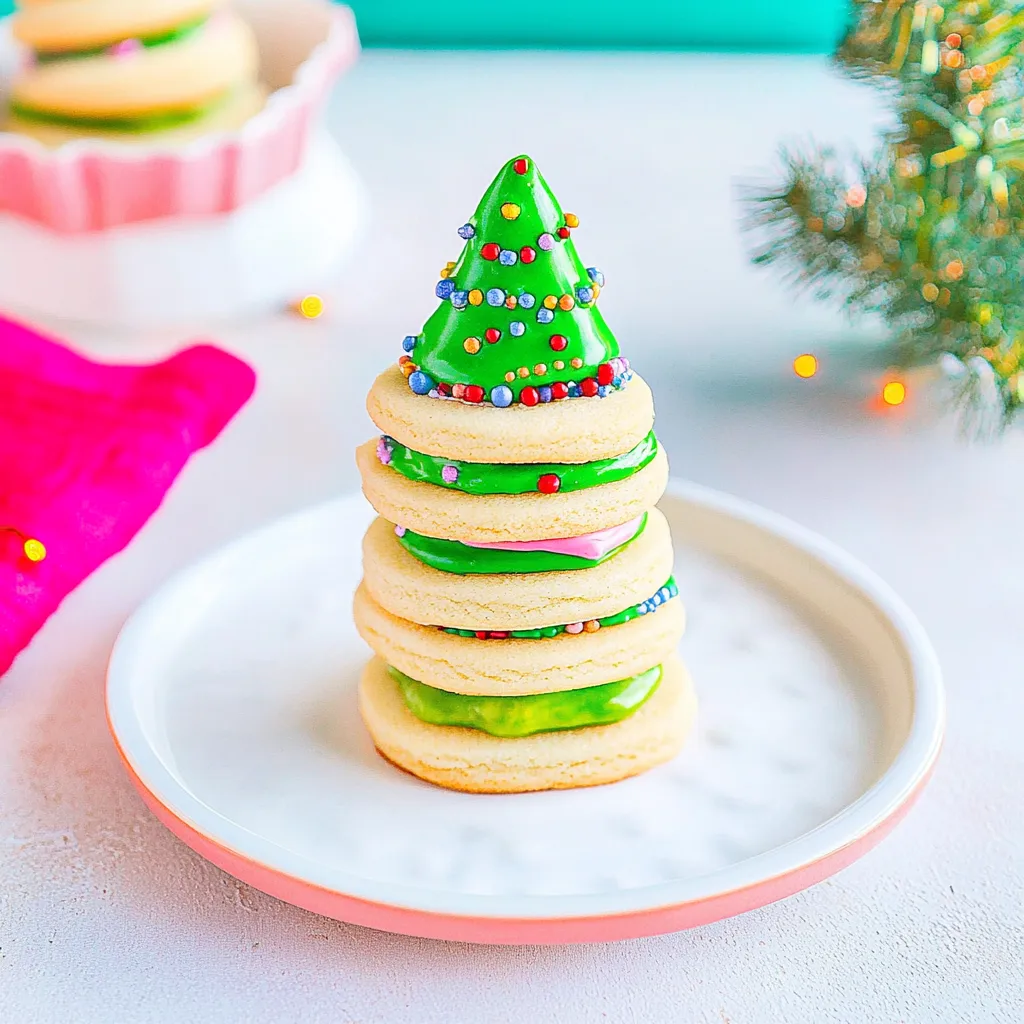
Stacked Christmas Tree Cookies
Every holiday season, I find myself drawn into the festive spirit, and nothing brings that cheer to life quite like Stacked Christmas Tree Cookies. These charming little treats are not just cookies; they’re a colorful celebration on a plate, perfect for sharing with family and friends. I remember the first time I made these cookies; the kitchen was filled with the delicious scent of baking as I painstakingly layered each cookie to create the whimsical tree. It’s a delightful tradition that brings everyone together—kids and adults alike gather around, each wanting to create their own masterpiece. The excitement in the air is palpable as we decide on colors for frosting and the best way to decorate our edible trees. With all the laughter and fun, these cookies have become more than just a recipe; they are a symbol of our holiday joy and creativity.
Recipe Snapshot
45 mins
20 mins
25 mins
Medium
150 kcal
1 g
Vegan, Gluten-Free, AIP
7 g
Mixing Bowl, Baking Sheet, Whisk, Blender, Oven
Why Try This Stacked Christmas Tree Cookies
Perfect for Holiday Celebrations
There’s something truly magical about making Stacked Christmas Tree Cookies during the holidays. They add a touch of whimsy to any gathering, making them a conversation starter at parties. The cheerful colors and festive shapes remind us of the joy that the season brings. Whether it’s a holiday party or a family gathering, these cookies are sure to make a lasting impression.
Creative Expression
These cookies offer a wonderful opportunity for creative expression. You can customize them in countless ways— from choosing different colors for frosting to adding sprinkles and other decorations. Kids especially love this aspect, as they can unleash their imaginations and create cookies that reflect their unique personalities. It’s a delightful way to spend time together, fostering creativity and bonding over a shared activity.
Easy to Prepare
Despite their impressive appearance, Stacked Christmas Tree Cookies are surprisingly easy to make. With simple ingredients and straightforward steps, even novice bakers can successfully whip up these festive treats. This makes them the ideal recipe for anyone looking to impress without spending all day in the kitchen.
Make Ahead Convenience
One of the best aspects of these cookies is their versatility. You can prepare them ahead of time, which is a lifesaver during the busy holiday season. Just bake the cookies, let them cool, and store them in an airtight container until you’re ready to decorate. This flexibility allows you to spread out your baking tasks, making your holiday planning a little less stressful.
Deliciously Sweet
Let’s not forget about the taste! Stacked Christmas Tree Cookies are not only fun to make; they’re delicious too! The buttery flavor combined with the sweetness of the frosting makes for a delightful treat that everyone will love. Trust me; it’s hard to eat just one!
Great for Gift Giving
If you’re looking for a heartfelt gift idea, these cookies are perfect. Package them in a beautiful box or bag, and you’ve got a thoughtful, homemade gift that friends and family will appreciate. They’re sure to bring smiles and warmth wherever they go!
What Goes Into Stacked Christmas Tree Cookies

Creating Stacked Christmas Tree Cookies requires a few simple ingredients that work harmoniously together. The combination of butter, sugar, and flour serves as the base of these delightful cookies, while powdered sugar and milk add sweetness and creaminess to the frosting. Each ingredient plays a crucial role in ensuring that the cookies not only taste great but also have the perfect texture for stacking.
- 1 cup butter softened – This is the key ingredient that gives the cookies their rich, buttery flavor. Softening the butter allows for easy mixing, helping to create a light and fluffy dough.
- 3/4 cup granulated sugar – Sweetness is crucial! The granulated sugar helps balance the flavors and adds to the cookie’s overall texture.
- 1 large egg – The egg binds the ingredients together, providing structure and moisture to the cookies.
- 1 teaspoon vanilla extract – A hint of vanilla enhances the sweetness and provides a warm aroma.
- 2 1/2 cups flour – Flour is the backbone of cookie dough, giving it structure and helping it hold its shape.
- 1 teaspoon baking powder – This leavening agent helps the cookies rise and become fluffy.
- 3 cups powdered sugar – Essential for frosting, powdered sugar provides sweetness and a smooth texture.
- 1/2 cup butter softened – Additional butter for the frosting makes it creamy and delicious.
- 3 tablespoons milk – Adds moisture to the frosting, making it easy to spread or pipe.
- 1 teaspoon vanilla extract – Adding this to the frosting gives it extra flavor.
- food coloring – A fun addition that allows you to customize the look of your cookies.
- sprinkles – For an extra festive touch, add sprinkles to decorate your cookies!
Cooking Method for Stacked Christmas Tree Cookies
Making Stacked Christmas Tree Cookies is a delightful experience that fills your kitchen with holiday scents. Follow these simple steps, and you’ll be on your way to creating your own cookie masterpiece.
- Preheat your oven to 350 degrees. It’s important to have your oven ready before you start; this ensures even baking of your cookies.
- In a medium bowl, beat together butter, granulated sugar, egg, and vanilla until the mixture is light and fluffy. This process incorporates air into the butter, making your cookies tender.
- In a separate bowl, whisk together flour and baking powder. This helps to evenly distribute the baking powder throughout the flour, ensuring a uniform rise.
- Gradually add the dry mixture to the wet mixture, beating until well blended. You’ll notice the dough becoming thicker and more cohesive at this point.
- Divide the dough into three portions, shaping each into different sizes of cookie balls. For small cookies, use a rounded teaspoon of dough; for medium, use two rounded teaspoons; and for large, three rounded teaspoons. You should have a total of 15 balls of each size, creating a fun stacking opportunity!
- Place the small cookie balls onto a parchment-lined baking sheet. Press down gently with a glass to flatten them slightly, which helps them bake evenly.
- Repeat this process for the medium and large cookie balls, placing each size on separate baking sheets. This is crucial because each size will bake at different times.
- Bake the cookies in the preheated oven. The small cookies will take about 4 to 6 minutes, medium cookies about 6 to 8 minutes, and large cookies around 8 to 10 minutes. Keep an eye on them until the bottoms start to turn golden brown.
- Once baked, remove the cookies from the oven and let them cool completely on wire racks. This cooling time allows them to firm up, making them easier to handle.
- While the cookies cool, prepare the frosting. In a medium bowl, beat together powdered sugar and butter until it’s light and fluffy. Add milk and vanilla, mixing until well combined.
- If desired, add food coloring to the frosting for a festive look. You can use different colors to create a vibrant assortment.
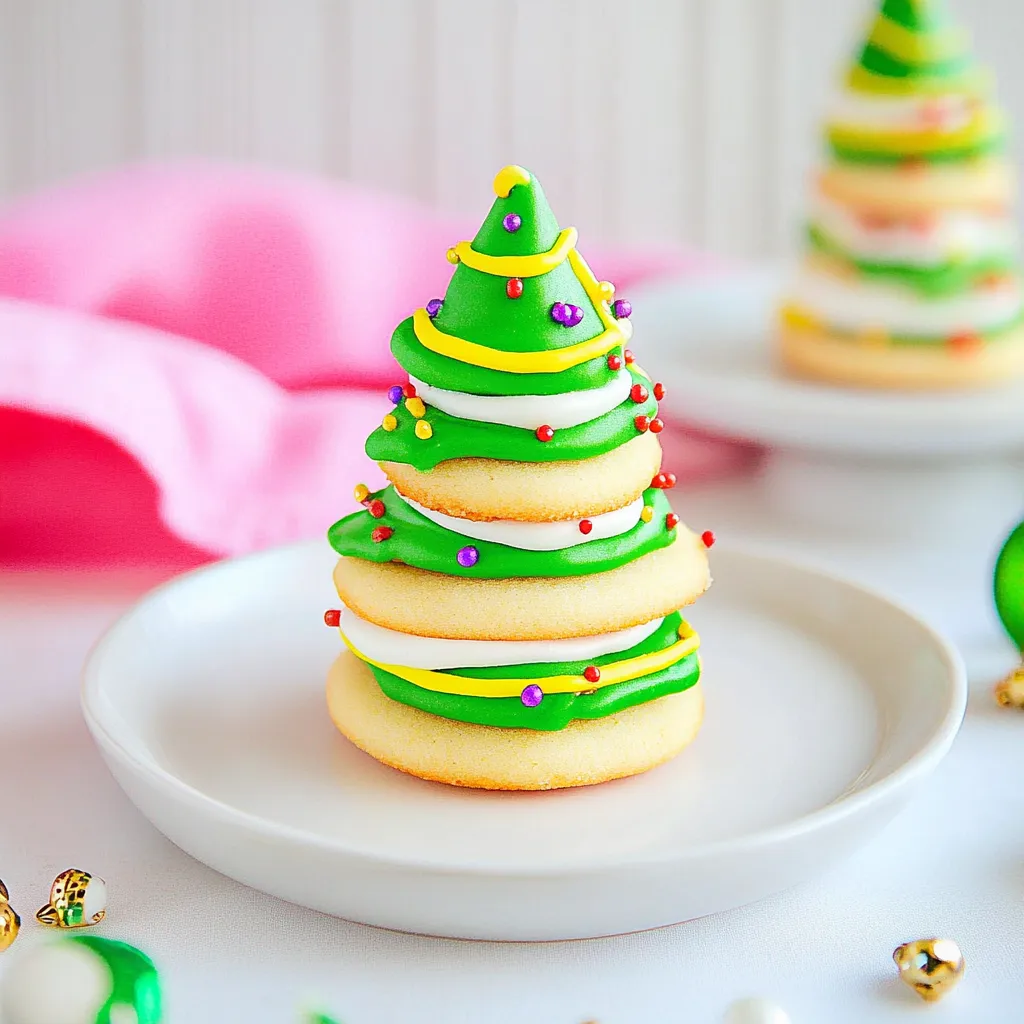
- Now it’s time to assemble your cookies! Use the frosting to “glue” together the three cookie sizes, starting with the largest on the bottom, followed by the medium, and finishing with the smallest on top. It creates a delightful tree shape!
- Finally, pipe or spread frosting onto the top of the largest cookie and place the medium cookie on top. Repeat this step for the smallest cookie, adding a touch of frosting and finishing with sprinkles if desired. Enjoy your beautiful Stacked Christmas Tree Cookies!
Things Worth Knowing
- Chilling the Dough: If your dough feels too soft to work with, consider chilling it for about 30 minutes. This makes it easier to shape the cookies.
- Even Baking: Rotate your baking sheets halfway through the baking time to ensure even browning of all cookies.
- Mixing Technique: When beating your butter and sugars, make sure to incorporate air for a lighter texture. This is crucial for achieving fluffy cookies.
- Frosting Consistency: If your frosting is too thick, add a little more milk to reach your desired consistency, making it easier to spread or pipe.
Change It Up
Looking to add a personal touch to your Stacked Christmas Tree Cookies? Here are some fun variations and tips!
- Flavor Variations: Consider adding flavors like almond or lemon to the dough for a unique twist.
- Nut Additions: For a nutty flavor, mix in some finely chopped nuts like walnuts or pecans to your dough.
- Alternative Frosting: Instead of traditional frosting, try using a cream cheese frosting for a tangy flavor that pairs well with the sweetness of the cookies.
- Decoration Ideas: Get creative! Use mini chocolate chips or small candies to add details or create faces on your cookie creations.
- Storage: Store your cookies in an airtight container at room temperature for up to five days. They can also be frozen for up to three months, which is great for prepping ahead of time!
- Serving Suggestions: These cookies are perfect for holiday parties, cookie exchanges, or even as festive treats for neighbors and friends. They make a beautiful centerpiece on dessert tables!
What Goes Well With This Stacked Christmas Tree Cookies
Serving Stacked Christmas Tree Cookies is not only about the cookies themselves; it’s about creating a delightful experience for your guests. Here are some suggestions:
- Hot Cocoa: Pair these cookies with a warm cup of hot cocoa for the ultimate holiday treat.
- Holiday Parties: These cookies make a fantastic addition to any holiday party, adding both sweetness and festive cheer.
- Cookie Exchanges: Share your creations during cookie exchanges; they’re sure to be a hit among your friends and family.
- Gift Giving: Package these cookies nicely and give them as gifts. It’s a heartfelt gesture that friends and family will appreciate.
- Kids’ Parties: Perfect for kids’ holiday parties or school events, these cookies can be decorated together as a fun activity!
- Seasonal Events: From Christmas to New Year’s celebrations, these cookies fit perfectly into any winter event.
FAQ
Conclusion
Stacked Christmas Tree Cookies are a perfect addition to any holiday celebration, bringing joy and creativity into the kitchen. Their fun shape and delicious flavor make them a hit among both kids and adults. I encourage you to bring some holiday cheer into your home by trying out this delightful recipe. You won’t just be making cookies; you’ll be creating memories!

Stacked Christmas Tree Cookies
Equipment
- Mixing Bowl
- Baking Sheet
- Whisk
- Blender
- Oven
Ingredients
- 1 cup Butter softened for easier mixing
- 3/4 cup Granulated Sugar for sweetness
- 1 large Egg binds the ingredients
- 1 teaspoon Vanilla Extract adds warm flavor
- 2 1/2 cups Flour base of the cookies
- 1 teaspoon Baking Powder helps cookies rise
- 3 cups Powdered Sugar for frosting
- 1/2 cup Butter for frosting
- 3 tablespoons Milk adds moisture to frosting
- 1 teaspoon Vanilla Extract flavor for frosting
- to taste Food Coloring for decorative purposes
- as desired Sprinkles for decoration
Instructions
- 1. Preheat your oven to 350 degrees. It’s important to have your oven ready before you start; this ensures even baking of your cookies.
- 2. In a medium bowl, beat together butter, granulated sugar, egg, and vanilla until the mixture is light and fluffy. This process incorporates air into the butter, making your cookies tender.
- 3. In a separate bowl, whisk together flour and baking powder. This helps to evenly distribute the baking powder throughout the flour, ensuring a uniform rise.
- 4. Gradually add the dry mixture to the wet mixture, beating until well blended. You’ll notice the dough becoming thicker and more cohesive at this point.
- 5. Divide the dough into three portions, shaping each into different sizes of cookie balls. For small cookies, use a rounded teaspoon of dough; for medium, use two rounded teaspoons; and for large, three rounded teaspoons. You should have a total of 15 balls of each size, creating a fun stacking opportunity!
- 6. Place the small cookie balls onto a parchment-lined baking sheet. Press down gently with a glass to flatten them slightly, which helps them bake evenly.
- 7. Repeat this process for the medium and large cookie balls, placing each size on separate baking sheets. This is crucial because each size will bake at different times.
- 8. Bake the cookies in the preheated oven. The small cookies will take about 4 to 6 minutes, medium cookies about 6 to 8 minutes, and large cookies around 8 to 10 minutes. Keep an eye on them until the bottoms start to turn golden brown.
- 9. Once baked, remove the cookies from the oven and let them cool completely on wire racks. This cooling time allows them to firm up, making them easier to handle.
- 10. While the cookies cool, prepare the frosting. In a medium bowl, beat together powdered sugar and butter until it’s light and fluffy. Add milk and vanilla, mixing until well combined.
- 11. If desired, add food coloring to the frosting for a festive look. You can use different colors to create a vibrant assortment.
- 12. Now it’s time to assemble your cookies! Use the frosting to “glue” together the three cookie sizes, starting with the largest on the bottom, followed by the medium, and finishing with the smallest on top. It creates a delightful tree shape!
- 13. Finally, pipe or spread frosting onto the top of the largest cookie and place the medium cookie on top. Repeat this step for the smallest cookie, adding a touch of frosting and finishing with sprinkles if desired. Enjoy your beautiful Stacked Christmas Tree Cookies!
Notes
- Make Ahead Of Time: If you would like to make these cookies ahead of time, the best option is to bake the cookies, cool them completely, then store in an airtight container and place into the fridge for a few days, or freezer for a longer period of time. When ready to serve them, bring them to room temperature, frost and decorate.
- Storage: Store cookies in an airtight container for five days. They can be frozen for up to three months. If freezing, it’s ideal to freeze the unfrosted cookies, then thaw and decorate when ready to use.