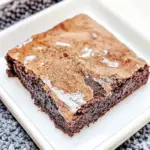
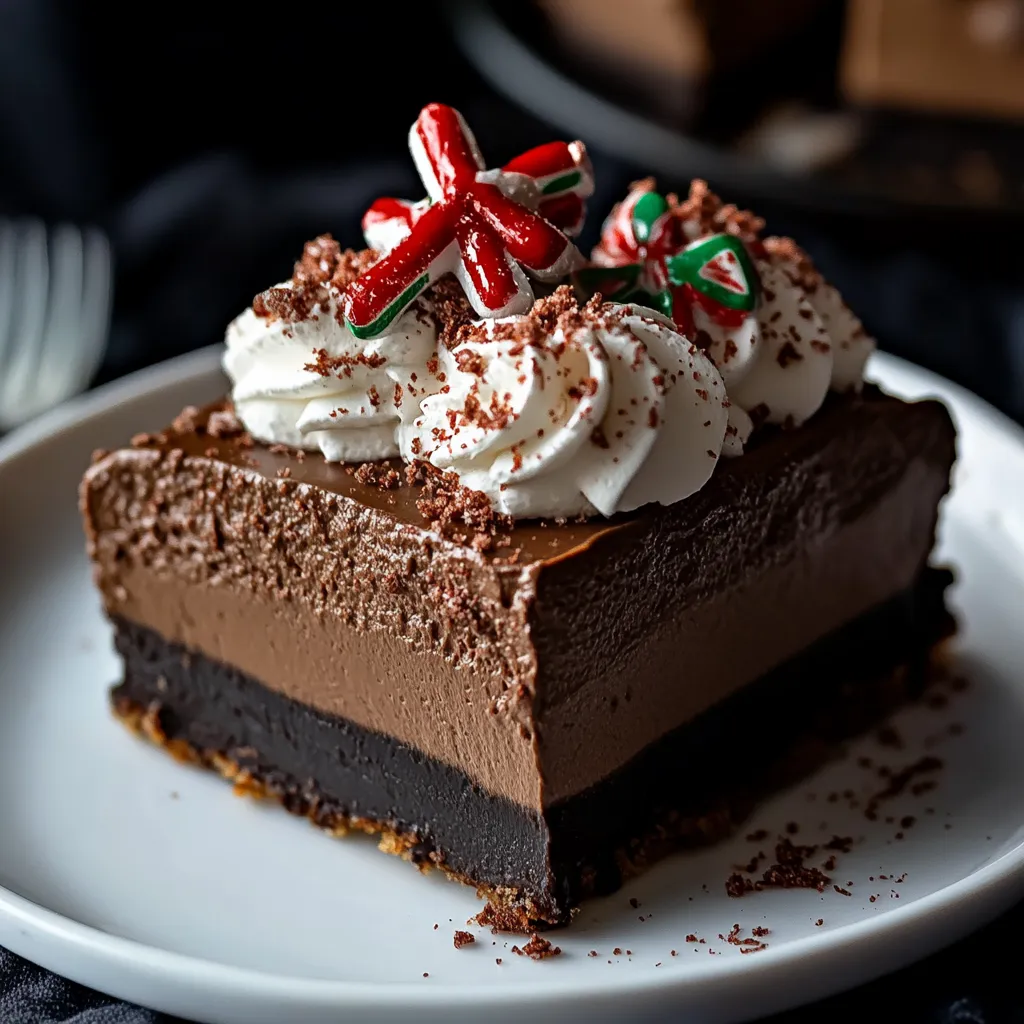
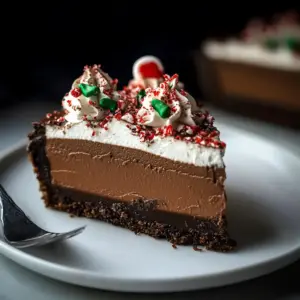
No Bake Peppermint Mocha Cheesecake
There’s something truly magical about the holiday season, and one of my favorite ways to celebrate is with a dessert that embodies all those cozy flavors. The No Bake Peppermint Mocha Cheesecake is not just a treat; it’s a festive experience that fills your home with the rich aroma of chocolate and the refreshing hint of peppermint. I remember the first time I made this cheesecake for a family gathering. Everyone was captivated by its luscious texture and the way it melted in their mouths. It’s the perfect no-bake option, allowing you to spend less time in the kitchen and more time enjoying the company of loved ones.
This cheesecake is a labor of love, bringing together rich ingredients like full-fat cream cheese and heavy cream, creating a silky-smooth filling that balances beautifully with a crunchy chocolate crust. What’s even better is how simple it is to prepare, making it an ideal dessert for any holiday gathering or cozy winter evening. With each slice, you’re not just tasting a dessert; you’re indulging in a moment of joy. I can’t help but think of how this cheesecake will become a beloved tradition in your home just like it has in mine. So, let’s dive into the deliciousness that is the No Bake Peppermint Mocha Cheesecake.
Recipe Snapshot
30 mins
30 mins
0 mins
Medium
489 kcal
8 g
Gluten-Free, Low FODMAP
38 g
Mixing Bowl, Chef’s Knife, Wooden Spoon, Blender, Frying Pan, Whisk, Food Processor, Saucepan
Why You’ll Love This No Bake Peppermint Mocha Cheesecake
Rich and Creamy Texture
The No Bake Peppermint Mocha Cheesecake boasts an incredibly rich and creamy texture that is simply irresistible. When you take that first bite, the smooth filling envelops your taste buds, making it a decadent experience. The combination of full-fat cream cheese and heavy cream creates a luxurious mouthfeel that makes you feel like you’re indulging in something truly special.
Perfect for the Holidays
This recipe is tailor-made for the holidays. The festive flavors of peppermint and mocha evoke warmth and cheer, making it a delightful centerpiece for your holiday table. Whether you’re hosting a party or attending a potluck, this cheesecake will definitely be the star of the show, leaving everyone asking for seconds.
No Baking Required
If you’re like me and sometimes dread turning on the oven during the chilly winter months, this is the perfect solution. The No Bake Peppermint Mocha Cheesecake takes the hassle out of baking while still delivering an impressive dessert. With minimal effort, you can whip up a cheesecake that looks and tastes gourmet.
Customizable and Versatile
This cheesecake is incredibly versatile and can adapt to your preferences. You can play around with the toppings, perhaps adding crushed candies or even drizzling some melted chocolate. It’s a canvas for your creativity, allowing you to make it uniquely yours!
Great for Make-Ahead
One of the best features of this cheesecake is that it can be made ahead of time. It requires chilling in the refrigerator for at least six hours, which means you can prepare it the day before your gathering. This not only saves time but also allows the flavors to meld beautifully.
Kid-Friendly Fun
Making the No Bake Peppermint Mocha Cheesecake can be a fun family activity. Kids will enjoy helping crush the cookies for the crust or adding the peppermint candies on top. It’s a great way to bring everyone together in the kitchen, creating memories that will last long after the last bite is gone.
Main Ingredients for No Bake Peppermint Mocha Cheesecake
When creating the No Bake Peppermint Mocha Cheesecake, the ingredients play a crucial role in achieving that perfect flavor and texture. The star players include a rich blend of chocolates, creamy cheeses, and the refreshing bite of peppermint. Each ingredient has been thoughtfully selected to contribute to a harmonious balance of flavors, ensuring every slice is a delightful experience.
- Chocolate Sandwich Cookies: This is the base of the cheesecake crust. Their rich, chocolatey flavor adds depth and a satisfying crunch, making every bite a pleasure.
- Unsalted Butter: It binds the cookie crumbs together to create a sturdy crust that holds up beautifully under the luscious filling.
- Espresso Powder: A key ingredient that enhances the chocolate flavor, giving it that rich mocha essence without overwhelming the dessert.
- Lindt LINDOR Peppermint Cookie Milk Chocolate Truffles: These add a delightful layer of peppermint flavor, making the cheesecake both festive and indulgent.
- Full-Fat Cream Cheese: The backbone of the cheesecake filling, providing creaminess and richness that is simply irresistible.
- Granulated Sugar and Light Brown Sugar: Together, they add the perfect sweetness and depth, complementing the chocolate and peppermint beautifully.
- Dutch-Process Cocoa Powder: This ingredient enhances the chocolate flavor, giving the cheesecake a deep, rich color and taste.
- Peppermint Extract: For that unmistakable peppermint flavor that brings the holiday spirit to life.
- Heavy Cream: Whipped to perfection, it adds a lightness to the cheesecake, creating a contrast to the dense filling.
- Crushed Candy Canes: A festive touch that adds a delightful crunch and a pop of color on top of the cheesecake.
Cooking Instructions for No Bake Peppermint Mocha Cheesecake

Creating this delicious No Bake Peppermint Mocha Cheesecake is a simple and enjoyable process. Follow these steps to ensure your cheesecake turns out perfectly every time. Trust me, the end result is worth every minute spent in the kitchen!
Lightly grease the bottom and sides of a 9-inch springform pan. This ensures the cheesecake releases easily once it sets. It’s a small but crucial step to avoid any sticky situations later on!
In a large bowl, combine the crushed chocolate sandwich cookies, melted unsalted butter, and espresso powder. Mix well until everything is evenly coated. The mixture should resemble wet sand.
Press the crust mixture firmly into the bottom of the prepared pan, pressing down in the middle and slightly up the sides. This creates a sturdy foundation for your cheesecake. Chill the crust in the freezer while you prepare the filling.
Fill a medium pot one-third full with water and bring it to a low simmer over medium heat. This will create a double boiler effect for melting the chocolate.
Place a heatproof bowl that fits snugly on top of the pot (it shouldn’t touch the simmering water) and reduce the heat to low. Add the unwrapped Lindt LINDOR Peppermint Cookie Milk Chocolate Truffles and coarsely chopped Lindt semi-sweet chocolate to the bowl. Stir occasionally until the chocolate is completely melted. Remove from heat, leaving the bowl over the hot water to keep it warm.
Stir in the additional espresso powder into the melted chocolate mixture, blending well. Set aside to cool slightly.
In a food processor or high-powered blender, pulse the full-fat cream cheese until smooth, scraping down the sides of the bowl as needed (about two minutes). Add in both granulated sugar and light brown sugar, along with Dutch-process cocoa powder. Blend until smooth. Add in the peppermint extract and heavy cream, mixing until just combined.
Fold in the melted chocolate mixture until everything is well combined. The filling will be thick and rich—this is what you want!
Remove the crust from the freezer and scrape the filling over the crust, smoothing the top to make it even. This will ensure a beautiful presentation once it’s served.
Transfer the cheesecake to the refrigerator and let it chill for at least six hours or overnight. This allows the flavors to meld and the cheesecake to set properly.
Add chopped Lindt semi-sweet chocolate to a medium bowl and set it aside. In a small saucepan, bring the remaining heavy cream to a simmer over medium heat. Pour half of the hot cream over the chopped chocolate and let it sit for two minutes to melt.
Using a whisk, mix the chocolate and cream together until smooth. Slowly add the remaining cream while whisking until you achieve a glossy ganache. Stir in the unsalted butter until completely melted, followed by the second dose of espresso powder. The ganache should be dark and shiny.
Spread the ganache over the chilled cheesecake, smoothing it out evenly. Finally, sprinkle the top with crushed candy canes for a festive touch and let it set for about one hour before slicing.
To serve, use a thin-bladed sharp knife to slice the cheesecake, wiping the knife clean between each cut for neat slices. Enjoy this festive treat with friends and family!
Store any leftovers loosely covered in the refrigerator for up to four days—if it lasts that long!
Things Worth Knowing
- When melting chocolate, always use low heat to avoid burning. Chocolate can seize easily, so patience is key.
- For a smoother ganache, make sure both the chocolate and cream are at similar temperatures before mixing.
- Chilling time is crucial; the cheesecake needs to set properly in order to achieve the right texture.
- Feel free to customize your cheesecake with different toppings like whipped cream or caramel sauce.
Make It Your Own
Every recipe can be personalized, and the No Bake Peppermint Mocha Cheesecake is no exception. Here are some tips to make it truly yours:
- Storage: Ensure the cheesecake is covered loosely with plastic wrap to avoid moisture buildup while stored in the fridge.
- Freezing: This cheesecake can be frozen for up to two months. Just wrap it well to preserve its flavor and texture.
- Variations: Consider using dark chocolate instead of semi-sweet for an even richer flavor.
- Seasonal Touch: During the holidays, you can add festive sprinkles or edible glitter for a fun presentation.
- Serving Suggestions: Serve slices with a dollop of whipped cream and a sprinkle of additional crushed candy canes on top.
What Goes Well With This No Bake Peppermint Mocha Cheesecake
Pairing the No Bake Peppermint Mocha Cheesecake with the right accompaniments can enhance your dessert experience. Here are some great options:
- Hot Chocolate: A classic pairing that complements the chocolatey flavors of the cheesecake perfectly.
- Seasonal Fruits: Fresh berries or slices of crisp apples can provide a refreshing contrast to the richness of the cheesecake.
- Coffee or Espresso: The rich flavors of coffee enhance the mocha aspect of the cheesecake and offer a delightful finish to your meal.
- Cheese Board: Serve alongside a cheese platter with assorted cheeses and crackers for a delightful balance of sweet and savory.
- Holiday Parties: This cheesecake is perfect for gatherings, whether it’s a Christmas dinner or a cozy winter get-together.
- Special Occasions: Try serving it for birthdays or anniversaries—it’s sure to impress!
FAQ
Conclusion
The No Bake Peppermint Mocha Cheesecake is a special treat that beautifully combines the flavors of chocolate and peppermint, creating a festive dessert that everyone will love. With its creamy texture and no-bake simplicity, it’s sure to become a holiday favorite. I encourage you to try making it for your next gathering—once you do, you’ll understand why it’s such a beloved recipe!
No Bake Peppermint Mocha Cheesecake
Equipment
- Mixing Bowl
- Chef's Knife
- Wooden Spoon
- Blender
- Frying Pan
- Whisk
- Food Processor
- Saucepan
Ingredients
- 1 full-size package chocolate sandwich cookies crushed into fine crumbs (36 sandwich cookies in total)
- 8 tablespoons unsalted butter melted
- 1/2 teaspoon espresso powder
- 1 8.5 ounce bag Lindt LINDOR Peppermint Cookie Milk Chocolate Truffles
- 7 ounces Lindt semi-sweet chocolate coarsely chopped (I suggest using their EXCELLENCE 70% Cocoa Bars)
- 1 and 1/2 teaspoons espresso powder
- 1 and 1/2 pounds full-fat cream cheese at room temperature
- 1 cup granulated sugar (198g/7 ounces)
- 1/4 cup light brown sugar packed (53g/1 and 7/8 ounces)
- 2 tablespoons Dutch-process cocoa powder
- 1 teaspoon peppermint extract
- 1 cup heavy cream at room temperature
- 1 and 1/3 cups Lindt semi-sweet chocolate finely chopped (I suggest using their EXCELLENCE 70% Cocoa Bars)
- 1 and 1/4 cups heavy cream (12 ounces)
- 1/4 cup unsalted butter at room temperature, cut into cubes
- 1 teaspoon espresso powder
- 3/4 teaspoon peppermint extract
- 1/2 cup crushed candy canes
Instructions
- Lightly grease the bottom and sides of a 9-inch springform pan. This ensures the cheesecake releases easily once it sets. It’s a small but crucial step to avoid any sticky situations later on!
- In a large bowl, combine the crushed chocolate sandwich cookies, melted unsalted butter, and espresso powder. Mix well until everything is evenly coated. The mixture should resemble wet sand.
- Press the crust mixture firmly into the bottom of the prepared pan, pressing down in the middle and slightly up the sides. This creates a sturdy foundation for your cheesecake. Chill the crust in the freezer while you prepare the filling.
- Fill a medium pot one-third full with water and bring it to a low simmer over medium heat. This will create a double boiler effect for melting the chocolate.
- Place a heatproof bowl that fits snugly on top of the pot (it shouldn’t touch the simmering water) and reduce the heat to low. Add the unwrapped Lindt LINDOR Peppermint Cookie Milk Chocolate Truffles and coarsely chopped Lindt semi-sweet chocolate to the bowl. Stir occasionally until the chocolate is completely melted. Remove from heat, leaving the bowl over the hot water to keep it warm.
- Stir in the additional espresso powder into the melted chocolate mixture, blending well. Set aside to cool slightly.
- In a food processor or high-powered blender, pulse the full-fat cream cheese until smooth, scraping down the sides of the bowl as needed (about two minutes). Add in both granulated sugar and light brown sugar, along with Dutch-process cocoa powder. Blend until smooth. Add in the peppermint extract and heavy cream, mixing until just combined.
- Fold in the melted chocolate mixture until everything is well combined. The filling will be thick and rich—this is what you want!
- Remove the crust from the freezer and scrape the filling over the crust, smoothing the top to make it even. This will ensure a beautiful presentation once it’s served.
- Transfer the cheesecake to the refrigerator and let it chill for at least six hours or overnight. This allows the flavors to meld and the cheesecake to set properly.
- Add chopped Lindt semi-sweet chocolate to a medium bowl and set it aside. In a small saucepan, bring the remaining heavy cream to a simmer over medium heat. Pour half of the hot cream over the chopped chocolate and let it sit for two minutes to melt.
- Using a whisk, mix the chocolate and cream together until smooth. Slowly add the remaining cream while whisking until you achieve a glossy ganache. Stir in the unsalted butter until completely melted, followed by the second dose of espresso powder. The ganache should be dark and shiny.
- Spread the ganache over the chilled cheesecake, smoothing it out evenly. Finally, sprinkle the top with crushed candy canes for a festive touch and let it set for about one hour before slicing.
- To serve, use a thin-bladed sharp knife to slice the cheesecake, wiping the knife clean between each cut for neat slices. Enjoy this festive treat with friends and family!
- Store any leftovers loosely covered in the refrigerator for up to four days—if it lasts that long!
Notes
- Storage: Ensure the cheesecake is covered loosely with plastic wrap to avoid moisture buildup while stored in the fridge.
- Freezing: This cheesecake can be frozen for up to two months. Just wrap it well to preserve its flavor and texture.
- Variations: Consider using dark chocolate instead of semi-sweet for an even richer flavor.
- Seasonal Touch: During the holidays, you can add festive sprinkles or edible glitter for a fun presentation.
- Serving Suggestions: Serve slices with a dollop of whipped cream and a sprinkle of additional crushed candy canes on top.