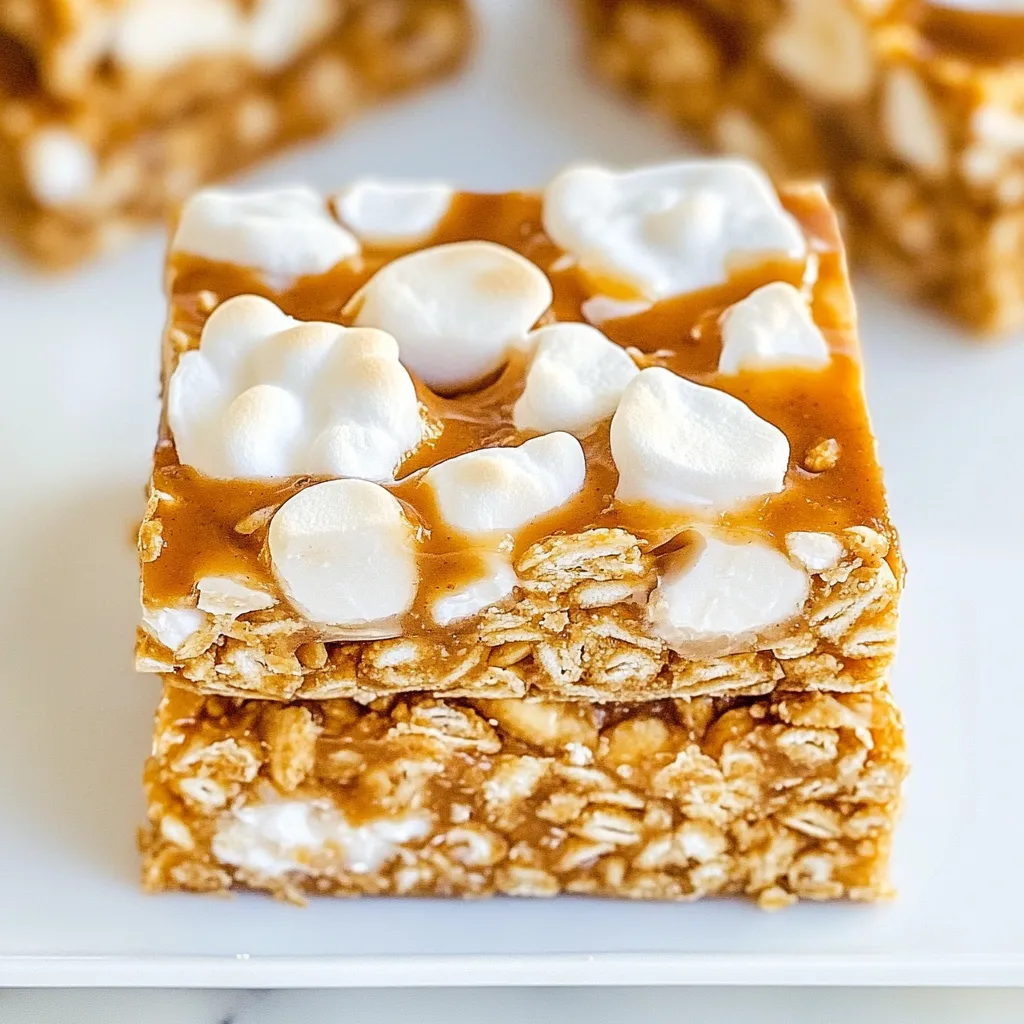
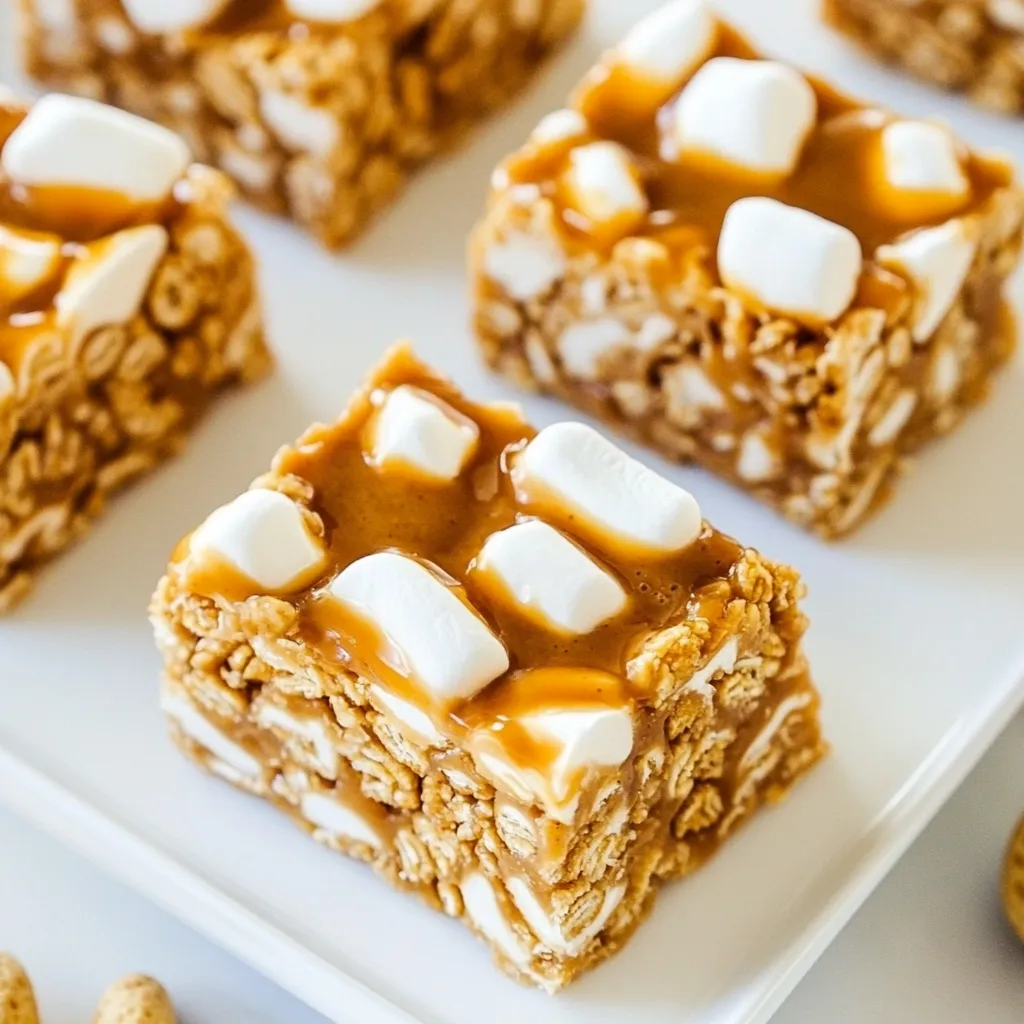
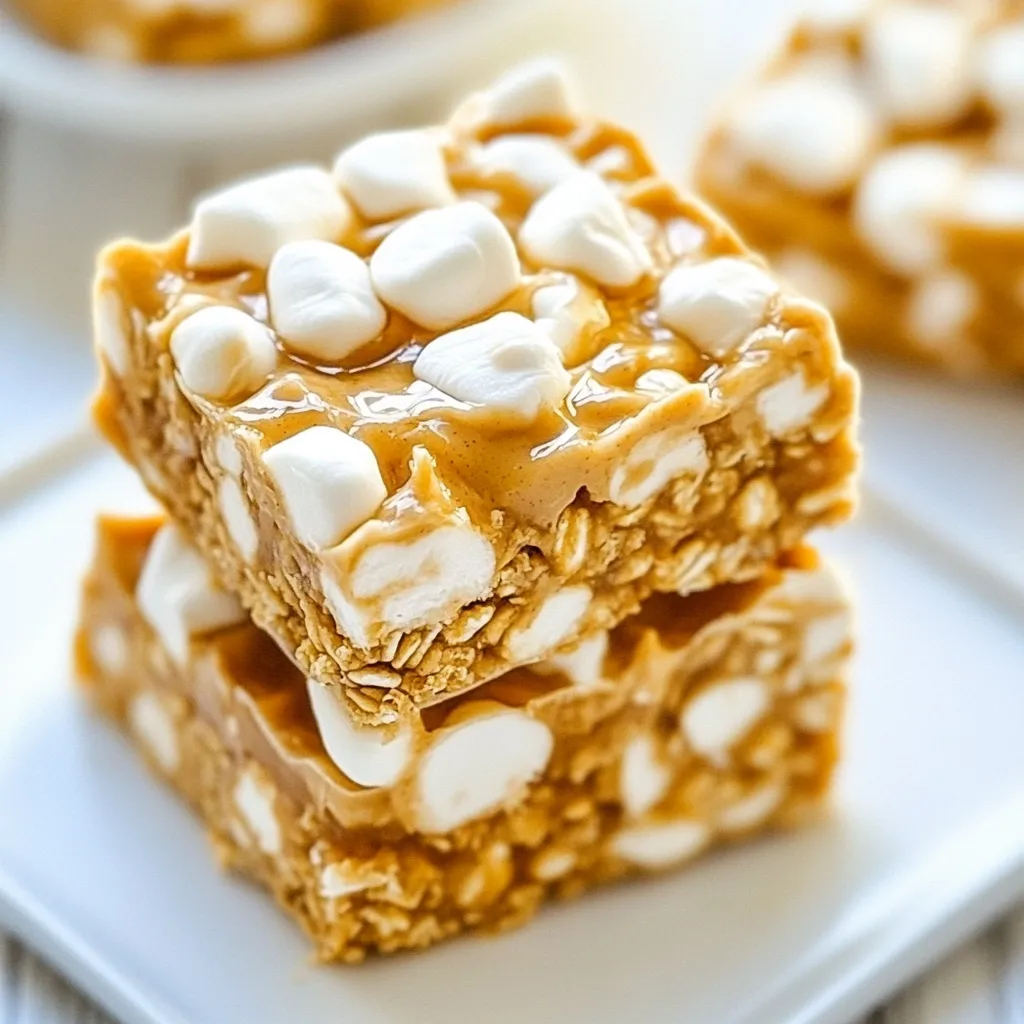
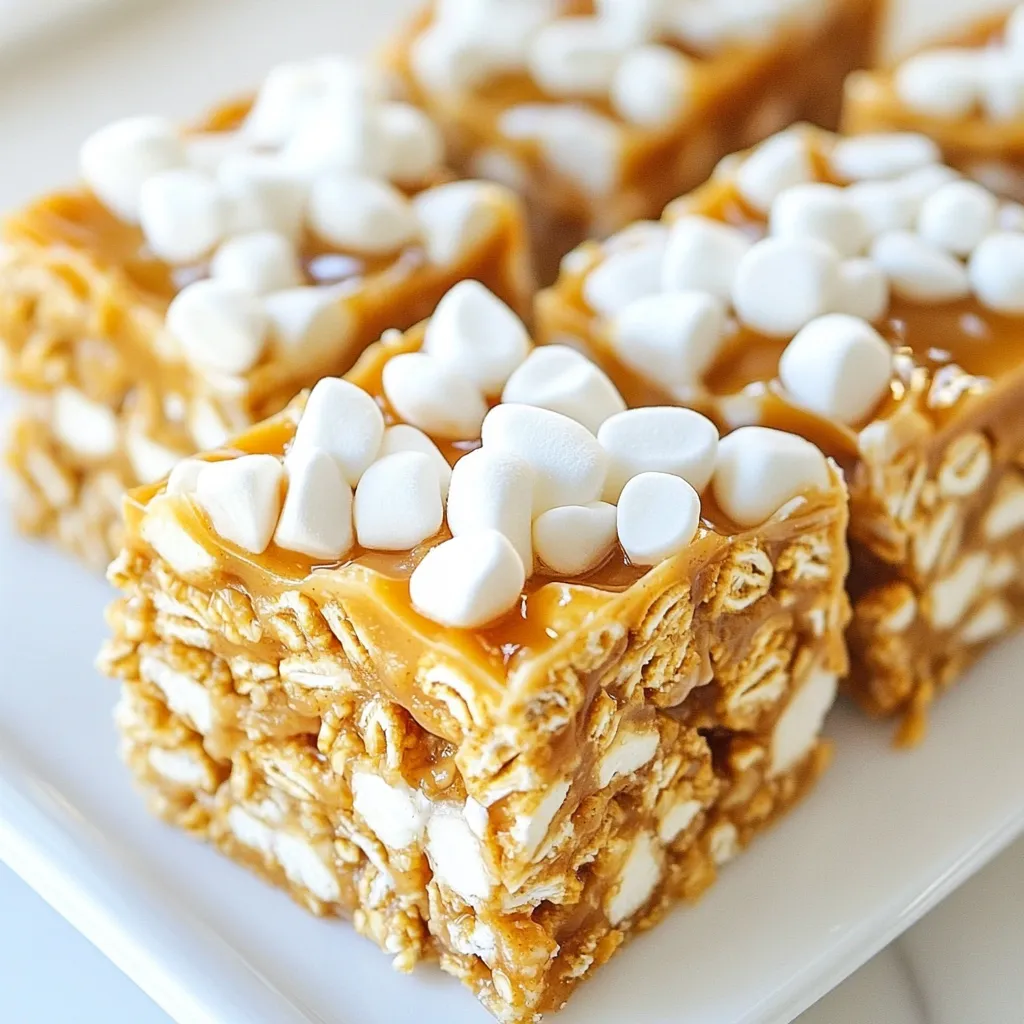
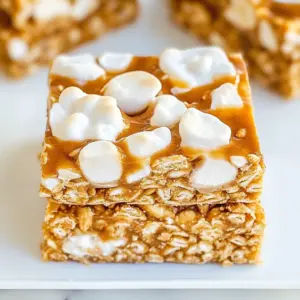
No Bake Peanut Butter Cereal Bars
There’s something truly special about making No Bake Peanut Butter Cereal Bars in the comfort of your own kitchen. These bars remind me of lazy afternoons spent with friends, where laughter echoes and the sweet aroma of peanut butter fills the air. I can still see my younger self, eagerly mixing the ingredients and sneaking bits of the cereal when I thought no one was watching. They are not just a treat; they’re a nostalgic journey back to simpler times. Whenever I whip up a batch, it feels like I’m creating little memories with each layer. Whether for a quick snack or a fun dessert at gatherings, these bars are always a hit.
Recipe Snapshot
7 mins
5 mins
2 mins
Medium
180 kcal
4 g
Gluten-Free, Low FODMAP
8 g
Frying Pan, Mixing Bowl, Wooden Spoon
Why This No Bake Peanut Butter Cereal Bars Is a Winner
There are plenty of reasons why No Bake Peanut Butter Cereal Bars hold a special place in my heart. Allow me to share a few!
1. Quick and Easy
One of the best things about these bars is how effortlessly they come together. With no baking required, you can have a delicious treat ready in no time. Just a few minutes of preparation and some chilling in the fridge, and you’ll have a satisfying snack that everyone will love.
2. Perfect for All Ages
These bars aren’t just for kids; they’re a hit with adults too! The combination of peanut butter and cereal appeals to everyone, making them a versatile treat for family gatherings, parties, or even a cozy night in.
3. Customizable
While the classic recipe is fantastic on its own, you can easily customize it to fit your tastes. Add in your favorite nuts, dried fruits, or even a touch of chocolate chips to give it your unique twist. The possibilities are endless!
4. Great for Meal Prep
These bars are a fantastic option for those busy weeks when you need something quick to grab and go. They store well in an airtight container, making them perfect for meal prep. Just cut them into squares and you’re set for the week!
5. Nostalgic Memories
Every bite of No Bake Peanut Butter Cereal Bars evokes memories of childhood and fun times in the kitchen. They remind us of the simple joys in life, like making something delicious with friends or family. These bars carry the spirit of togetherness and joy.
Ingredients for No Bake Peanut Butter Cereal Bars
The ingredients for No Bake Peanut Butter Cereal Bars are simple yet effective. Each component plays a crucial role in delivering that delightful flavor and texture that we all crave. The key players here are creamy peanut butter, which lends a rich nuttiness, along with cereal that adds crunchiness and substance. Together, they create a bar that’s both satisfying and a little indulgent.
- 1 heaping cup creamy peanut butter: I recommend using brands like Jif or Skippy for best results. Avoid natural or homemade peanut butter as they can alter the texture of the bars.
- ½ cup light corn syrup: This ingredient helps bind everything together and adds just the right amount of sweetness. Make sure it’s light-colored for the best outcome.
- ½ cup granulated sugar: This adds sweetness and helps achieve the perfect sticky texture.
- ¼ cup light brown sugar: Packed for extra depth of flavor, it complements the granulated sugar.
- 1 tablespoon vanilla extract: Adds a warm, aromatic note to the bars.
- 3½ cups Special K cereal: This is my go-to choice, but you can substitute with Corn Flakes or even Rice Krispies.
- About 5 ounces marshmallows: These will provide a touch of sweetness and gooeyness. If you like, you can use mini marshmallows for easier mixing.
Putting Together No Bake Peanut Butter Cereal Bars
Making No Bake Peanut Butter Cereal Bars is an enjoyable process that will leave your kitchen smelling amazing. Follow these steps for delicious results!
- Start by lining an 8-inch square pan with aluminum foil, ensuring that it hangs over the edges for easy removal later. Give it a light spray with cooking spray to further prevent sticking.
- In a large microwave-safe bowl, combine 1 heaping cup of peanut butter, corn syrup, granulated sugar, and brown sugar. Heat this mixture in the microwave on high power for 1 minute until melted.
- After a minute, take it out and give it a good stir. You’ll notice the mixture is a bit granular, but that’s perfectly normal. Return the bowl to the microwave and heat for another minute on high power.
- Once melted and smooth, stir in 1 tablespoon of vanilla extract. This step elevates the flavor profile beautifully!
- Next, add in 3½ cups of Special K cereal and about 5 ounces of marshmallows. Mix everything together gently. The marshmallows will start to melt slightly, adding to the gooey texture.
- Carefully turn the mixture out into the prepared pan, packing it down firmly with a spatula. Smooth the top with the spatula for an even finish.
- Cover the pan with a sheet of foil to prevent any unwanted fridge odors from mingling with your delicious bars. Place it in the fridge for about 2 hours, or until the mixture is fully set.
- Once set, use the foil overhang to lift the bars out of the pan. Slice them into squares or rectangles, depending on your preferred serving size.
- These bars can be stored in an airtight container at room temperature for up to 1 week, in the refrigerator for up to 2 weeks, or in the freezer for up to 6 months. Enjoy!
Things Worth Knowing
- Use a Good Quality Peanut Butter: Avoid natural or homemade versions, as they can affect the texture of the bars.
- Don’t Overheat: Be cautious not to overheat the mixture in the microwave; some separation may occur if it gets too hot.
- Cutting Tips: For cleaner cuts, use a sharp knife and wipe it after each cut.
- Chill Properly: Ensure the bars chill adequately to maintain their shape when sliced.
Make It Your Own
There are endless ways to customize your No Bake Peanut Butter Cereal Bars. Here are some tips to help you get creative!
- Add Nuts: Incorporate your favorite chopped nuts such as almonds, walnuts, or peanuts for added crunch.
- Include Chocolate: Drizzle melted chocolate over the bars or mix in chocolate chips for a richer treat.
- Experiment with Other Cereals: Feel free to swap in your favorite cereal varieties for different textures and flavors.
- Use Different Sweeteners: Try honey or maple syrup in place of corn syrup to vary the sweetness profile.
- Flavor Variations: Adding spices like cinnamon or nutmeg can give an interesting twist!
Perfect Pairings for No Bake Peanut Butter Cereal Bars
When it comes to serving No Bake Peanut Butter Cereal Bars, there are plenty of delightful options to consider:
- With a Glass of Milk: Pair these bars with a classic glass of milk for a sweet treat that feels nostalgic and satisfying.
- Lunchbox Staple: They make a fantastic addition to kids’ lunchboxes or as after-school snacks.
- Picnic Treat: These bars are portable and easy to pack, perfect for summer picnics or road trips.
- Sweet End to Dinner: Serve them as a dessert after family meals, especially with fruit or a scoop of ice cream.
- Holiday Gatherings: They can be a hit at seasonal gatherings, providing a crunchy yet sweet contrast to other desserts.
- Storage Tips: Store in an airtight container for freshness, and remember they can be frozen for longer storage.
FAQ
Conclusion
The No Bake Peanut Butter Cereal Bars are a deliciously nostalgic snack that everyone can enjoy. With their rich flavor and quick preparation, they’re perfect for any occasion—be it a family gathering, an after-school treat, or just a little something sweet for yourself. I encourage you to try making them; you won’t regret it!
No Bake Peanut Butter Cereal Bars
Equipment
- Frying Pan
- Mixing Bowl
- Wooden Spoon
Ingredients
- 1 cup creamy peanut butter Use Jif, Skippy, or similar; do not use natural or homemade peanut butter.
- ½ cup light corn syrup Light colored, not lite.
- ½ cup granulated sugar
- ¼ cup light brown sugar Packed.
- 1 tablespoon vanilla extract
- 3½ cups Special K cereal Corn Flakes may be substituted, or use about 3 cups Rice Krispies cereal.
- 5 ounces marshmallows Half of one standard bag; I used large but mini are ideal.
Instructions
- Line an 8-inch square pan with aluminum foil leaving overhang, spray with cooking spray; set aside.
- In a large microwave-safe bowl, combine 1 heaping cup peanut butter, corn syrup, sugars, and heat on high power for 1 minute to melt.
- Stop to stir. Mixture will be on the granular side, this is okay.
- Return bowl to microwave and heat for 1 more minute on high power.
- Stir in the vanilla.
- Stir in the cereal and marshmallows. The marshmallows will melt to some extent, but not fully.
- Turn mixture out into prepared pan, packing it down somewhat firmly with a spatula, and smooth the top.
- Cover pan with a sheet of foil (to prevent fridge smells), and place pan in fridge to set up for about 2 hours or until set, before lifting out with foil overhang, slicing, and serving.
- Bars will keep airtight at room temperature for up to 1 week, in the refrigerator for up to 2 weeks, or in the freezer for up to 6 months.
Notes
- Storage: Store in an airtight container for freshness.
- Freezing: You can freeze these bars for up to 6 months.
- Variations: Feel free to add nuts or chocolate chips to customize your bars.
- Enjoy fresh: They taste best when fresh, but can be stored for later.
- Serve chilled: They are best served chilled for the perfect texture.