Mint Chocolate Chip Cake
There’s a special kind of magic that happens when you bring together the flavors of mint and chocolate. The first time I made Mint Chocolate Chip Cake, it was for a friend’s birthday party. I remember the moment I took the first bite; the refreshing burst of mint paired with the rich, velvety chocolate was absolutely delightful. As the years have passed, this cake has become a staple in my baking repertoire, always eliciting smiles from friends and family alike. I love how it transports me back to that first celebration, each slice bringing the same joy. Whether it’s a birthday, anniversary, or simply a cozy night in, this cake is perfect for any occasion. The vibrant colors, the fluffy layers, and the smooth frosting remind me of the sweetness in life. Trust me, once you make this Mint Chocolate Chip Cake, it will quickly become one of your go-to recipes!
Recipe Snapshot
55 mins
25 mins
30 mins
Medium
450 kcal
4 g
Gluten-Free, Low FODMAP
24 g
Mixing Bowl, Baking Sheet, Chef’s Knife, Blender, Frying Pan, Oven, Food Processor
What You’ll Enjoy About This Mint Chocolate Chip Cake
Irresistible Flavor Combination
What makes Mint Chocolate Chip Cake truly special is its unique flavor combination. The freshness of mint perfectly complements the deep, rich chocolate, creating a symphony of taste that dances on your palate. Each bite is a delightful journey, and it’s hard to stop at just one slice!
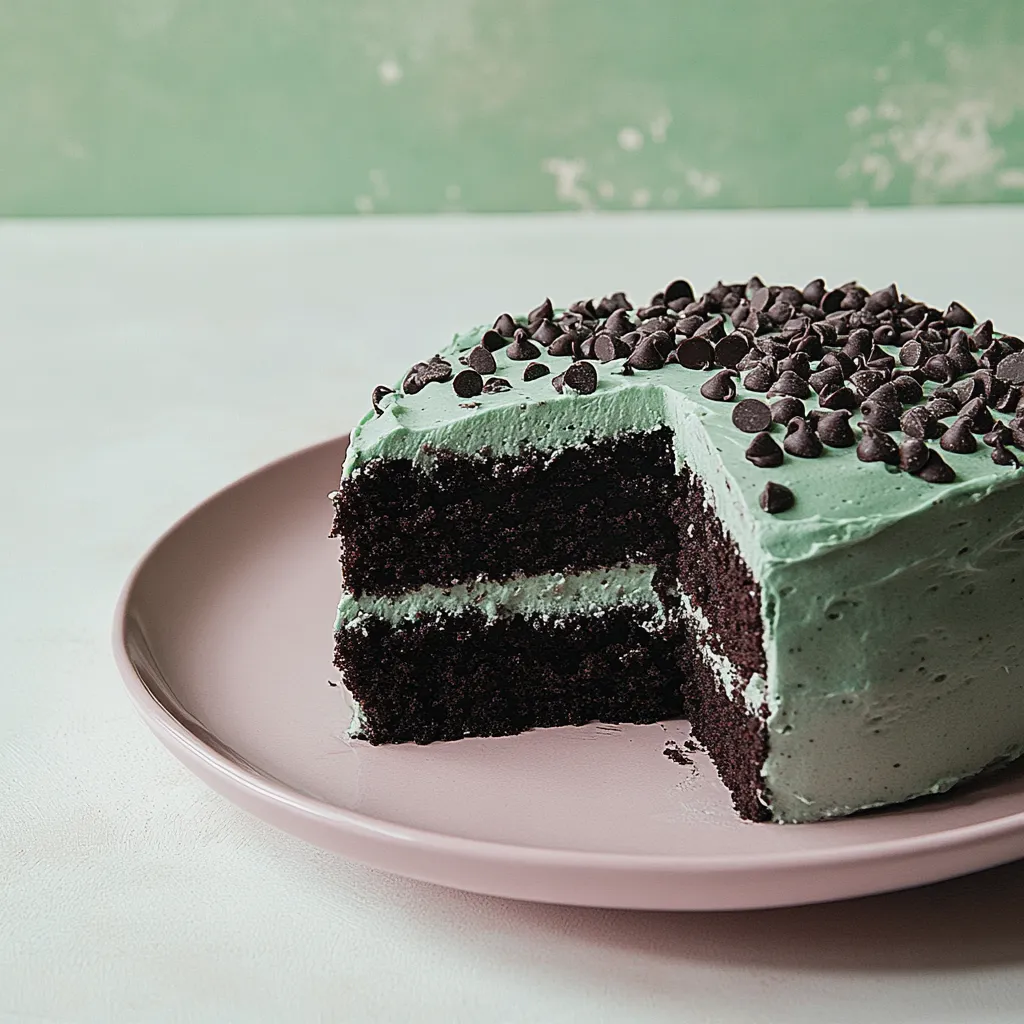
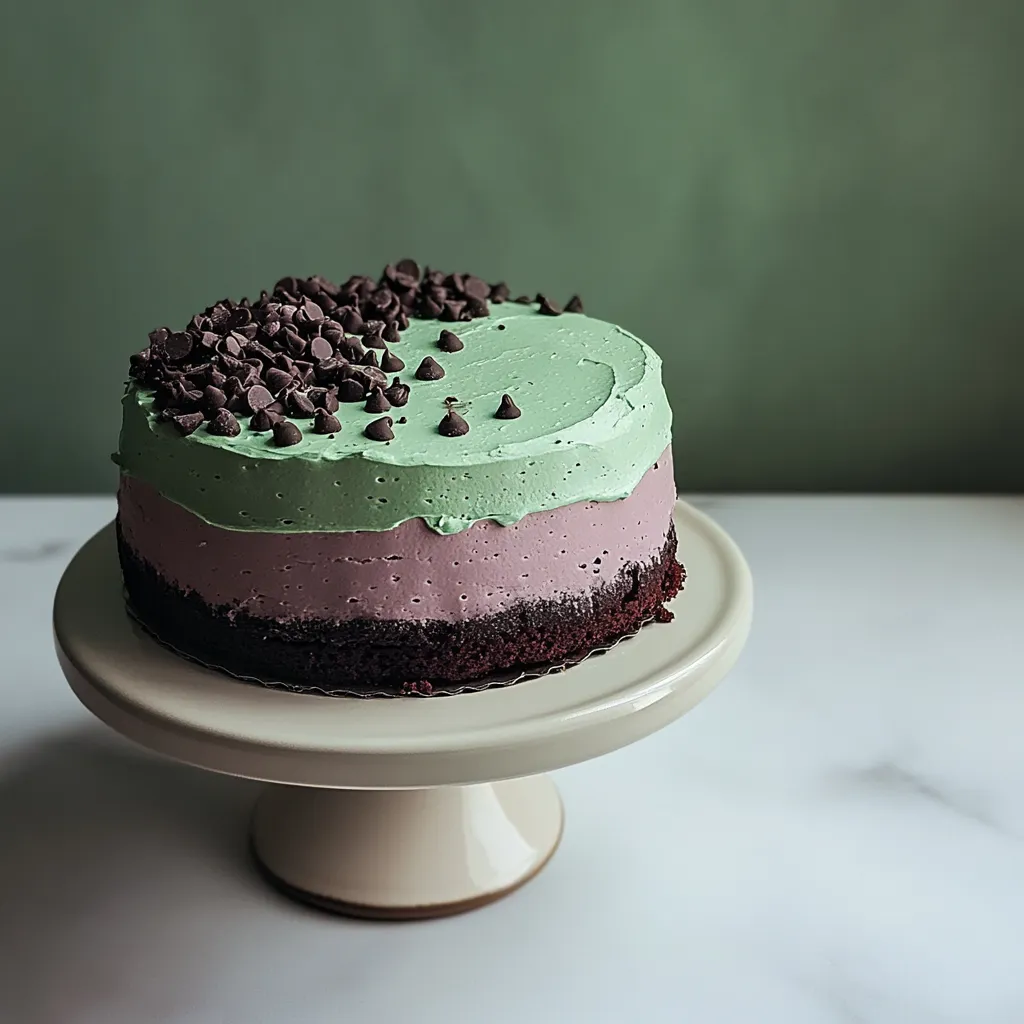
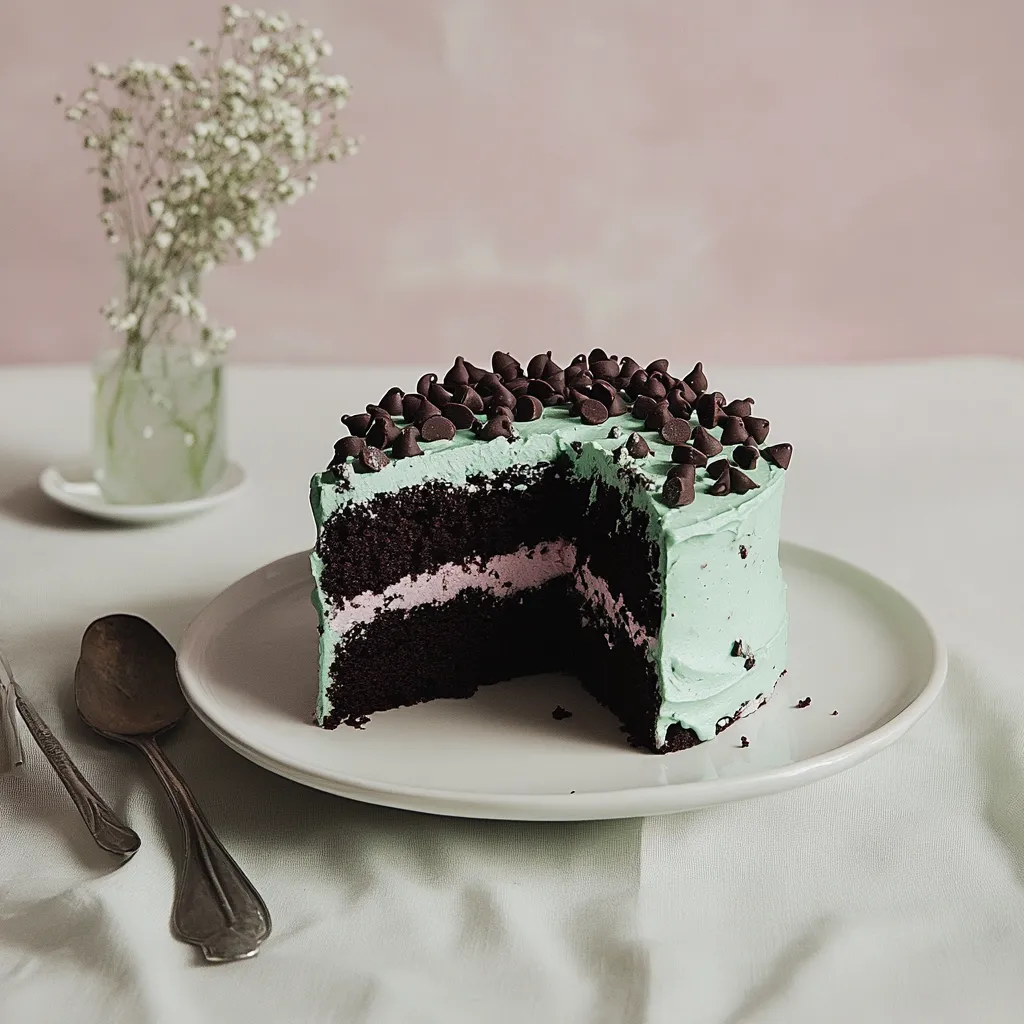
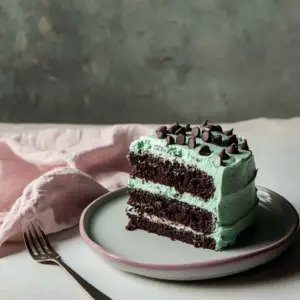
Visually Stunning
This cake isn’t just delicious; it’s a feast for the eyes. The vibrant green of the mint frosting against the dark chocolate layers creates an impressive centerpiece that’s bound to impress your guests. Whether you’re serving it at a party or enjoying it at home, it’s a showstopper.
Perfect for Any Occasion
Whether it’s a holiday celebration, a birthday, or just a casual get-together, Mint Chocolate Chip Cake fits right in. Its refreshing flavor makes it versatile for both winter and summer celebrations. You can enjoy it with a cup of coffee or a scoop of your favorite ice cream!
Fun to Decorate
One of my favorite parts about making this cake is the decorating process. With the mint frosting and cacao nibs, the possibilities are endless! You can let your creativity shine with fun decorating techniques, making it an enjoyable activity for anyone, regardless of baking experience.
Can Be Made in Advance
This cake actually gets better as it sits! You can bake the layers ahead of time and assemble them just before serving. This makes Mint Chocolate Chip Cake a great option for busy bakers, allowing you to prepare in advance and enjoy the moment with your guests.
Memorable Impressions
After sharing this cake with friends and family, I’ve often heard them reminisce about it long after the last slice is gone. It’s more than just a dessert; it’s a memory maker!
What You’ll Need for Mint Chocolate Chip Cake
Gathering the right ingredients is key to crafting the perfect Mint Chocolate Chip Cake. Each ingredient plays a vital role in creating a balance of flavors and textures. From the rich all-purpose flour that forms the base to the peppermint extract that adds that refreshing touch, these components come together to create a cake that’s as delightful to eat as it is to behold.
- All-Purpose Flour – 1 cup plus 2 tablespoons: The backbone of your cake, providing structure and stability.
- White Granulated Sugar – 1 cup plus 2 tablespoons: Sweetens the cake while enhancing the flavor of other ingredients.
- Baking Cocoa Powder – 1/2 cup: This rich ingredient adds a deep chocolate flavor that’s essential for any chocolate cake.
- Instant Espresso Powder – 1 1/2 teaspoons: Enhances the chocolate flavor, making it more robust and satisfying.
- Baking Soda – 1 teaspoon: Helps the cake rise, giving it a light and fluffy texture.
- Baking Powder – 3/4 teaspoon: Works alongside baking soda to provide extra lift.
- Salt – 3/4 teaspoon: Balances the sweetness and enhances the overall flavor of the cake.
- Eggs – 1 egg plus 1 egg yolk: Provides moisture and helps bind the ingredients together.
- Buttermilk – 1/2 cup: Adds richness and tang, contributing to a tender crumb.
- Warm Water – 1/2 cup: Hydrates the dry ingredients and helps achieve a smooth batter.
- Olive Oil – 1 tablespoon: Adds moisture and richness to the cake.
- Vanilla Extract – 2 teaspoons: Adds a warm, sweet flavor that complements the chocolate.
- Unsalted Butter – 1 1/2 cups, at room temperature: Creates a rich flavor and a tender texture in the cake.
- Heavy Cream – 2 tablespoons: Adds richness to the frosting for a creamy consistency.
- Powdered Sugar – 4 cups, sifted: Sweetens and thickens the frosting.
- Salt – 1/4 teaspoon: Balances the sweetness in the frosting.
- Peppermint Extract – 1/4 teaspoon: Provides the signature minty flavor that makes this cake special.
- Food Coloring – 1 drop each of blue and yellow: Adds a fun visual element to the frosting.
- Cacao Nibs – 1 tablespoon: Adds texture and a slight crunch to the frosting, enhancing the chocolate flavor.
Cooking Instructions for Mint Chocolate Chip Cake
Now that you’ve gathered your ingredients, it’s time to dive into the baking process of your Mint Chocolate Chip Cake. I promise you; it’s much easier and more fun than you might expect! Just follow these steps, and soon you’ll have a beautiful cake ready for any occasion.
- Preheat your oven to 350 degrees F. Make sure it’s properly heated before you place your cakes inside; this ensures even baking.
- Butter and flour three 6-inch cake pans (or two 8-inch cake pans) thoroughly. For added security against sticking, consider lining the bottoms with parchment paper. Set the pans aside.
- In a large mixing bowl or the bowl of a stand mixer fitted with the paddle attachment, combine the all-purpose flour, white sugar, baking cocoa powder, espresso powder, baking soda, baking powder, and salt. Mix them until they’re well combined, creating a dry mixture.
- Next, crack one egg and one egg yolk into the bowl, then add the buttermilk, warm water, olive oil, and vanilla extract. Mix everything together until it’s thoroughly combined and smooth. Don’t worry if the batter seems thinner than usual; that’s how it should be!
- Now, divide the batter evenly among the prepared cake pans. Tap them gently on the counter to remove any air bubbles, which can create uneven layers.
- Transfer the pans to the preheated oven and bake for 27 to 30 minutes, or until a skewer inserted into the center comes out clean. Keep an eye on them as baking times may vary.
- While the cakes are baking, clean the mixing bowl and allow it to dry. We’ll use it again for the frosting.
- Once the cakes are out of the oven, let them cool in the pans for about 10 minutes before transferring them to wire racks to cool completely.
- To make the frosting, add the cacao nibs to a blender or food processor and pulse until broken into tiny pieces. Set them aside.
- In the cleaned mixing bowl, add the unsalted butter and heavy cream. Beat them together until smooth and fluffy, taking about one minute. Sift in the powdered sugar while mixing on low to avoid a cloud of sugar.
- Once the frosting is nearly combined, add the peppermint extract and beat until it’s smooth. Then, add the drops of blue and yellow food coloring, adjusting as needed for your desired shade.
- Finally, fold in the pulsed cacao nibs, mixing until evenly distributed throughout the frosting.
- To assemble, place one layer of cake on a cake board or serving plate. Spread about a 1/4 cup of frosting on top, smoothing it out evenly. Place the second layer on top and repeat the process.
- For decoration, feel free to add decorative swirls or patterns with the remaining frosting, topping it with some extra cacao nibs for flair. Slice, serve, and enjoy your delicious creation!
Things Worth Knowing
- Ingredient Quality: Using high-quality cocoa and real butter can significantly enhance the flavor of your cake.
- Cooling Time: Allow the cakes to cool completely before frosting; this prevents the frosting from melting.
- Layering Technique: For an even frosting layer, use an offset spatula to spread the frosting smoothly.
- Serving Temperature: This cake tastes best at room temperature; refrigerate leftovers to keep them fresh.
Helpful Hints
Here are some tips to ensure your Mint Chocolate Chip Cake turns out perfectly every time. These guidelines will help you manage everything from baking to storing your delicious cake.
- Storage: Keep leftover cake in an airtight container at room temperature for up to three days, or refrigerate for up to a week.
- Freezing: This cake freezes well! Slice it and wrap individual pieces in plastic wrap, then store in a freezer-safe bag for up to three months.
- Pairing: Serve with a scoop of vanilla ice cream or a drizzle of chocolate sauce for added indulgence.
- Decorating: Experiment with decorating techniques; use sprinkles or edible glitter for extra flair.
- Layering: For a more impressive cake, consider adding layers of mint chocolate ganache or whipped cream between the cake layers.
Accompaniments for Mint Chocolate Chip Cake
- Ice Cream: This cake pairs wonderfully with a scoop of vanilla or mint ice cream, enhancing the minty flavor.
- Fresh Berries: Serve with fresh strawberries or raspberries to add a tangy contrast to the sweetness of the cake.
- Coffee: A nice cup of coffee complements the chocolate flavors perfectly, making it a great dessert for after dinner.
- Special Occasions: Perfect for birthdays, anniversaries, or even festive gatherings; this cake always impresses.
- Seasonal Celebrations: Enjoy it during holidays like St. Patrick’s Day or Christmas for a festive twist.
FAQ
Conclusion
This Mint Chocolate Chip Cake is not just another dessert; it’s a delightful experience that brings joy and satisfaction with each bite. Its unique flavor combination and stunning visuals make it a standout choice for any occasion. I encourage you to try it and share the love with friends and family. No matter the celebration, this cake is sure to create sweet memories!
Mint Chocolate Chip Cake
Equipment
- Mixing Bowl
- Baking Sheet
- Chef's Knife
- Blender
- Frying Pan
- Oven
- Food Processor
Ingredients
- 1 cup All-Purpose Flour
- 1 cup White Granulated Sugar
- 1/2 cup Baking Cocoa Powder
- 1 1/2 teaspoon Instant Espresso Powder
- 1 teaspoon Baking Soda
- 3/4 teaspoon Baking Powder
- 3/4 teaspoon Salt
- 1 Egg
- 1 Egg Yolk
- 1/2 cup Buttermilk
- 1/2 cup Warm Water
- 1 tablespoon Olive Oil
- 2 teaspoon Vanilla Extract
- 1 1/2 cup Unsalted Butter
- 2 tablespoon Heavy Cream
- 4 cup Powdered Sugar
- 1/4 teaspoon Salt
- 1/4 teaspoon Peppermint Extract
- 1 drop Blue Food Coloring
- 1 drop Yellow Food Coloring
- 1 tablespoon Cacao Nibs
Instructions
- Preheat your oven to 350 degrees F. Make sure it's properly heated before you place your cakes inside; this ensures even baking.
- Butter and flour three 6-inch cake pans (or two 8-inch cake pans) thoroughly. For added security against sticking, consider lining the bottoms with parchment paper. Set the pans aside.
- In a large mixing bowl or the bowl of a stand mixer fitted with the paddle attachment, combine the all-purpose flour, white sugar, baking cocoa powder, espresso powder, baking soda, baking powder, and salt. Mix them until they’re well combined, creating a dry mixture.
- Next, crack one egg and one egg yolk into the bowl, then add the buttermilk, warm water, olive oil, and vanilla extract. Mix everything together until it’s thoroughly combined and smooth. Don’t worry if the batter seems thinner than usual; that’s how it should be!
- Now, divide the batter evenly among the prepared cake pans. Tap them gently on the counter to remove any air bubbles, which can create uneven layers.
- Transfer the pans to the preheated oven and bake for 27 to 30 minutes, or until a skewer inserted into the center comes out clean. Keep an eye on them as baking times may vary.
- While the cakes are baking, clean the mixing bowl and allow it to dry. We’ll use it again for the frosting.
- Once the cakes are out of the oven, let them cool in the pans for about 10 minutes before transferring them to wire racks to cool completely.
- To make the frosting, add the cacao nibs to a blender or food processor and pulse until broken into tiny pieces. Set them aside.
- In the cleaned mixing bowl, add the unsalted butter and heavy cream. Beat them together until smooth and fluffy, taking about one minute. Sift in the powdered sugar while mixing on low to avoid a cloud of sugar.
- Once the frosting is nearly combined, add the peppermint extract and beat until it’s smooth. Then, add the drops of blue and yellow food coloring, adjusting as needed for your desired shade.
- Finally, fold in the pulsed cacao nibs, mixing until evenly distributed throughout the frosting.
- To assemble, place one layer of cake on a cake board or serving plate. Spread about a 1/4 cup of frosting on top, smoothing it out evenly. Place the second layer on top and repeat the process.
- For decoration, feel free to add decorative swirls or patterns with the remaining frosting, topping it with some extra cacao nibs for flair. Slice, serve, and enjoy your delicious creation!