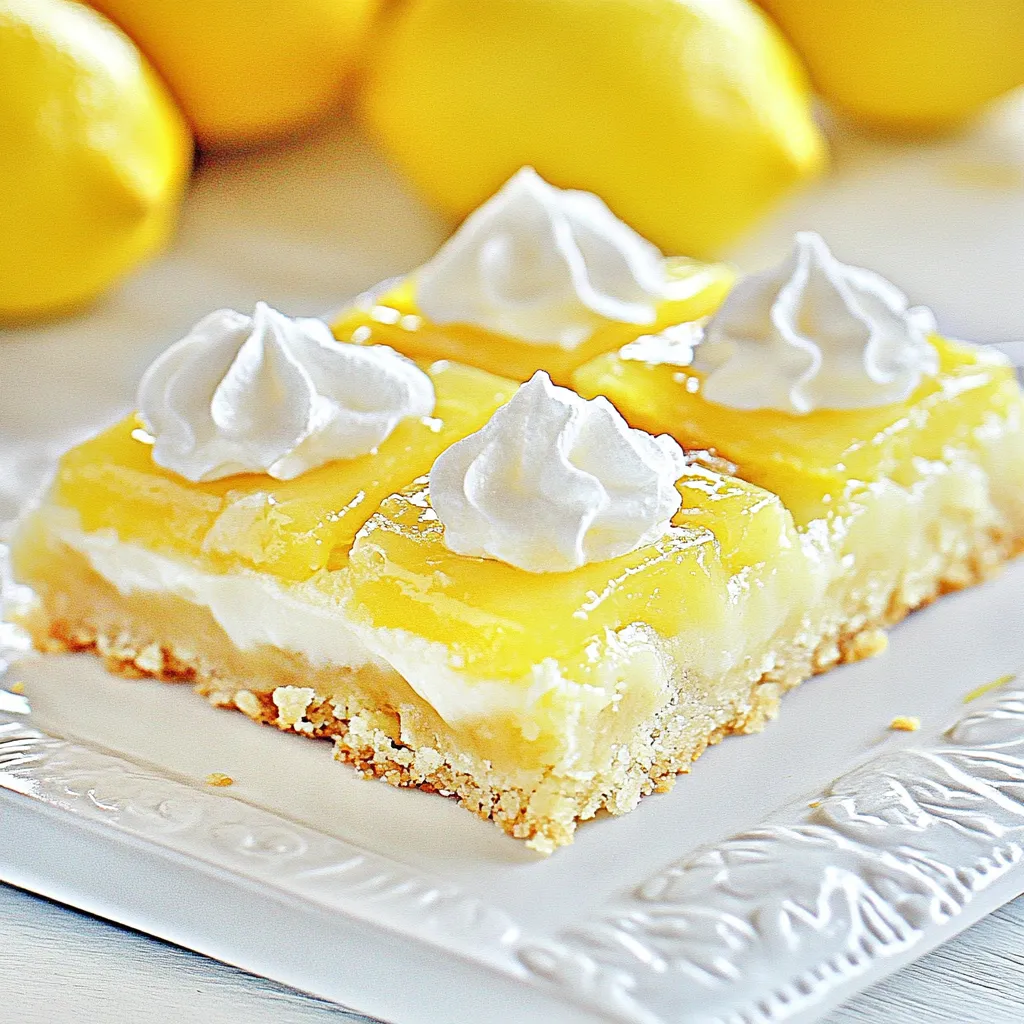
Lemon Pie Bars
There’s something undeniably refreshing about Lemon Pie Bars. When I first tried them at a friend’s gathering, I was immediately captivated by their bright, zesty flavor and creamy texture. The burst of lemon brings a memory of sunny spring days, even when the weather doesn’t cooperate. Every bite is like a little piece of happiness. I’ve made these bars for family gatherings, potlucks, and even as a simple treat for myself after a long week. They’re the perfect balance of sweet and tart, and I love serving them chilled—there’s just something about the coolness that makes them even more delightful. Plus, they’re surprisingly easy to whip up! The best part? You can make them ahead of time, so they’re perfect for any occasion!
Recipe Snapshot
1 hr 5 mins
20 mins
45 mins
Medium
290 kcal
3g g
Vegan, Gluten-Free, AIP
13g g
Frying Pan, Mixing Bowl, Baking Sheet
Why You Need This Lemon Pie Bars
Perfect for Any Occasion
What I appreciate most about Lemon Pie Bars is their versatility. They’re great for spring gatherings, summer picnics, or even a cozy winter day indoors. No matter the season, these bars fit right in and bring a joyous burst of flavor.
Easy to Make
If you’re new to baking, don’t worry! These bars are straightforward to prepare. With basic ingredients like butter, sugar, and flour, you can create something that looks and tastes impressive without feeling overwhelmed.
Customizable Deliciousness
You can tweak the flavors to suit your taste. Add more almond extract for a nuttier twist or mix in berries for a fruity kick. There’s so much room for creativity while still keeping that beloved lemon base.
Perfect for Sharing
These bars are a hit at any gathering. People love their bright taste and unique texture, making them an instant favorite. I love cutting them into small squares, perfect for sharing and sampling!
Refreshing Dessert
With summer approaching, having a refreshing dessert like Lemon Pie Bars is a must. They cleanse the palate beautifully after a hearty meal, and their lightness makes them an excellent choice for warm weather.
Ingredients to Make Lemon Pie Bars
To create the magic of Lemon Pie Bars, you need a few key ingredients that work harmoniously together. The bright and tart lemon pie filling forms the star of this dish, while the buttery crust and sweet glaze create a delightful contrast. Each component is essential, ensuring that the bars are as flavorful as they are satisfying.
- 1 cup butter softened – The base that adds richness and helps create a tender crust.
- 2 cups sugar – Sweetens the mixture and balances the tartness of the lemon.
- 4 eggs – Provides structure and helps bind the ingredients.
- 1 teaspoon vanilla extract – Enhances the flavors with its warm notes.
- 1/4 teaspoon almond extract – Adds a subtle, nutty flavor that complements the lemon.
- 3 cups flour – Forms the base of the crust, giving it structure and stability.
- 1 teaspoon salt – Balances sweetness and enhances overall flavor.
- 2 cans 15.75 oz Duncan Hines Wilderness lemon pie filling – The main ingredient that brings the zesty goodness.
- 1 cup powdered sugar – Used for the glaze, adding a smooth sweetness.
- 1/2 teaspoon vanilla extract – For the glaze, adding a touch of flavor.
- 1/2 teaspoon almond extract – Additional flavor dimension for the glaze.
- 2 tablespoons milk – To create a smooth glaze consistency.
Putting Together Lemon Pie Bars
Making Lemon Pie Bars is a simple and enjoyable process. Follow these steps to create these delightful treats that are sure to impress your friends and family.
- Start by creaming together butter and sugar. Use an electric mixer on medium speed until the mixture is light and fluffy, about three to five minutes. You should see a significant change in texture, and the color will lighten. This step is essential as it incorporates air into the batter, helping your bars to rise nicely.
- Next, add in the eggs, one at a time, beating well after each addition. You should notice the mixture becoming smoother and slightly thicker. This is crucial for the right consistency, as the eggs help bind everything together.
- Mix in the vanilla extract and almond extract. The combination of these extracts will add depth to the flavor profile, enriching the overall taste of your bars.
- In a separate bowl, whisk together the flour and salt. Gradually add this to the wet ingredients, mixing just until combined. Be careful not to overmix. You want your batter to be smooth but still retain some air. You should have a thick batter that holds its shape.
- Now, preheat your oven to 350 degrees Fahrenheit (about 175 degrees Celsius). Prepare a greased jelly roll pan by lining it with parchment paper for easy removal of the bars later.
- Spread three cups of the batter evenly in the prepared pan. It should be a nice, even layer that covers the bottom completely.
- Next, spread the lemon pie filling on top of the batter. This can be done with a spatula for a smooth finish. Make sure it’s evenly distributed; this will create a lovely tart layer that contrasts beautifully with the sweet batter.
- Using the remaining batter, drop spoonfuls over the top of the lemon pie filling. This doesn’t have to be perfect, as it will spread a little while baking, but aim for a nice distribution to allow for a beautiful, textured top.
- Now, place the pan in the preheated oven and bake for about 45 minutes. You’ll know they’re done when a toothpick inserted in the center comes out clean. The top should be lightly golden and firm to the touch, not jiggly.
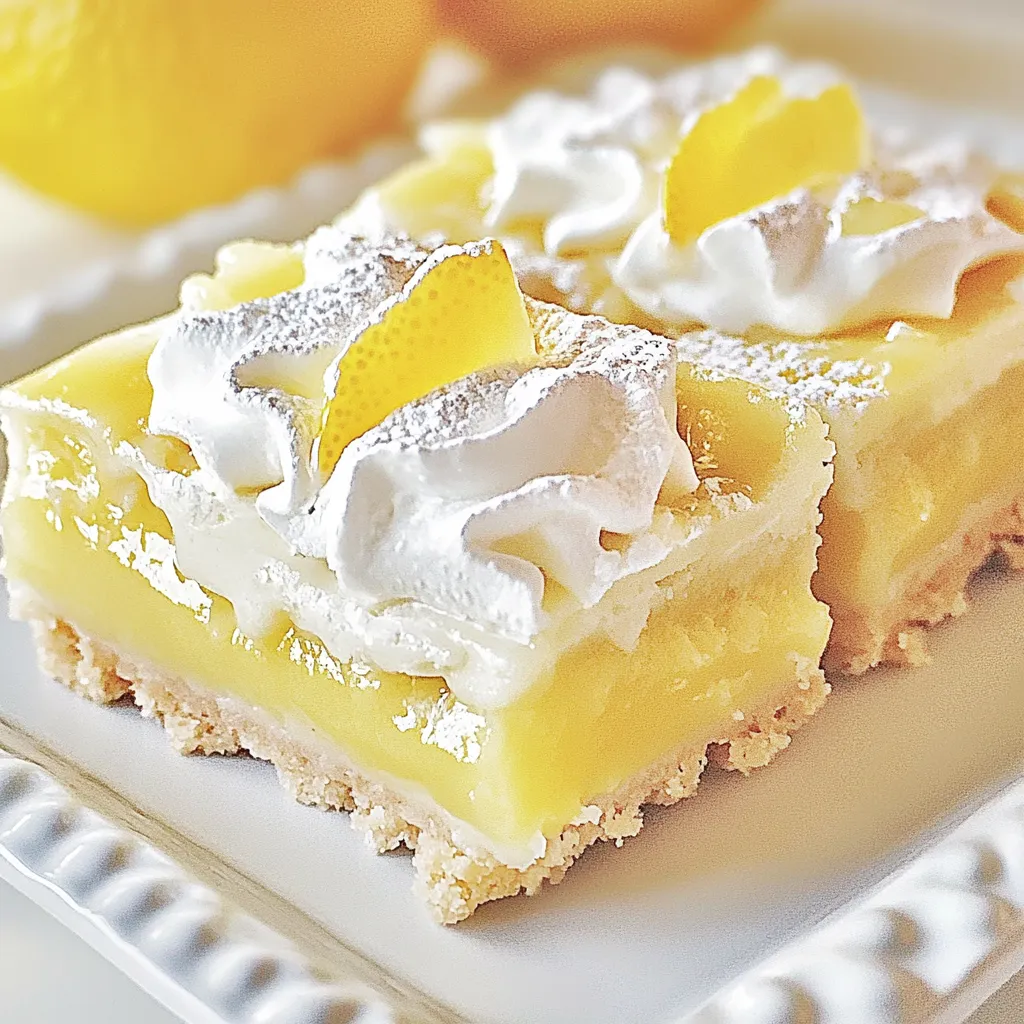
- Once baked, remove them from the oven and allow them to cool completely in the pan. After cooling, you can make the glaze by whisking together powdered sugar, milk, vanilla extract, and almond extract. Drizzle this over the cooled bars for a sweet finish. For the best texture, if you’re serving the next day, wait to glaze them until just before serving so they don’t get soggy.
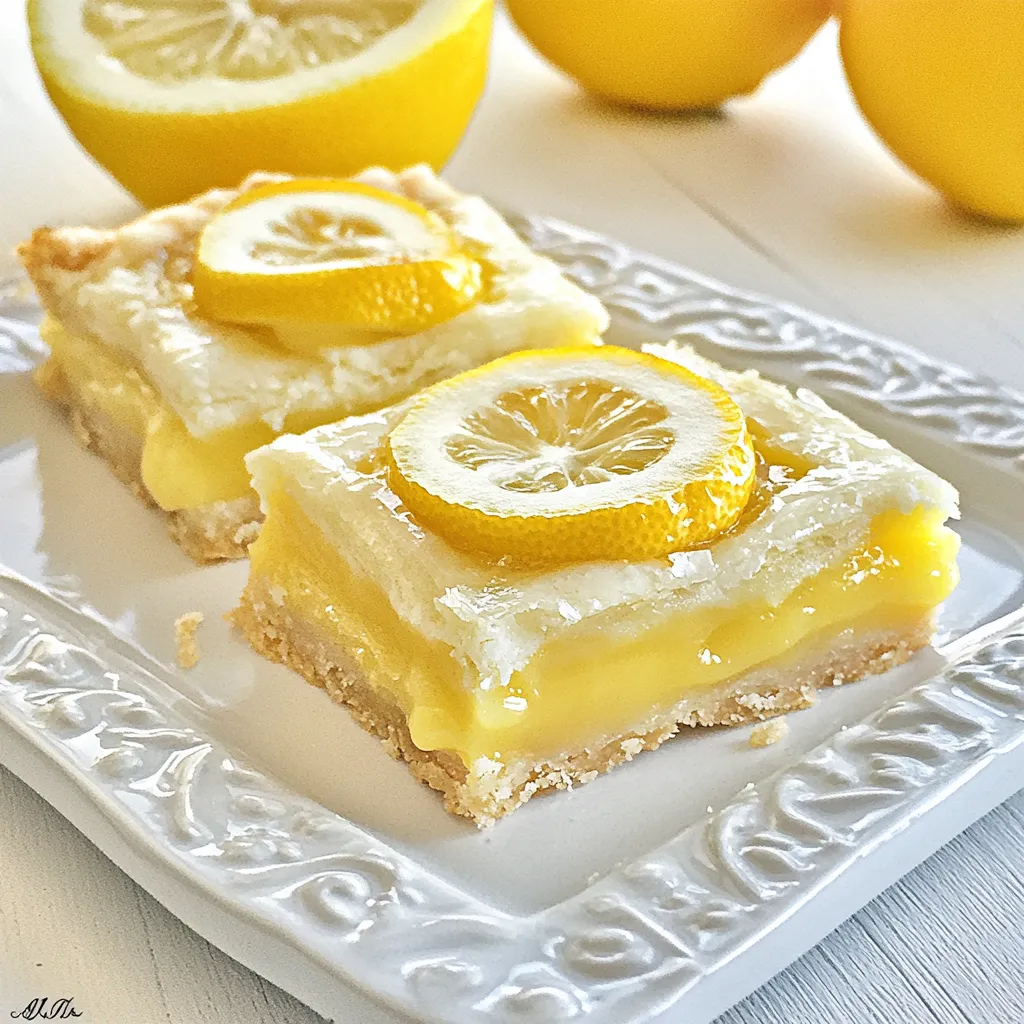
- Finally, cut into squares and serve chilled. Enjoy the delightful burst of flavor in every bite of your Lemon Pie Bars!
Things Worth Knowing
- Room Temperature: Let your butter come to room temperature before you start. This helps it cream better with the sugar.
- Mixing Technique: Avoid overmixing the batter after adding the flour. This can lead to tougher bars.
- Cooling Time: Let the bars cool completely before adding the glaze. This ensures it sets nicely and doesn’t soak into the bars.
- Storage: Store any leftovers in the refrigerator to maintain their texture and freshness.
Customization Ideas
Customizing your Lemon Pie Bars can be a fun way to create your unique twist on this classic dessert. Here are some ideas to inspire you!
- Add Berries: Consider folding in some fresh blueberries or raspberries into the batter before baking for an added burst of flavor.
- Coconut Twist: Sprinkle some shredded coconut on top of the filling before adding the remaining batter for a tropical flair.
- Chocolate Drizzle: For a unique combination, drizzle melted chocolate over the glaze for a contrasting flavor.
- Lemon Zest: Add some fresh lemon zest to the batter for an extra zing of lemon flavor.
- Gluten-Free Option: Substitute regular flour with gluten-free flour to make these bars suitable for a gluten-sensitive diet.
- Different Extracts: Play with different extracts like lemon or orange for a citrusy variation.
- Nutty Add-Ins: Fold in some chopped nuts, like pecans or walnuts, for added texture and flavor.
What to Serve With Lemon Pie Bars
When it comes to serving Lemon Pie Bars, there are plenty of options to elevate your dessert experience. Here are some ideas:
- Fresh Berries: Pair your bars with a side of fresh mixed berries such as strawberries, blueberries, or raspberries. Their natural sweetness complements the tangy lemon beautifully.
- Whipped Cream: A dollop of lightly sweetened whipped cream enhances the bars’ taste, providing a creamy contrast to the tartness.
- Iced Tea: Serve with a refreshing glass of iced tea. A hint of mint or lemon in the tea can pair excellently with the bars.
- Light Salads: Consider serving these bars after a light salad. A simple mixed greens salad with a vinaigrette can refresh the palate before enjoying dessert.
- Special Occasions: These bars are perfect for celebrations like family reunions, birthdays, or even casual summer get-togethers. They can be a delightful ending to any meal.
- Seasonal Pairings: During spring, you could incorporate floral elements in your table setting, like edible flowers, to enhance the seasonal vibe of your Lemon Pie Bars.
FAQ
Conclusion
Lemon Pie Bars are a superbly refreshing treat that balances sweet and tart flavors beautifully. With their creamy texture and delightful lemony taste, they’re a dessert worth trying. I encourage you to whip up a batch, share them with loved ones, and relish in the smiles they bring. Don’t miss the chance to enjoy this simple yet elegant dessert!
Lemon Pie Bars
Equipment
- Frying Pan
- Mixing Bowl
- Baking Sheet
Ingredients
- 1 cup butter softened
- 2 cups sugar
- 4 eggs
- 1 teaspoon vanilla extract
- 1/4 teaspoon almond extract
- 3 cups flour
- 1 teaspoon salt
- 2 cans Duncan Hines Wilderness lemon pie filling 15.75 oz each
- 1 cup powdered sugar
- 1/2 teaspoon vanilla extract for glaze
- 1/2 teaspoon almond extract for glaze
- 2 tablespoons milk for glaze
Instructions
- Start by creaming together butter and sugar. Use an electric mixer on medium speed until the mixture is light and fluffy, about three to five minutes. You should see a significant change in texture, and the color will lighten. This step is essential as it incorporates air into the batter, helping your bars to rise nicely.
- Next, add in the eggs, one at a time, beating well after each addition. You should notice the mixture becoming smoother and slightly thicker. This is crucial for the right consistency, as the eggs help bind everything together.
- Mix in the vanilla extract and almond extract. The combination of these extracts will add depth to the flavor profile, enriching the overall taste of your bars.
- In a separate bowl, whisk together the flour and salt. Gradually add this to the wet ingredients, mixing just until combined. Be careful not to overmix. You want your batter to be smooth but still retain some air. You should have a thick batter that holds its shape.
- Now, preheat your oven to 350 degrees Fahrenheit (about 175 degrees Celsius). Prepare a greased jelly roll pan by lining it with parchment paper for easy removal of the bars later.
- Spread three cups of the batter evenly in the prepared pan. It should be a nice, even layer that covers the bottom completely.
- Next, spread the lemon pie filling on top of the batter. This can be done with a spatula for a smooth finish. Make sure it’s evenly distributed; this will create a lovely tart layer that contrasts beautifully with the sweet batter.
- Using the remaining batter, drop spoonfuls over the top of the lemon pie filling. This doesn’t have to be perfect, as it will spread a little while baking, but aim for a nice distribution to allow for a beautiful, textured top.
- Now, place the pan in the preheated oven and bake for about 45 minutes. You’ll know they’re done when a toothpick inserted in the center comes out clean. The top should be lightly golden and firm to the touch, not jiggly.
- Once baked, remove them from the oven and allow them to cool completely in the pan. After cooling, you can make the glaze by whisking together powdered sugar, milk, vanilla extract, and almond extract. Drizzle this over the cooled bars for a sweet finish. For the best texture, if you’re serving the next day, wait to glaze them until just before serving so they don’t get soggy.
- Finally, cut into squares and serve chilled. Enjoy the delightful burst of flavor in every bite of your Lemon Pie Bars!
Notes
- Storage: Store any leftovers in the refrigerator to maintain their texture and freshness.
- Freezing: You can freeze these bars for up to two months. Just make sure to wrap them tightly.
- Variations: Experiment with different extracts or add-ins to create your version of these bars!