How To Dye Easter Eggs With Rice
Every spring, as the days grow longer and the flowers start to bloom, I find myself reflecting on childhood memories of dyeing Easter eggs. The joy of gathering with family to create colorful masterpieces is a tradition I cherish deeply. This year, I’m excited to share how to make this delightful activity even more fun with my recipe for How To Dye Easter Eggs With Rice. Not only is it a fantastic way to bond with loved ones, but it also turns out beautifully vibrant colors using simple ingredients you probably already have at home.
Recipe Snapshot
17 mins
2 mins
15 mins
Medium
80 kcal
6 g
Whole30, Vegan, Gluten-Free
5 g
Plastic zipper sandwich bags, Measuring cup, Tray or plate lined with paper towel, Optional: gloves
Why This How To Dye Easter Eggs With Rice Stands Out
Simple and Fun
One of the main reasons I love this method of dyeing eggs is how simple it is. You don’t need fancy equipment or expensive dyes. Just a few household items, and you’re set!
Creative Expression
Dyeing Easter eggs is a wonderful opportunity to express creativity. The colors you choose and the patterns you create can reflect your personality or even the season itself. Whether you stick to pastels or go for bold neon hues, each egg becomes a unique work of art.
Perfect for All Ages
This activity is perfect for everyone, from toddlers to grandparents. Kids love the tactile experience of rolling the eggs in rice, while adults can enjoy the artistic side of egg design. It’s a way for all generations to come together and share laughter.
Eco-Friendly Fun
Using rice as a medium for dyeing is not only creative but also environmentally friendly. You can reuse the rice for future projects after adding new dye, making it a sustainable option.
Memorable Traditions
Establishing traditions is so important, and dyeing Easter eggs is one that many families treasure. It’s a rite of spring that brings everyone together, creating lasting memories that you can look back on for years to come.
Easy Clean-Up
Compared to traditional dyeing methods, this process using rice is relatively mess-free. You don’t have to deal with messy spills, just a quick cleanup when you’re done. The rice absorbs the dye, keeping everything contained and ensuring a smooth experience.
Ingredients Overview for How To Dye Easter Eggs With Rice
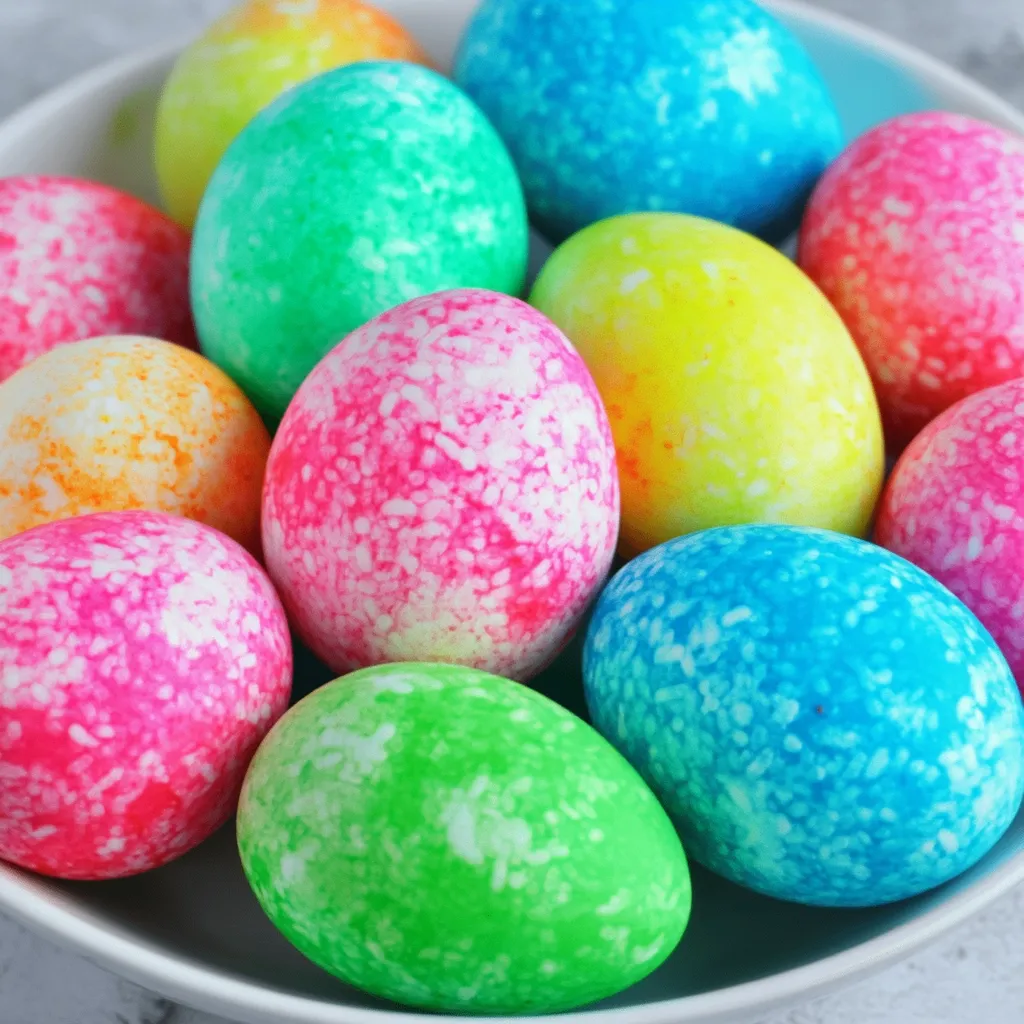
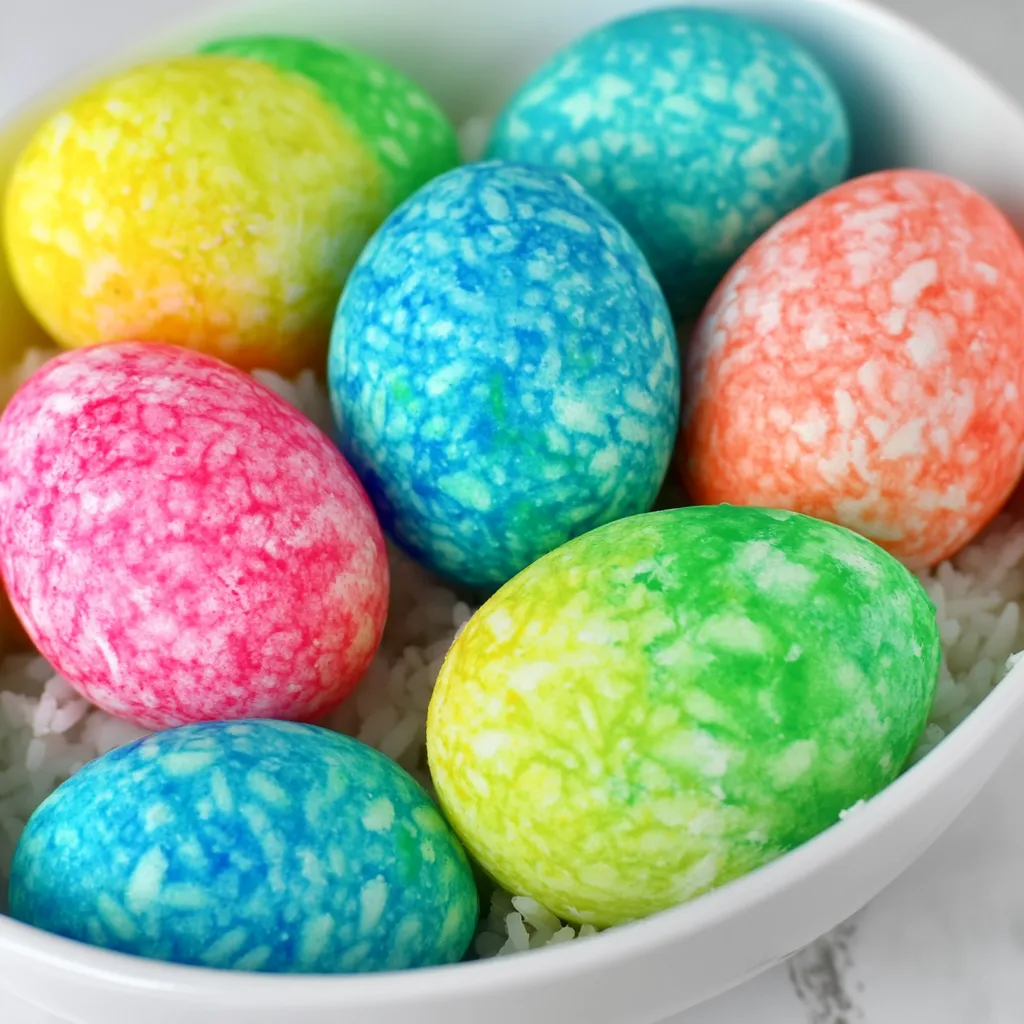
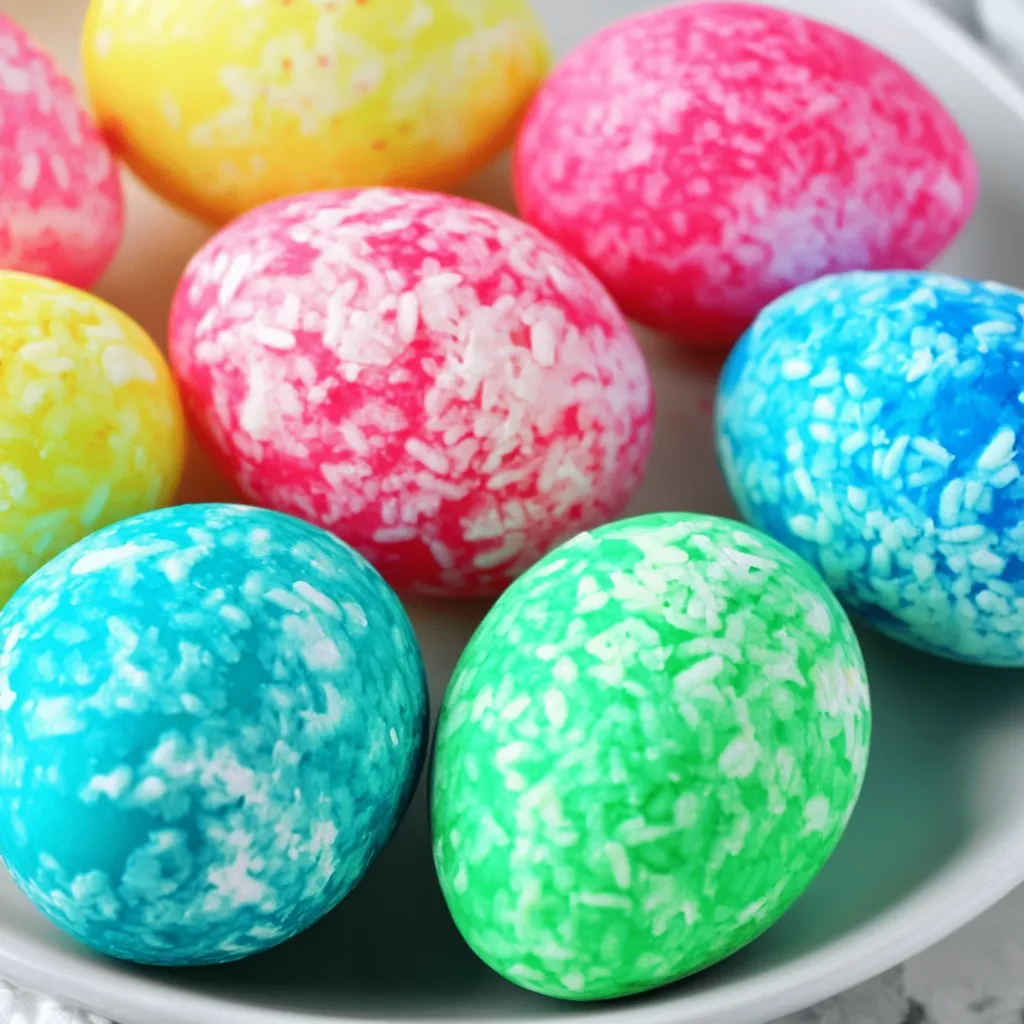
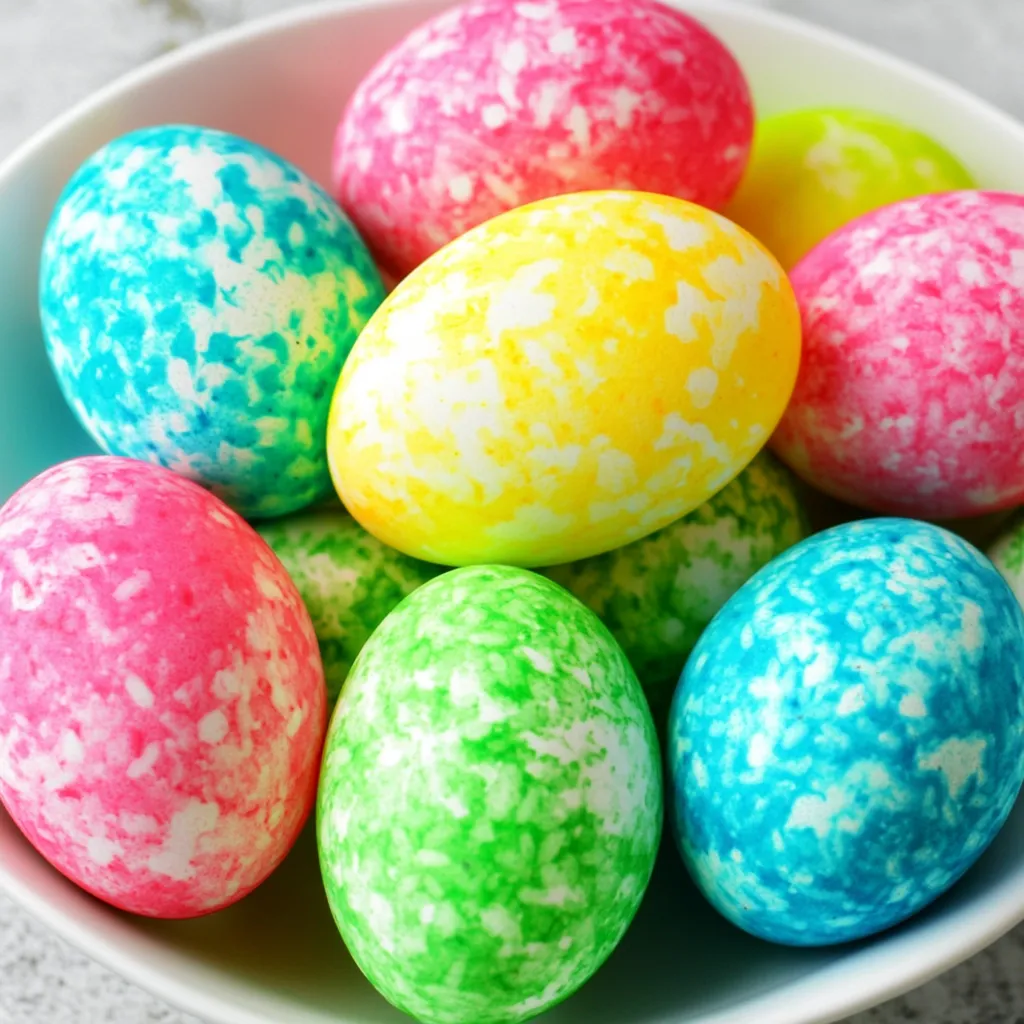
When it comes to dyeing eggs, the ingredients are quite straightforward. The key players here are boiled eggs, food coloring, dry rice, and vinegar. Each component plays a vital role in achieving vibrant colors that stand out on your festive table.
- Boiled eggs: These are the canvas for your creative dyeing project. Make sure they’re cooked and cooled for the best results.
- Food coloring: Both primary and neon colors work wonderfully for this technique, allowing you to mix and match to your heart’s content.
- Dry rice: The magic ingredient that helps transfer color onto the eggs while protecting them from getting overly messy. Use about 3 to 4 cups for multiple colors.
- Vinegar: This helps the dye adhere better to the eggs, ensuring a bright and lasting color. Just a teaspoon or two will do.
Recipe Directions for How To Dye Easter Eggs With Rice
Dyeing Easter eggs with rice is not only simple but also a delightful experience. Follow these easy steps to create your colorful treasures. Let’s dive into the fun!
- Open your plastic zipper top bags, one for every color you would like to have! Gather your supplies and get ready.
- Fill each bag with ½ cup of dry rice. This will act as the medium for dyeing and will absorb the color.
- Add 10-12 drops of food coloring into each bag. Choose one color per bag or mix them to create new shades.
- Roll the boiled egg in a small bowl of vinegar (1/4 cup works!). This helps set the colors on the egg and the rice.
- Place one hard-boiled egg in each bag and close the bag tightly. Make sure there’s enough space for the rice to move around the egg.
- Add about 1/2 teaspoon of vinegar to each bag. This will further enhance the dyeing process.
- Gently roll the egg around in the rice using both hands, covering the egg until it’s colored completely. You can also gently shake the bag, but ensure it’s closed.
- If you want bolder colors, you might find you need more food coloring. Just open the bag and add a few more drops to achieve the desired brightness.
- Remove each egg from the bag and set it on a tray lined with paper towels to dry. This helps prevent the colors from bleeding.
- Repeat this process for all remaining eggs. Remember, you can reuse the colored rice. Just add more drops of food coloring to color additional eggs!
Things Worth Knowing
- Choosing the right eggs: Use fresh, large-size eggs for the best results. Ensure they are fully cooked to avoid any mess.
- Storage: Store dyed eggs in a cool place, ideally the fridge, to keep them fresh for your Easter celebrations.
- Color mixing: Don’t hesitate to mix colors in the bags! This can yield unique shades that are fun and vibrant.
- Drying time: Allow the eggs to dry completely before displaying them. This helps the colors set better and prevents any smudging.
Substitutions and Tips
While the recipe is straightforward, here are some tips to ensure your egg-dyeing experience is top-notch. From storage to pairing suggestions, these tips will help maximize your fun!
- Storage: How to store leftovers: Keep any unused dyed eggs in a refrigerator. They can last about a week.
- Freezing: Can you freeze this? It’s not recommended to freeze decorated eggs, as this can alter their texture.
- Pairing: What to serve with this: Serve your colorful eggs alongside a spring salad or as part of an Easter brunch spread.
- Experimentation: Feel free to experiment with different colors and patterns! The more creative you get, the better.
- Safety: Always supervise young children during the dyeing process to prevent any spills or accidents with food coloring.
What to Serve With How To Dye Easter Eggs With Rice
When it comes to celebrating with dyed eggs, the possibilities are endless! Here are some delightful ideas to pair with your beautifully colored creations:
- Spring Salads: A fresh salad packed with vibrant greens complements the colors of your dyed eggs beautifully.
- Easter Brunch: Incorporate your dyed eggs into a festive brunch alongside quiches, pastries, and fresh fruits.
- Deviled Eggs: Use some of your dyed eggs to make delicious deviled eggs for an appetizing treat.
- Picnic Platter: Create a colorful picnic platter with your dyed eggs, seasonal fruits, and finger sandwiches.
- Egg Decorating Station: Set up a decorating station where guests can personalize their dyed eggs during celebrations.
- Seasonal Dishes: Pair your dyed eggs with dishes that reflect the season, such as roasted spring vegetables or herb-infused spreads.
FAQ
Conclusion
Dyeing Easter eggs with rice brings a fun and colorful twist to your holiday celebrations. This method not only results in vibrant colors but also offers a unique bonding experience with family and friends. I encourage you to try it out this Easter season. You’ll love the joy it brings, and each egg will become a cherished keepsake filled with memories!

How To Dye Easter Eggs With Rice
Equipment
- Plastic zipper sandwich bags
- Measuring Cup
- Tray or plate lined with paper towel
- Optional: gloves
Ingredients
- 12 pieces Boiled eggs
- 3-4 cups Dry rice
- 2-3 teaspoons Vinegar
- 10-12 drops Food coloring
Instructions
- Open your plastic zipper top bags, one for every color you would like to have!
- Fill each bag with ½ cup of dry rice.
- Add 10-12 drops of food coloring into each bag. Choose one color per bag, or mix the colors up to see what colors you can create.
- Roll the boiled egg in a small bowl of vinegar (1/4 cup works!). This will help to set the colors on both the egg and the rice.
- Add one hard-boiled egg to each bag and close the bag tightly.
- Add about 1/2 teaspoon of vinegar to each bag. This will help to set the colors on both the egg and the rice.
- Gently roll the egg around in the rice using both hands and cover the egg until colored completely. You can also gently shake the bag but make sure the bag is closed before you shake!
- You may find you want more food coloring for certain colors. Simply open the bag and add a few more drops of food coloring.
- Remove each egg from bag and set on tray to dry.
- Repeat this process for all remaining eggs. You can reuse used rice to color the eggs. Just add more drops of food coloring into the bag to color more eggs!
Notes
- Tip 1: Gel food coloring gives beautiful vibrant colors. Add a little at a time if you use gel.
- Tip 2: Don’t touch the eggs with wet hands! The dye will rub off on your finger when your hands are wet.
- Tip 3: If making a rainbow egg, start with the lightest color first and work to the darkest.