Homemade Chocolate Turtles
Every time I prepare Homemade Chocolate Turtles, a wave of nostalgia sweeps over me. These delightful treats bring back memories of family gatherings and holiday celebrations. The process of creating them is just as rewarding as indulging in their sweet, nutty flavor. The combination of crunchy pecans, smooth caramel, and rich chocolate creates a symphony of textures that dance on the palate. I remember the first time I made these with my grandmother; she taught me the delicate balance of flavors and textures that make these turtles so special. Every bite is a bite into cherished memories, and I find joy in sharing them with friends and family. Whether it’s a cozy evening at home or a festive gathering, these treats are a perfect addition to any occasion.
Recipe Snapshot
14760 hr
21600 mins
864000 mins
Hard
150 kcal
2 g
Keto, Gluten-Free, Low FODMAP
7 g
Wooden Spoon, Oven, Mixing Bowl, Baking Sheet
Why This Homemade Chocolate Turtles Is So Good
1. Irresistible Flavor Combination
The magic of Homemade Chocolate Turtles lies in their incredible flavor combination. The nuttiness of the pecans pairs beautifully with the sweet, gooey caramel, creating a delightful contrast. And let’s not forget the rich chocolate layer that ties it all together, making each bite a blissful experience.
2. Perfect for Any Occasion
These treats aren’t just for special occasions; they’re perfect for everyday snacks too! Whether you’re treating yourself after a long day or preparing a sweet gift, Homemade Chocolate Turtles never disappoint.
3. Fun to Make
Making Homemade Chocolate Turtles is a fun activity! It’s a great way to get kids involved in the kitchen, allowing them to learn about measuring, melting, and assembling. Plus, the satisfaction of creating something delicious is priceless.
4. Customizable
One of the best things about this recipe is that you can customize it to your liking. Want to add some sea salt on top for a sweet and salty twist? Go for it! Not a fan of milk chocolate? Use dark chocolate instead. The possibilities are endless!
5. Homemade Touch
There’s something special about homemade treats. When you make Homemade Chocolate Turtles, you’re not just making candy; you’re creating memories. The love and effort you put into making these sweet delicacies is what makes them truly special.
6. Great for Sharing
These turtles are perfect for sharing! Pack them in a pretty box for a thoughtful gift or make a big batch for your next gathering. Everyone loves a homemade treat, and Homemade Chocolate Turtles are always a hit!
What Goes Into Homemade Chocolate Turtles
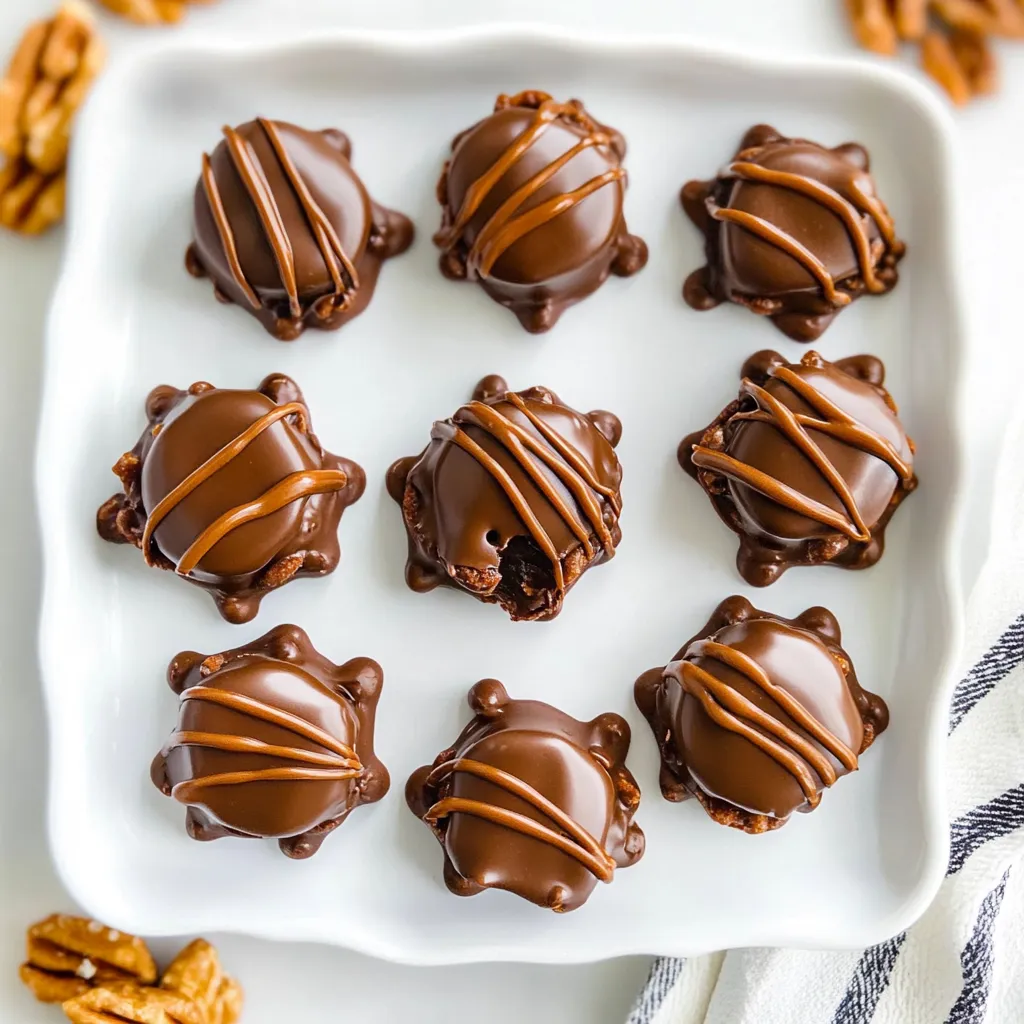
The essence of Homemade Chocolate Turtles can be found in its wonderful ingredients. Each component plays a vital role in achieving the perfect combination of flavors and textures. The pecans provide a crunchy base, while the caramel adds a creamy sweetness. Finally, the chocolate coating brings it all together with its rich, indulgent flavor.
- Pecan halves: These are the star of the show! Their crunchiness complements the smoothness of the caramel perfectly, providing a delightful texture.
- Individually wrapped caramels: These are a convenient choice for delicious, creamy sweetness without the fuss of making caramel from scratch.
- Heavy cream: This helps to create a smooth and velvety caramel sauce that melds beautifully with the pecans.
- Milk chocolate chips: The rich flavor of milk chocolate enhances the overall sweetness of the turtles, creating an irresistible treat.
- Sea salt: A touch of salt can elevate the flavor, adding a delightful contrast to the sweetness of the chocolate and caramel.
Cooking Instructions for Homemade Chocolate Turtles
Creating Homemade Chocolate Turtles is easier than you might think, and it’s a delightful way to spend some time in the kitchen. Let’s dive into the steps to make these sweet treasures! Follow along closely for the best results.
- Preheat your oven to 350 degrees. This is essential for toasting the pecans just right. Line a baking sheet with parchment paper and set it aside.
- Spread the pecan halves evenly over the parchment paper. You want them to toast nicely, so make sure they’re not overcrowded. Bake for about 5 minutes, keeping an eye on them to prevent burning. The goal is a light golden brown color, which will enhance their flavor.
- Once toasted, remove the pecans from the oven and allow them to cool completely. This step is important, as it will ensure that the caramel doesn’t melt when you spoon it over the pecans.
- Prepare your working area by lining 2 to 3 baking sheets with lightly sprayed parchment paper, wax paper, or a silicone baking liner. This will prevent any sticking when the turtles cool.
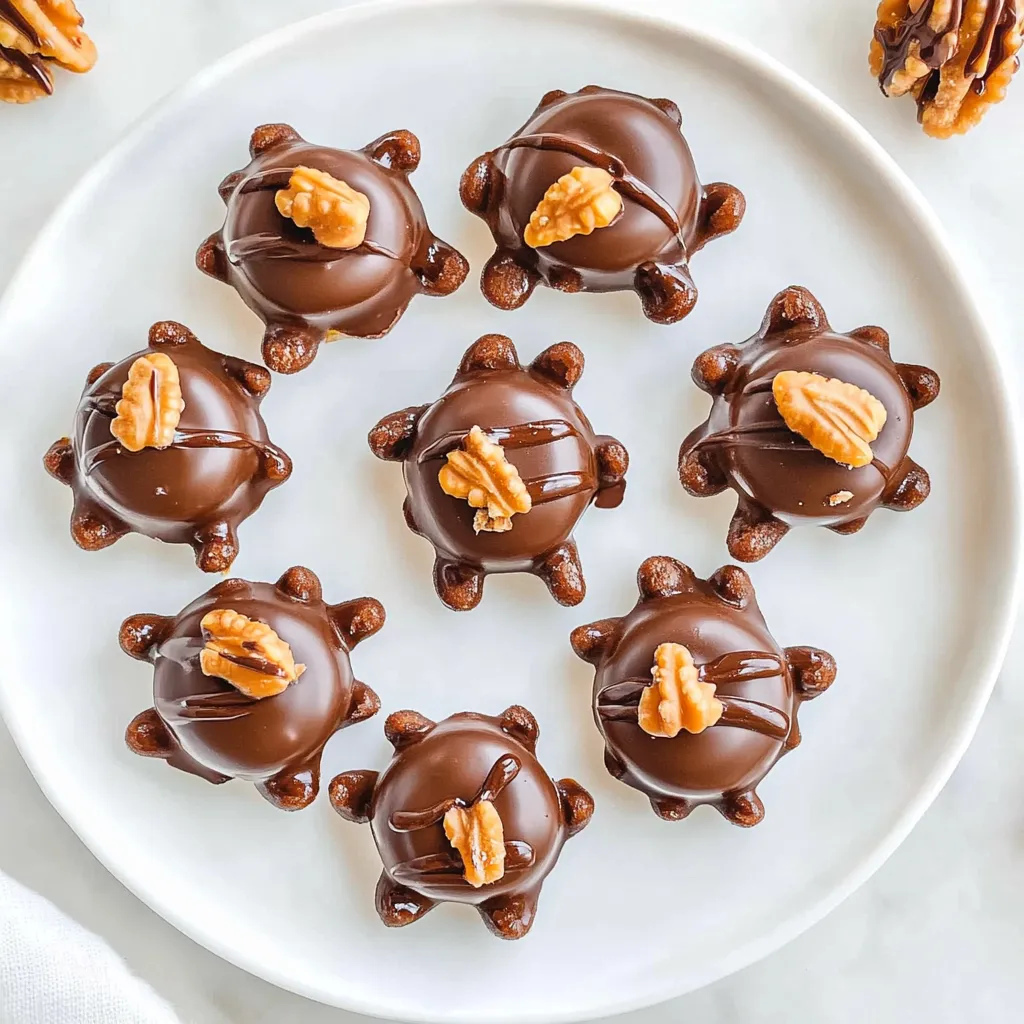
- Arrange the cooled pecans in clusters of 3 to 4 halves. Make sure to leave at least 1 to 1.5 inches between each cluster, as they will expand slightly when you add the caramel.
- Unwrap the individually wrapped caramels and place them into a medium-sized heat-safe bowl. It’s time to melt them!
- Add the 2 tablespoons of heavy cream to the bowl with the caramels. Place the bowl in the microwave and heat it at 45-second intervals, stirring well after each interval.
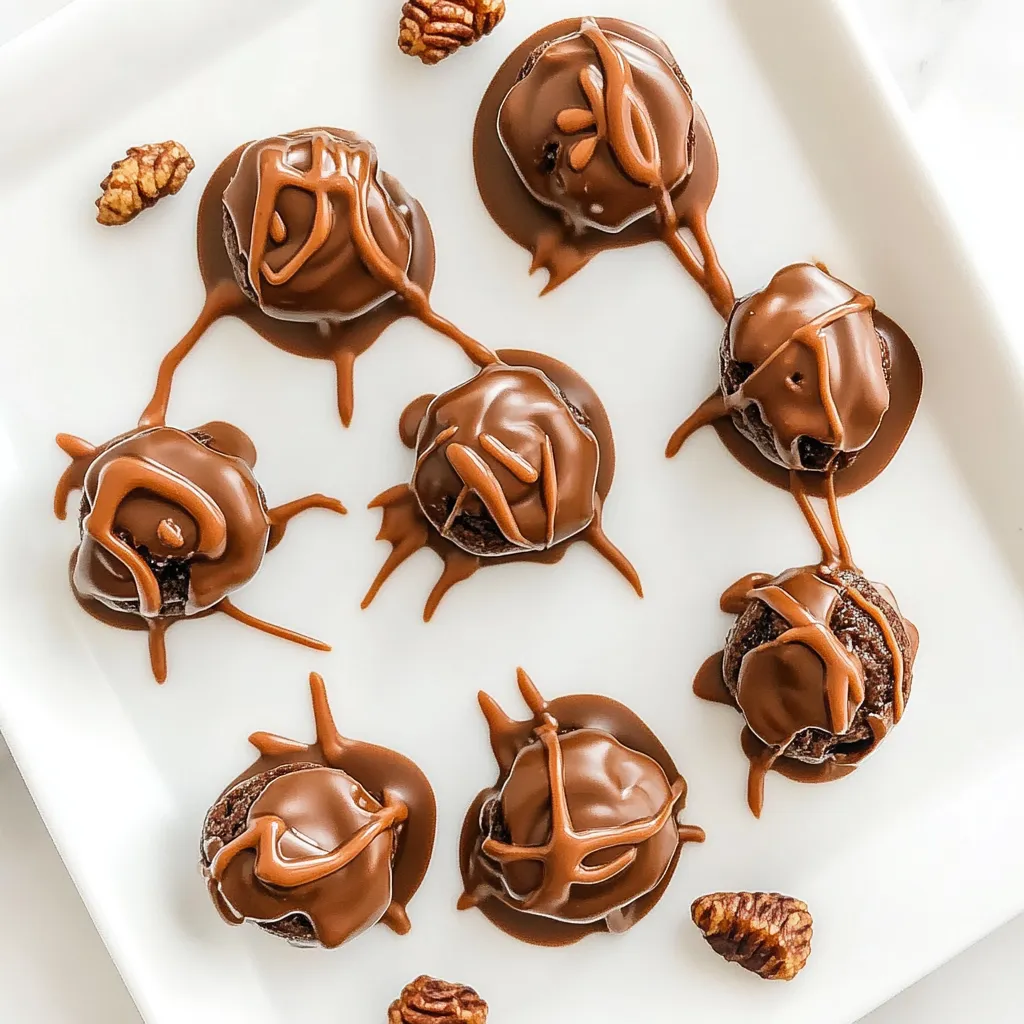
- Continue heating until the mixture is completely smooth and combined. This should take about 2 to 3 intervals. Once smooth, immediately spoon 1 to 1.5 teaspoons of the caramel over the center of each pecan cluster, letting it drizzle slightly.
- Now, it’s time to melt the milk chocolate chips. Place them in a microwaveable bowl and heat them for 30 seconds. Stir, then repeat the process, ensuring you don’t overheat the chocolate. You want to keep some chips intact for texture.
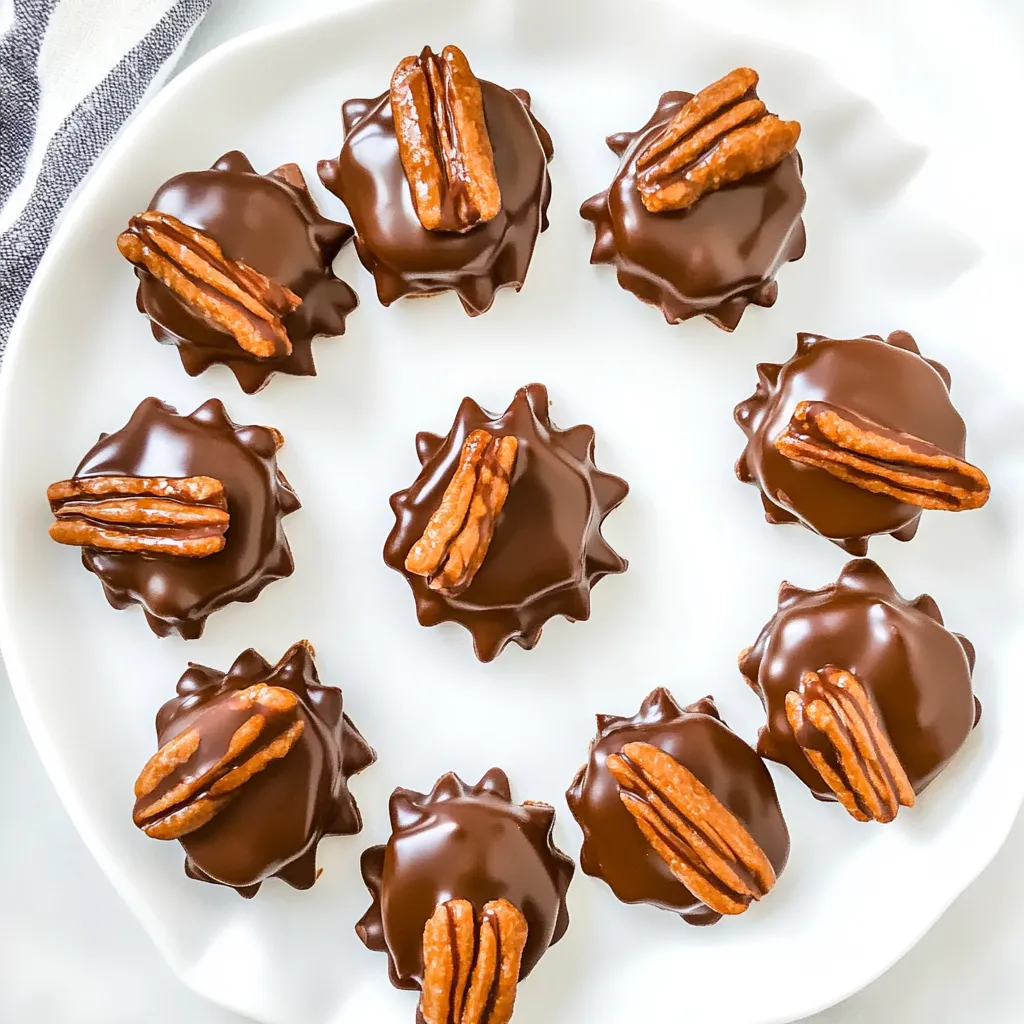
- Once the chocolate is melted and smooth, spoon 1 to 1.5 teaspoons over the caramel, swirling it gently with the back of the spoon to create a nice finish. If desired, sprinkle just a dash of sea salt on top for that sweet and salty touch.
- Allow the Homemade Chocolate Turtles to sit at room temperature for at least 2 hours to set properly. Patience is key here!
Things Worth Knowing
- Cooling Time: Ensure your turtles are completely set before attempting to remove them from the parchment. This will keep their shape intact.
- Storage: Store your turtles in an airtight container at room temperature. They should stay fresh for up to a week!
- Chocolate Melting: Be cautious while melting the chocolate; overheating can cause it to seize. Stir frequently to achieve a smooth texture.
- Ingredient Quality: Using high-quality chocolate and caramels can elevate the taste of your turtles significantly. Don’t skimp on these key ingredients!
How to Switch It Up
If you’re feeling adventurous, there are plenty of ways to customize your Homemade Chocolate Turtles. Here are some tips to make your turtles uniquely yours:
- Flavor Variations: Try adding a dash of cinnamon or nutmeg to the melted caramel for a warm spice kick.
- Different Nuts: If you’re not a fan of pecans, you can substitute with walnuts or almonds for a different flavor and texture.
- Chocolate Types: Experiment with dark chocolate or even white chocolate if you prefer a sweeter taste.
- Garnishes: Adding crushed nuts or sprinkles on top of the chocolate can give your turtles a fun decorative touch!
- Seasonal Variants: For a festive twist, consider using colored sprinkles or themed toppings for holidays.
Best Served With
Homemade Chocolate TurtlesWhen it comes to serving Homemade Chocolate Turtles, the options are endless! Here are some delightful ideas:
- Pair with Coffee: Enjoy these turtles alongside your favorite cup of coffee for a delightful afternoon treat.
- Gifts for Friends: Package them beautifully in a box for a thoughtful gift that is sure to impress.
- Party Platters: Include these turtles in dessert platters at parties or family gatherings, adding a touch of homemade goodness to the mix.
- Seasonal Celebrations: Perfect for holidays, Homemade Chocolate Turtles can be a centerpiece of your festive treats.
- With Ice Cream: Serve them with a scoop of vanilla ice cream for a luxurious dessert experience.
FAQ
Conclusion
The beauty of Homemade Chocolate Turtles lies in their simplicity and irresistible flavor. Not only are they easy to make, but they also evoke warm memories and bring joy to any occasion. I encourage you to try this recipe and experience the delight that comes with creating something so delicious. Trust me, once you taste these treats, you’ll want to make them again and again!

Homemade Chocolate Turtles
Equipment
- Wooden Spoon
- Oven
- Mixing Bowl
- Baking Sheet
Ingredients
- 3 cups Pecan halves
- 11 oz Individually wrapped caramels
- 2 tbsp Heavy cream
- 12 oz Milk chocolate chips
- 1-2 tbsp Sea salt optional for sprinkling
Instructions
- Preheat your oven to 350 degrees. Line a baking sheet with parchment paper and set it aside.
- Spread the pecan halves evenly over the parchment paper. Bake for about 5 minutes until golden brown. Allow them to cool completely.
- Line 2 to 3 baking sheets with parchment paper, wax paper, or silicone liners.
- Arrange the cooled pecans in clusters of 3 to 4 halves, leaving space between each.
- Remove the wrappers from the caramels and place them in a heat-safe bowl.
- Add the heavy cream and microwave at 45-second intervals, stirring until smooth.
- Spoon 1 to 1.5 teaspoons of caramel over each pecan cluster immediately.
- Microwave the milk chocolate chips for 30 seconds, stirring in between until fully melted.
- Spoon 1 to 1.5 teaspoons of melted chocolate over the caramel, swirling gently. Optionally sprinkle with sea salt.
- Let them sit at room temperature for 2 hours to set properly.