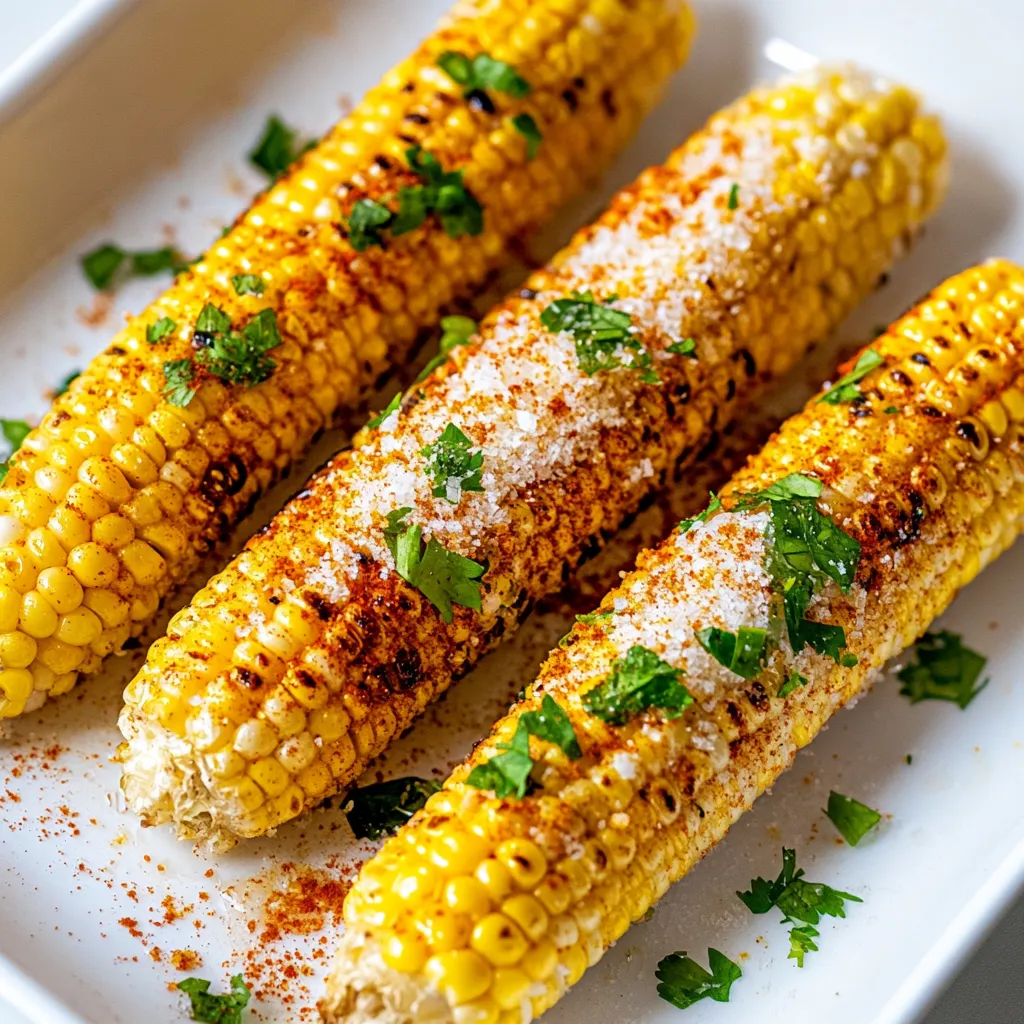
Grilled Corn
There’s something magical about summer evenings and the tantalizing aroma of Grilled Corn wafting through the air. I remember countless barbecues with family and friends, where the highlight of the night was always the sweet, smoky corn on the grill. It’s not just about the taste; it’s about the memories made while husking the corn together and waiting with anticipation as it sizzles to perfection. The joy of biting into that tender, juicy kernel, bursting with flavor and warmth—it’s an experience that captures the essence of summer. Whether you’re dining al fresco or enjoying a cozy night at home, Grilled Corn brings a sense of happiness and nostalgia that few dishes can replicate.
Recipe Snapshot
20 mins
5 mins
15 mins
Medium
120 kcal
3g g
Keto, Gluten-Free, Low FODMAP
2g g
Wooden Spoon, Grater, Peeler
Why You Need This Grilled Corn
Perfect for Summer Gatherings
One of the reasons I adore Grilled Corn is its versatility for summer gatherings. It’s an ideal side dish for barbecues, picnics, or even just a casual dinner at home. You can whip it up quickly and impress your guests with its deliciousness.
Simple to Prepare
Making Grilled Corn is incredibly easy and requires minimal ingredients. With just a few fresh cobs, butter, and spices, you can create a mouthwatering dish that’s bursting with flavor. There’s no complex preparation, and that simplicity is part of its charm.
A Blank Canvas for Flavor
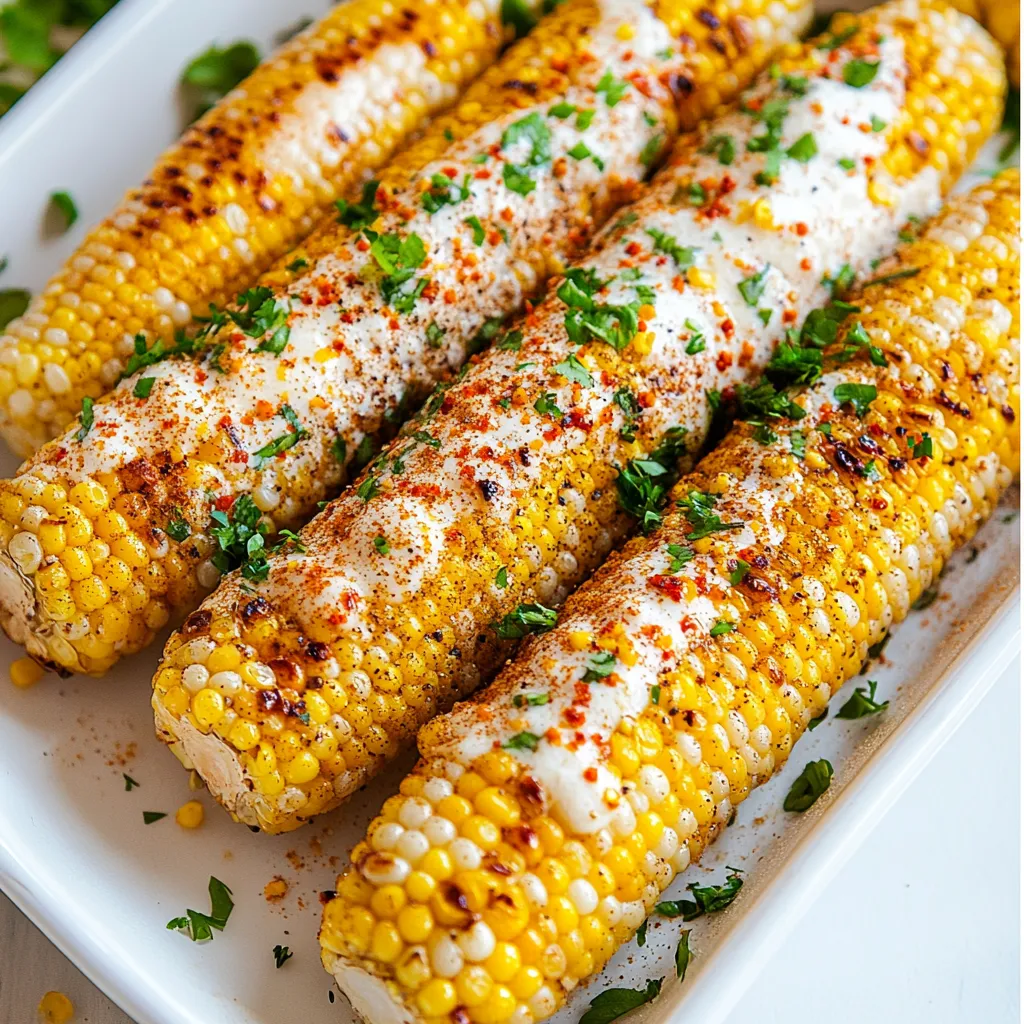
What I love most about Grilled Corn is how it can be customized to suit your taste. Whether you prefer classic butter and salt or want to experiment with spices and toppings, the flavor possibilities are endless. You can make it Mexican style with cheese and chili powder, or keep it simple with just a squeeze of lime.
Healthy and Delicious
This dish is not only tasty but also healthy. Corn is packed with vitamins and minerals, making Grilled Corn a guilt-free indulgence. It’s a great way to add some fresh produce to your meal without sacrificing flavor.
Brings People Together
Finally, Grilled Corn has a way of bringing people together. There’s something about sharing freshly grilled corn that sparks conversation and laughter. It’s a dish that encourages everyone to come together and enjoy the moment, making it perfect for any summer occasion.
Ingredients You’ll Need for Grilled Corn
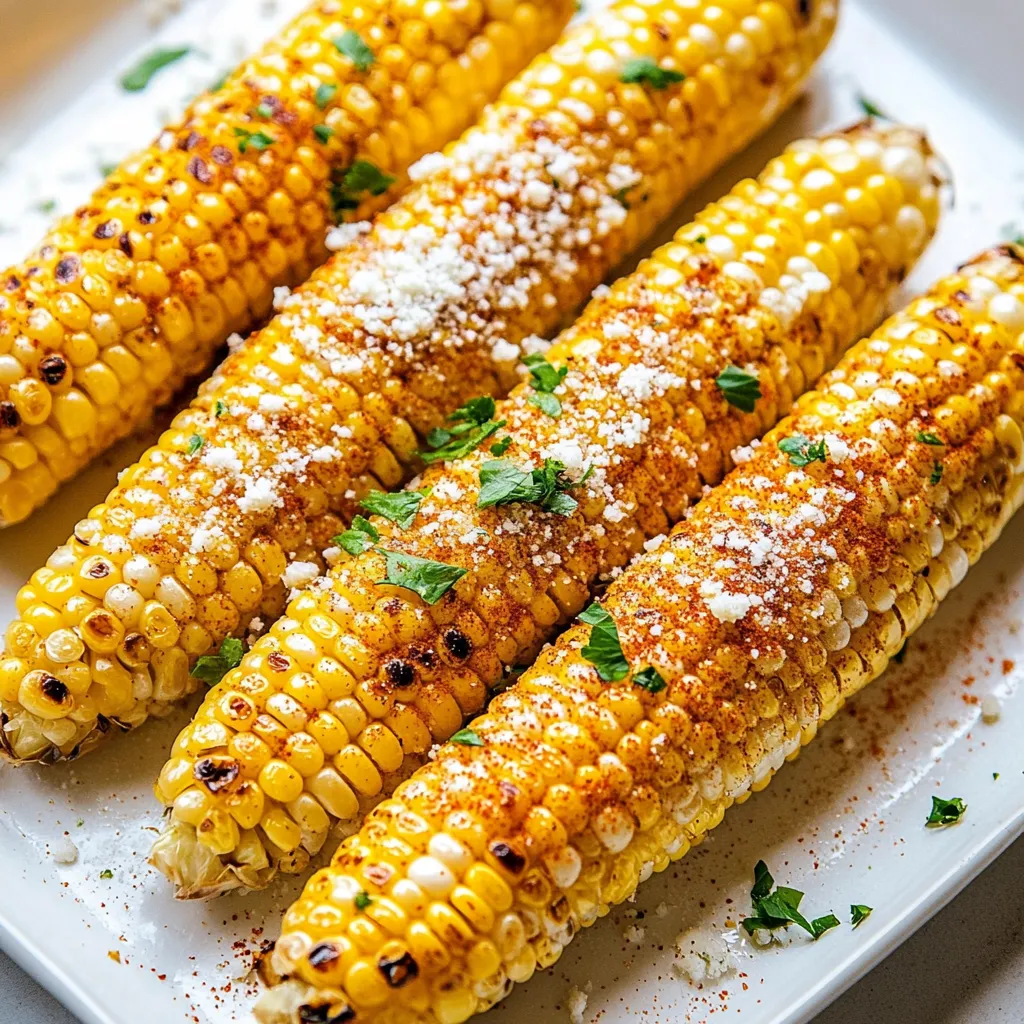
When it comes to Grilled Corn, the ingredients are simple yet fundamental to achieving that perfect flavor. The star of the show is, of course, the sweet corn, which, when grilled, takes on a smoky sweetness that’s simply irresistible. Pairing it with rich, creamy butter and a hint of spices elevates the dish to a whole new level of deliciousness.
- 4 ears fresh sweet corn, husks on
- 2 tablespoons unsalted butter
- 1 tablespoon finely grated Parmesan cheese or nutritional yeast
- ½ teaspoon chili powder
- ¼ teaspoon chipotle chile powder
- ¼ teaspoon ground cumin
- ¼ teaspoon kosher salt plus additional to taste
- Zest and juice of 1 small lime divided
- 3 tablespoons unsalted butter
- Kosher salt
- Ground black pepper
How to Make Grilled Corn
Getting that perfect Grilled Corn is a delightful process that anyone can master. Let’s dive into these easy, step-by-step instructions that will guide you to grilling corn like a pro!
Start by filling a large bowl or your largest pot with enough cold water to completely submerge the corn. This soaking will prevent the husks from burning while grilling.
Pull away the outermost layer of the husks from the corn. With scissors or kitchen shears, trim off the topmost part of the husks up to the cob, including the silk tassel. This way, the corn will grill evenly.
Once trimmed, place the ears in the water. Let them soak for at least 10 minutes or up to 8 hours. The longer they soak, the juicier they will be.
While the corn is soaking, heat your grill to medium (about 350 to 400°F). This temperature is key for achieving that perfect char without burning.
Remove the corn from the water and shake off any excess. Place the corn on the grill, cover it, and grill for 15 to 20 minutes. Make sure to turn the corn every 5 minutes. It’s important to keep an eye on them to ensure they cook evenly.
As the corn grills, the kernels will become tender when pierced with a thin, sharp knife. This is a good indicator that they’re done.
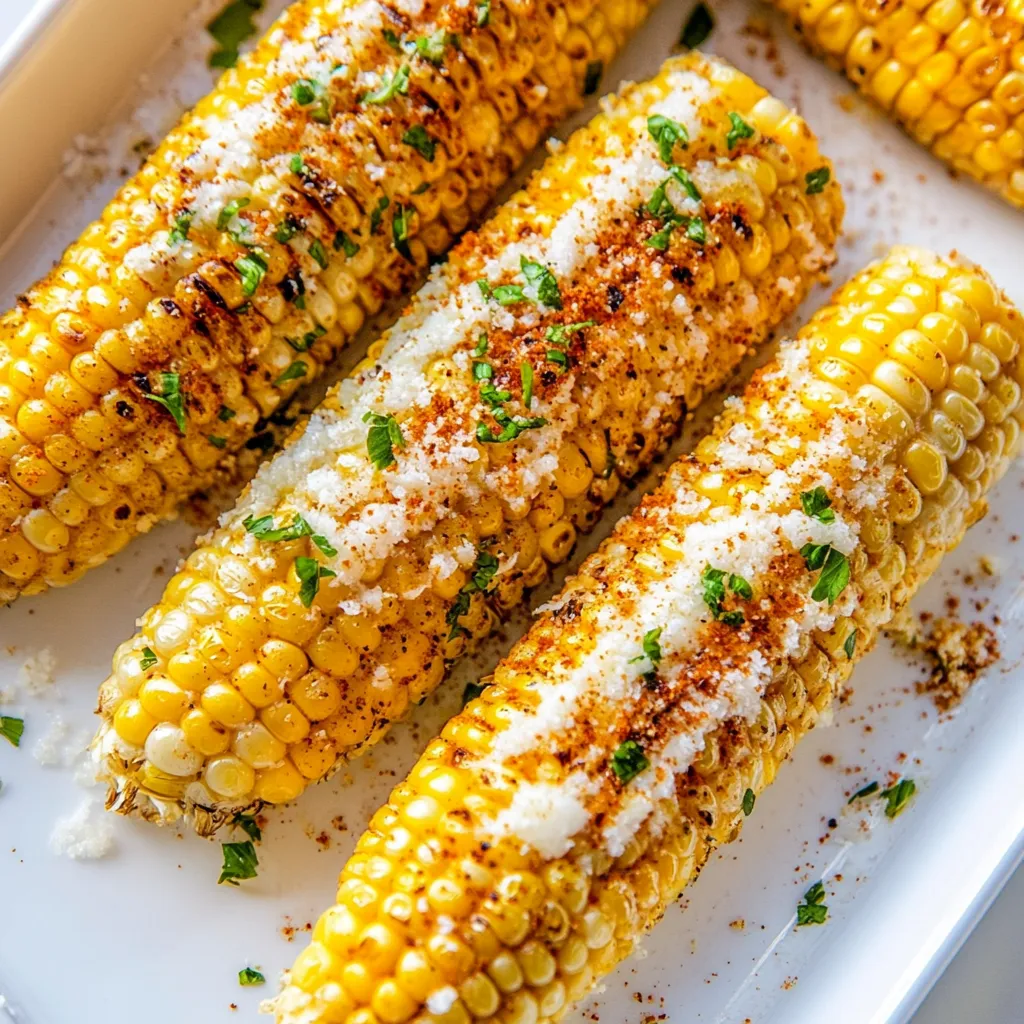
If you’re making the Mexican-style corn, melt some butter in a small bowl. Mix in the Parmesan, chili powder, chipotle chile powder, cumin, and salt. Zest the lime directly into the bowl, then cut the lime into wedges. Set this aside for later.
If you prefer classic corn, you can skip the previous step. Instead, simply butter the corn and season it directly with salt and pepper.
Once the corn is grilled, let it cool for at least 5 minutes. When it’s cool enough to handle, peel back the husks and remove any stuck-on bits of silk. If there’s any stubborn silk, you can rub it away with a kitchen towel.
Finally, brush the grilled corn all over with the Mexican butter if you went that route. Serve hot with a wedge of lime to squeeze over the top. For classic corn, just butter it and add the salt and pepper you desire.
Things Worth Knowing
- Soaking the Corn: Soaking the corn allows it to steam while grilling, ensuring that it stays juicy and flavorful.
- Grilling Temperature: Keeping your grill at medium heat is crucial for achieving that perfect char without burning.
- Turning the Corn: Regularly turning the corn on the grill helps cook it evenly and prevents any one side from getting too charred.
- Flavor Variations: Feel free to experiment with different toppings, such as lime juice, chili powder, or even herbs for a unique twist.
Recipe Notes about Grilled Corn
Here are some tips to help you make the best Grilled Corn possible. These simple pointers can enhance your grilling experience and ensure delicious results.
- Storage: Refrigerate leftover grilled corn for up to 4 days. Be sure to wrap it tightly in plastic wrap or store it in an airtight container to keep it fresh.
- Freezing: If you have any leftover grilled corn, consider cutting it off the cob and transferring it to a freezer-safe zip-top bag. This way, you can enjoy it later, and it can be frozen for up to 1 month.
- Reheating: To reheat, arrange the corn on a parchment-lined baking sheet and reheat in a 350°F oven for 4 minutes. Flip the corn and continue cooking until heated through.
- Serving Variations: You can serve the corn cut away from the cob if desired. Simply cut the kernels off and toss them in a bowl with butter and seasonings.
- Char Preference: Personal preference varies; I prefer to grill corn with the husks on for additional flavor and tenderness, but removing the husks and grilling directly can give a nice char.
Best Served With
When it comes to serving Grilled Corn, the options are endless. Here are some delicious pairings and occasions that elevate this dish:
- Barbecue Parties: Grilled Corn is a perfect side for any barbecue spread, complementing grilled meats and veggie skewers.
- Picnics: Pack it up for a picnic; it travels well and can be served warm or at room temperature.
- Summer Salads: Add charred corn to fresh summer salads mixed with greens, tomatoes, and avocado for added flavor and texture.
- Fresh Salsas: Combine grilled corn with diced tomatoes, onions, cilantro, and lime for a vibrant salsa to serve with tortilla chips.
- Seasonal Celebrations: Perfect for summer holidays or family gatherings, Grilled Corn brings people together around the grill.
FAQ
Conclusion
Grilled Corn is truly a summer classic that captures the essence of the season. With its sweet kernels and smoky flavor, it’s the perfect side dish for any barbecue or picnic. I encourage you to try making this delightful dish yourself—you won’t regret it!
Grilled Corn
Equipment
- Wooden Spoon
- Grater
- Peeler
Ingredients
- 4 ears Fresh Sweet Corn Husks on for grilling.
- 2 tablespoons Unsalted Butter For flavoring.
- 1 tablespoon Finely Grated Parmesan Cheese or Nutritional Yeast Used in Mexican-style corn.
- ½ teaspoon Chili Powder For a kick of spice.
- ¼ teaspoon Chipotle Chile Powder For smoky flavor.
- ¼ teaspoon Ground Cumin Adds depth.
- ¼ teaspoon Kosher Salt Plus additional to taste.
- 1 small lime Zest and Juice Divided for seasoning.
- 3 tablespoons Unsalted Butter For Mexican-style corn.
- Kosher Salt For additional seasoning.
- Ground Black Pepper For additional seasoning.
Instructions
- Fill a large bowl or your largest pot with enough cold water to completely submerge the corn.
- Pull away the outermost layer of the husks. With scissors or kitchen shears, trim off the topmost part of the husks up to the cob, including the silk tassel. Place the ears in the water. Let sit for at least 10 minutes or up to 8 hours (this will keep the husks from burning).
- Heat a gas or charcoal grill to medium (about 350 to 400°F).
- Remove the corn from the water and shake off excess. Place the corn on the grill, cover, then grill for 15 to 20 minutes, turning it every 5 minutes to ensure it cooks evenly. When the corn is done, the kernels should be tender when pierced with a thin, sharp knife.
- Meanwhile, if making the Mexican corn, in a small bowl melt the butter. Stir in the Parmesan, chili powder, chipotle chile powder, cumin, and salt. Zest the lime directly into the bowl, then cut the lime into wedges. If making classic corn, skip this step and butter and season the corn directly.
- Let the corn cool for at least 5 minutes. When cool enough to handle, peel back the husks and remove any stuck-on bits of silk (any remaining silk should come away easily, but if it is stubborn, it can be rubbed away with a kitchen towel).
- Brush the grilled corn all over with the Mexican butter; serve hot with a wedge of lime to squeeze over the top. Or for classic corn, butter the corn and season with salt and pepper as desired.
Notes
- Tip 1: I prefer to grill corn with the husks on. The husks add flavor and help the corn steam, then char perfectly.
- Tip 2: If you prefer to serve the corn cut away from the cob, cut away the kernels and place in a large bowl. Stir together with the butter and seasonings.
- Tip 3: TO STORE: Refrigerate leftover grilled corn for up to 4 days.
- Tip 4: TO REHEAT: Arrange the corn on a parchment-lined baking sheet. Reheat in a 350°F oven for 4 minutes, flip the corn over, then continue cooking for a few minutes longer, until heated through.
- Tip 5: TO FREEZE: Cut grilled corn away from the cob and transfer to a freezer safe ziptop bag. Freeze for up to 1 month.