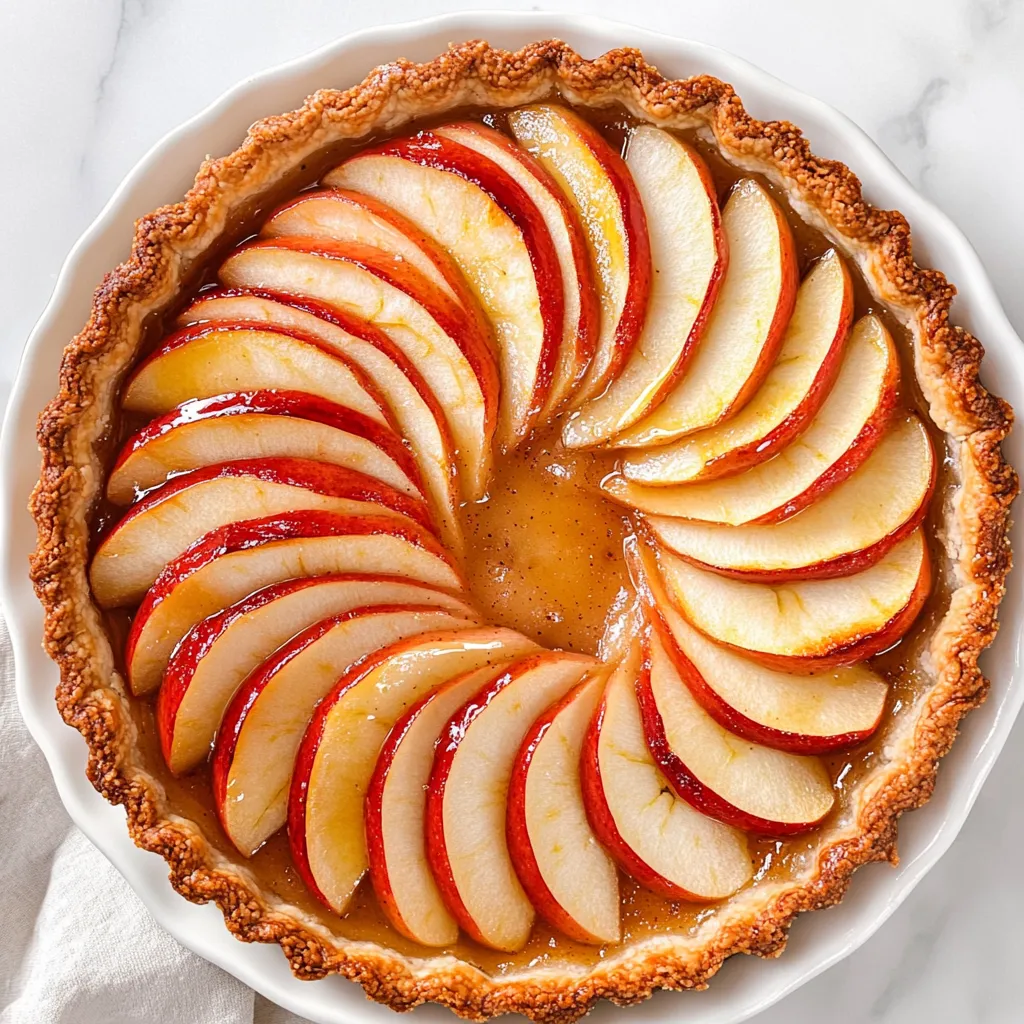
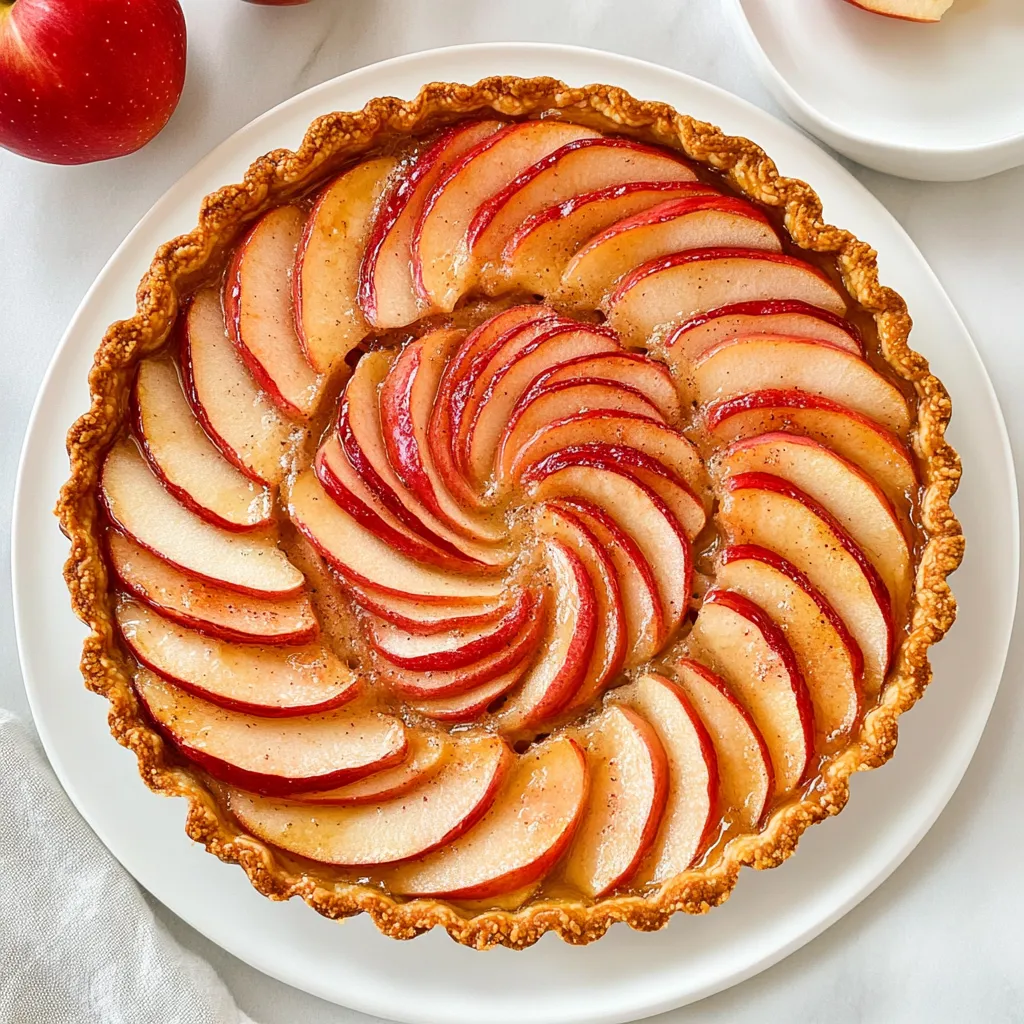
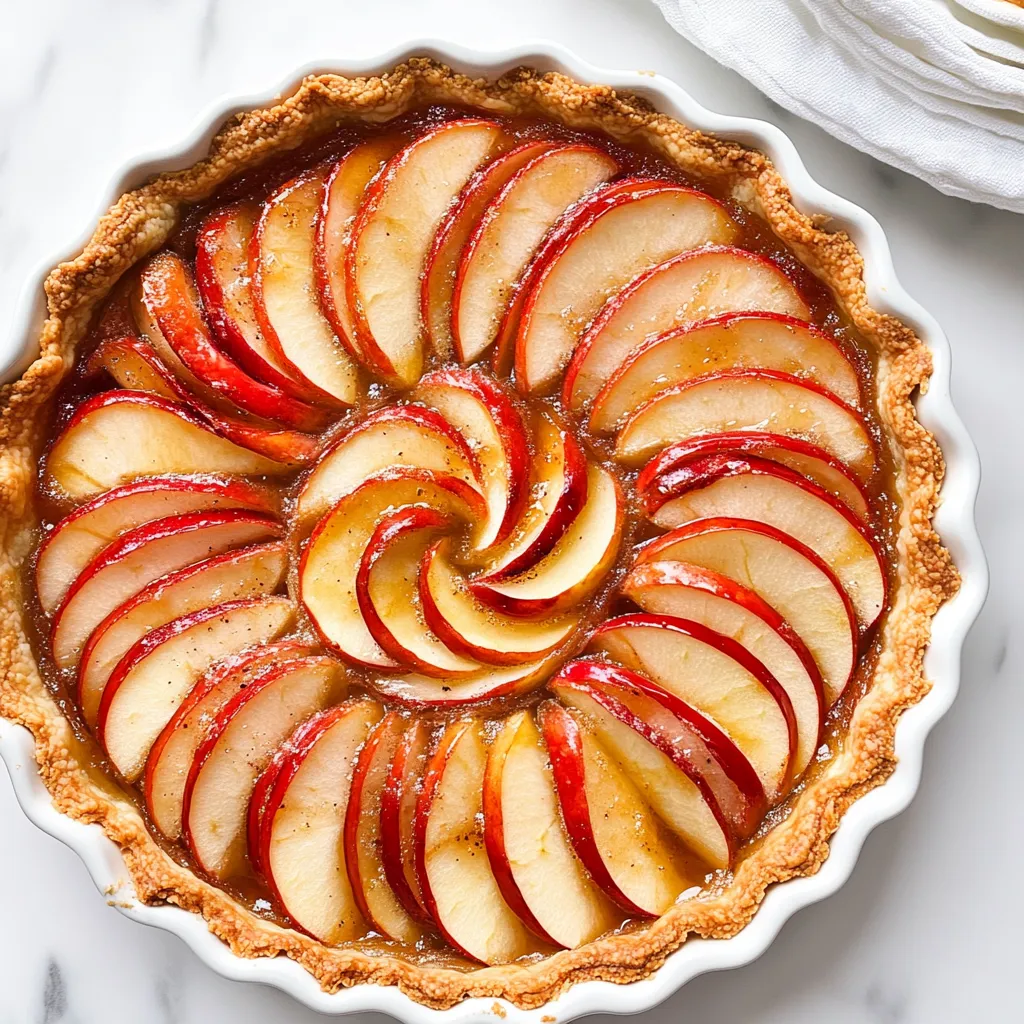
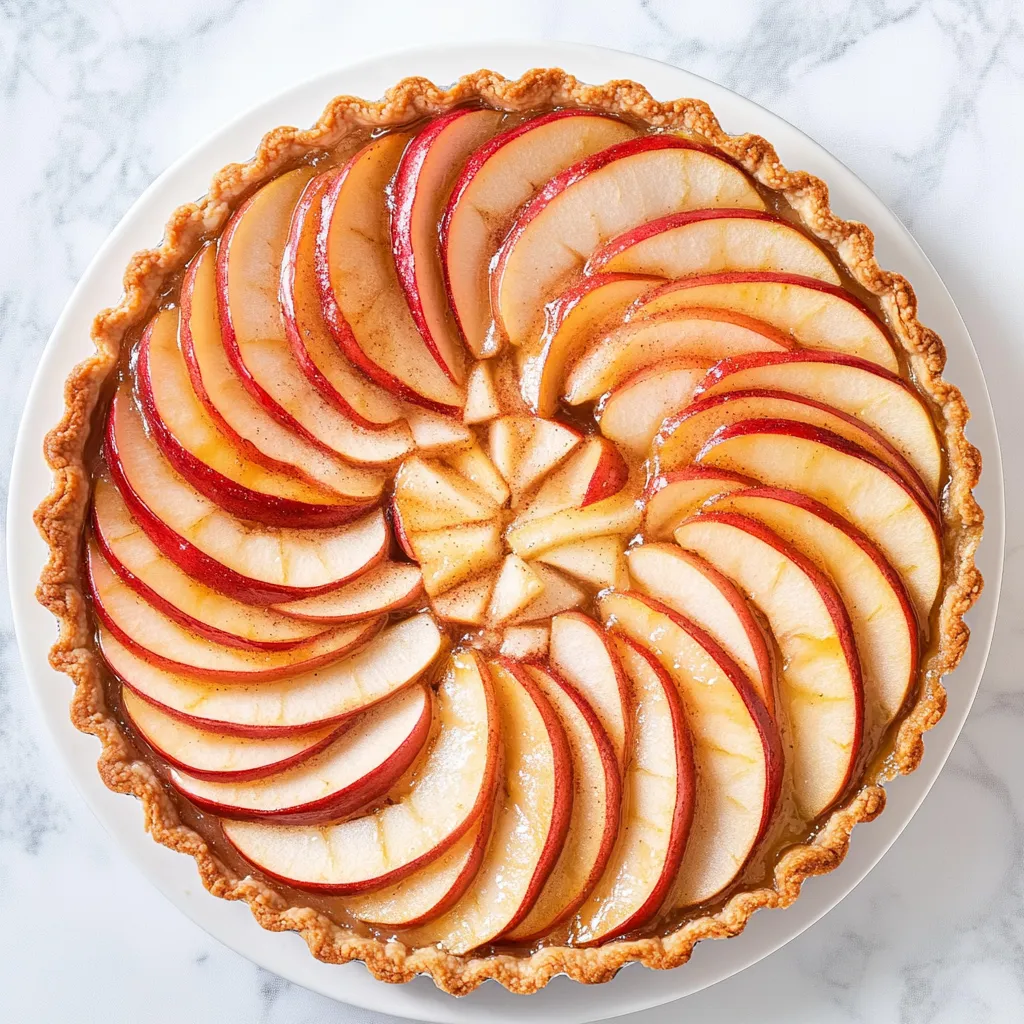
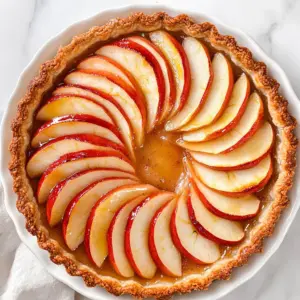
French Apple Tart
There’s something undeniably comforting about a French Apple Tart. I remember the first time I made it during a crisp autumn afternoon, the air filled with the scent of baking apples and warm spices. My kitchen transformed into a haven, where the rich aroma of melting butter and caramelized sugar wrapped around me. This tart isn’t just a dessert; it’s a piece of my heart, a recipe passed down through generations. Each time I slice into that perfectly baked crust, I’m reminded of family gatherings, laughter, and the sweet satisfaction of sharing something delicious with loved ones. The French Apple Tart encapsulates those cherished moments, inviting everyone to enjoy a slice of nostalgia with every bite.
Recipe Snapshot
60 mins
20 mins
40 mins
Medium
245 kcal
2 g
Gluten-Free, AIP
11 g
Mixing Bowl, Baking Sheet, Chef’s Knife, Frying Pan, Oven, Food Processor
The Charm of This French Apple Tart
Incredible Flavor Combination
The beauty of a French Apple Tart lies in its simple yet stunning flavor profile. The tartness of fresh apples harmonizes beautifully with the sweetness of brown sugar, creating a delightful balance that keeps you coming back for more.
Perfectly Buttery Crust
A key player in any great tart is the crust, and this recipe delivers with a perfectly flaky, buttery base. It cradles the apple filling wonderfully, allowing the flavors to meld while providing a satisfying texture.
Seasonal Delight
This tart is particularly special in the fall when apples are at their peak. Using seasonal ingredients not only enhances the taste but also connects you to the rhythms of nature, making each bite more meaningful.
Versatile Serving Options
You can serve a French Apple Tart as a stand-alone dessert or pair it with a dollop of whipped cream or a scoop of vanilla ice cream. The versatility allows it to shine at any occasion, from casual family dinners to festive celebrations.
Easy to Make
Don’t let the elegant appearance fool you; making a French Apple Tart is surprisingly straightforward. With just a handful of ingredients and a bit of love, you’ll have a gorgeous dessert that impresses everyone at the table.
Recipe Ingredients for French Apple Tart
The ingredients for a French Apple Tart are simple yet effective, each playing a crucial role in creating that perfect balance of flavor. The combination of fresh apples, a buttery crust, and aromatic spices creates a delightful experience that’s hard to resist.
- 1 ¼ cups all-purpose flour: The base of our tart, providing structure and flakiness.
- 1 tablespoon sugar: Adds a touch of sweetness to the crust.
- ¼ teaspoon salt: Enhances flavor and balances the sweetness.
- 8 tablespoons butter (1 stick), cold, and cubed: The star ingredient for a rich, buttery crust.
- ¼ cup ice water: Helps to bind the dough together without melting the butter.
- 4 apples, such as Granny Smith or Honey Crisp: Provide the tartness and sweetness that’s essential for flavor.
- ⅓ cup packed brown sugar: Adds depth and caramel notes to the apple filling.
- 1 tablespoon lemon juice: Brightens the flavors and prevents the apples from browning.
- ½ teaspoon ground cinnamon: The warm spice that adds a cozy aroma and flavor.
- 1 teaspoon pure vanilla: Enhances the overall flavor profile of the tart.
- 1 tablespoon granulated sugar: For sprinkling on top, creating a sweet crust.
- 2 tablespoons butter, cut into small pieces: Dotting on top for extra richness while baking.
Cooking Method for French Apple Tart
Cooking a French Apple Tart is an enjoyable journey that rewards you with an aromatic and flavorful dessert. Follow these steps carefully to create a stunning tart that will impress your family and friends.
- Begin by preparing the crust. Using a food processor, add the flour, sugar, and salt and pulse a couple of times to combine. Then, add the cold, cubed butter and pulse until the mixture resembles coarse crumbs, about 10 to 15 pulses. You want the butter pieces to be no bigger than peas.
- Next, add the ice water gradually while pulsing until the mixture is crumbly but holds together when pinched. This should take about 10 pulses. Remember, don’t overwork the dough! It should remain cold and flaky.
- Transfer the crumbly dough onto a clean kitchen towel placed on your counter. Gather the corners of the towel, twist it to create a pouch, and press the dough into a round shape before placing it in the refrigerator to chill for at least 30 minutes. This will help relax the gluten and make rolling easier.
- While the dough chills, preheat your oven to 400°F. Then, prepare your apples. Core the apples and cut them into thin slices, keeping them together as you slice for a beautiful presentation.
- Once the dough has chilled, roll it out on a lightly floured surface into a 13-inch circle, ensuring even thickness. If it sticks, don’t hesitate to sprinkle some more flour on the surface. Gently fold the dough in half to transfer it to a tart pan with a removable bottom.
- Unfold the dough in the pan, pressing it gently into the edges and trimming any excess. Dock the bottom with a fork to prevent it from puffing during baking.
- Now, return your focus to the apples. In a small mixing bowl, combine the brown sugar, lemon juice, cinnamon, and vanilla. Brush this mixture generously over the cut apples.
- Arrange the apples in your tart, fanning them out in a pleasing pattern. The visual appeal is half of the joy!
- Sprinkle the tart with granulated sugar and dot the top with small pieces of butter. This will create a lovely caramelized top.
- Place the tart in the preheated oven and bake for 35 to 40 minutes, until the crust is golden brown and the apples are tender. The smell will be heavenly!
- Let your tart cool slightly before slicing and serving. Enjoy the fruits of your labor!
Things Worth Knowing
- Chilling the Dough: Chilling the dough is essential for a flaky crust. It keeps the butter solid, preventing it from melting into the dough before baking.
- Choosing Apples: Use a mix of tart and sweet apples for the best flavor. Granny Smith for tartness and Honey Crisp for sweetness create a perfect balance.
- Prevent Browning: Tossing the sliced apples in lemon juice not only adds flavor but also prevents them from browning too quickly.
- Keep an Eye on Baking: Every oven is different, so keep an eye on your tart as it bakes. The crust should be golden and the apples tender but not mushy.
Ways to Adapt This Recipe
There are countless ways to put your unique spin on a French Apple Tart. Experimenting with flavors and textures can lead to delightful variations.
- Storage: After cooling, store any leftovers in an airtight container at room temperature for up to two days. If you prefer, refrigerate for longer shelf life.
- Freezing: You can freeze the unbaked tart. Wrap it tightly in plastic wrap and aluminum foil; bake it directly from the freezer, adding a few extra minutes to the baking time.
- Pairing: Serve your French Apple Tart with a scoop of vanilla ice cream or a dollop of freshly whipped cream to elevate the flavors.
- Spice Variation: For a twist, consider adding a pinch of nutmeg or allspice to the brown sugar mixture for a deeper spice flavor.
- Fruit Combination: Try mixing in other fruits like pears or quinces for a delightful change of pace.
Perfect Matches for French Apple Tart
A French Apple Tart is the star of any dessert table, but knowing how to serve it can enhance the experience even further.
- With Ice Cream: A scoop of vanilla bean ice cream next to a warm slice of tart creates a heavenly combination.
- Coffee Pairing: Enjoy your tart with a cup of freshly brewed coffee or tea for a relaxing afternoon treat.
- Family Gatherings: This tart is perfect for family gatherings or brunches, as it’s sure to please everyone.
- Seasonal Events: Think about serving it during fall festivities or holiday dinners to celebrate the season’s bounty.
- Storage Tips: If you have leftovers, store them in a cool place, and reheat slightly before serving to regain that crispy crust.
FAQ
Conclusion
The French Apple Tart is a beautiful blend of flavors and textures that brings warmth to any gathering. With its buttery crust and tender apples, it’s a dessert that you’ll be proud to share with friends and family. I wholeheartedly encourage you to try this recipe; the joy it brings to the table is truly unmatched!
French Apple Tart
Equipment
- Mixing Bowl
- Baking Sheet
- Chef's Knife
- Frying Pan
- Oven
- Food Processor
Ingredients
- 1 ¼ cup all-purpose flour
- 1 tablespoon sugar
- ¼ teaspoon salt
- 8 tablespoons butter (1 stick), cold, and cubed
- ¼ cup ice water
- 4 apples apples, such as Granny Smith or Honey Crisp
- ⅓ cup brown sugar, packed
- 1 tablespoon lemon juice
- ½ teaspoon ground cinnamon
- 1 teaspoon pure vanilla
- 1 tablespoon granulated sugar
- 2 tablespoons butter, cut into small pieces
Instructions
- Begin by preparing the crust. Using a food processor, add the flour, sugar, and salt and pulse a couple of times to combine. Then, add the cold, cubed butter and pulse until the mixture resembles coarse crumbs, about 10 to 15 pulses. You want the butter pieces to be no bigger than peas.
- Next, add the ice water gradually while pulsing until the mixture is crumbly but holds together when pinched. This should take about 10 pulses. Remember, don’t overwork the dough! It should remain cold and flaky.
- Transfer the crumbly dough onto a clean kitchen towel placed on your counter. Gather the corners of the towel, twist it to create a pouch, and press the dough into a round shape before placing it in the refrigerator to chill for at least 30 minutes. This will help relax the gluten and make rolling easier.
- While the dough chills, preheat your oven to 400°F. Then, prepare your apples. Core the apples and cut them into thin slices, keeping them together as you slice for a beautiful presentation.
- Once the dough has chilled, roll it out on a lightly floured surface into a 13-inch circle, ensuring even thickness. If it sticks, don’t hesitate to sprinkle some more flour on the surface. Gently fold the dough in half to transfer it to a tart pan with a removable bottom.
- Unfold the dough in the pan, pressing it gently into the edges and trimming any excess. Dock the bottom with a fork to prevent it from puffing during baking.
- Now, return your focus to the apples. In a small mixing bowl, combine the brown sugar, lemon juice, cinnamon, and vanilla. Brush this mixture generously over the cut apples.
- Arrange the apples in your tart, fanning them out in a pleasing pattern. The visual appeal is half of the joy!
- Sprinkle the tart with granulated sugar and dot the top with small pieces of butter. This will create a lovely caramelized top.
- Place the tart in the preheated oven and bake for 35 to 40 minutes, until the crust is golden brown and the apples are tender. The smell will be heavenly!
- Let your tart cool slightly before slicing and serving. Enjoy the fruits of your labor!
Notes
- Tip 1: After cooling, store any leftovers in an airtight container at room temperature for up to two days. If you prefer, refrigerate for longer shelf life.
- Tip 2: You can freeze the unbaked tart. Wrap it tightly in plastic wrap and aluminum foil; bake it directly from the freezer, adding a few extra minutes to the baking time.
- Tip 3: Serve your French Apple Tart with a scoop of vanilla ice cream or a dollop of freshly whipped cream to elevate the flavors.
- Tip 4: For a twist, consider adding a pinch of nutmeg or allspice to the brown sugar mixture for a deeper spice flavor.
- Tip 5: Try mixing in other fruits like pears or quinces for a delightful change of pace.