Easter Chick Bunny Cupcakes
The Easter Chick Bunny Cupcakes are more than just a dessert; they evoke the joyful spirit of spring and the Easter celebrations. I remember the first time I made these delightful cupcakes for my family. The kitchen was filled with laughter as my kids helped me decorate them, their little hands covered in frosting and sprinkles. Each cupcake transformed into a cute little chick or bunny, bringing smiles all around. It was a fun-filled afternoon filled with creativity and love, and I felt an immense sense of joy watching my family enjoy something we created together. These cupcakes aren’t just a treat; they’re a cherished memory, a way to celebrate the season, and a delightful addition to any Easter table.
Recipe Snapshot
1 hr 15 mins
55 mins
20 mins
Medium
200 kcal
2 g
Gluten-Free, AIP, Low FODMAP
10 g
Mixing Bowl, Baking Sheet, Wooden Spoon, Whisk, Oven
Why This Easter Chick Bunny Cupcakes Is a Winner
They Are Adorable
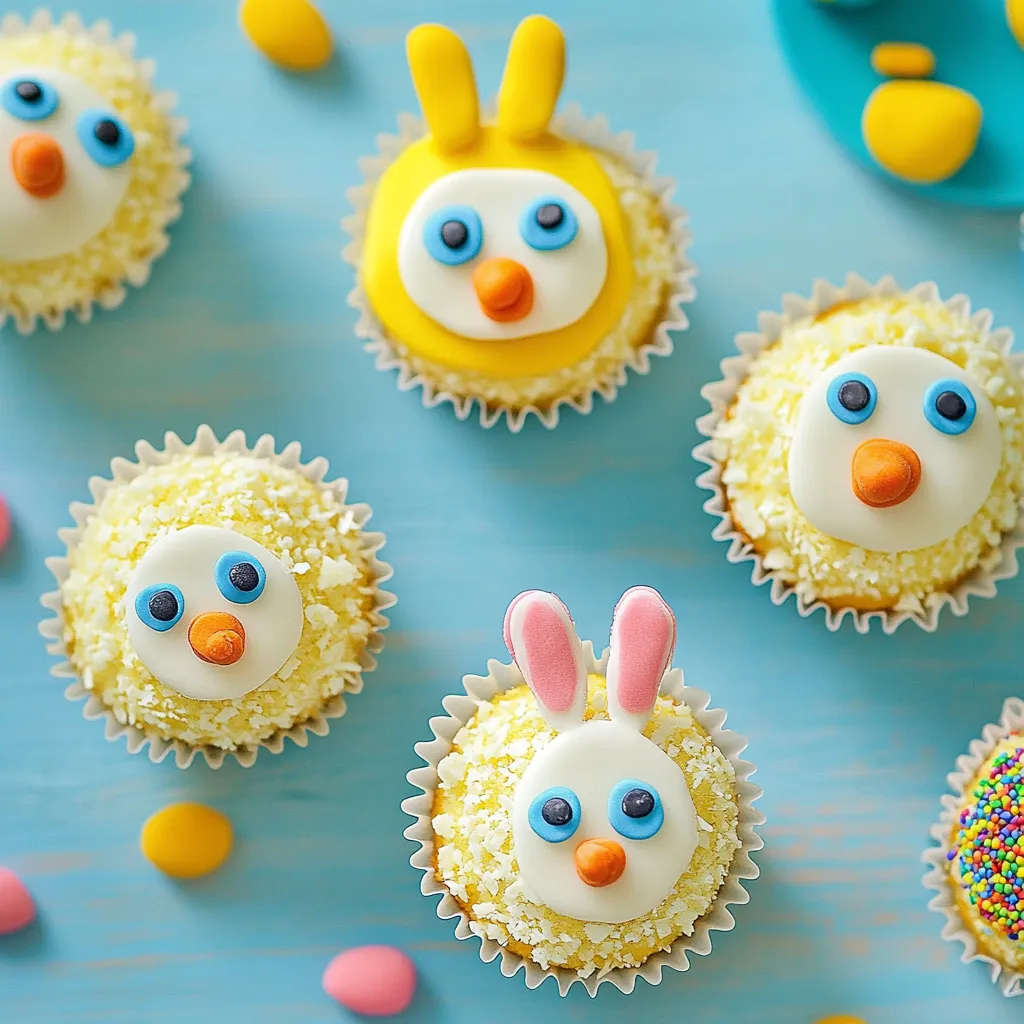
There’s something irresistibly charming about the Easter Chick Bunny Cupcakes. Their vibrant colors and playful designs make them the focal point of any dessert table. Each one looks like it has jumped straight out of a storybook. It’s hard not to smile when you see these little creations, and I can assure you that they will steal the show at your next gathering.
Perfect for Celebrations
These cupcakes are ideal for Easter, spring parties, or any festive occasion. They embody the spirit of celebration, making them perfect for family gatherings or friendly get-togethers. Guests will love not just the flavor but the fun shapes too.
Creative Decorating
The decorating process is a wonderful way to unleash your creativity. You can involve your kids, friends, or even have a cupcake decorating party. Creating each character with frosting and edible decorations is a fun activity that everyone can enjoy.
Delicious Flavors
These cupcakes don’t just look good; they taste amazing too! With a fluffy texture and a balance of sweetness from the frosting, they’re sure to please your palate. The combination of flavors, from the light vanilla to the rich buttercream, makes every bite memorable.
Great for Leftovers
We all know that leftovers sometimes get neglected, but not these cupcakes! They stay fresh and delicious for several days, making them a great treat to enjoy even after the celebration is over. Just store them properly, and you will be able to enjoy the joy they bring for days to come.
What Goes Into Easter Chick Bunny Cupcakes
The ingredients for the Easter Chick Bunny Cupcakes are simple yet essential. Each component plays a vital role in creating the delightful flavors and textures that make these cupcakes special. From the fluffy cupcake base to the creamy frosting, every ingredient works in harmony to create a delightful treat.
- 140g all-purpose flour – The backbone of the cupcake, giving it structure and lightness.
- ½ tsp baking powder – This helps the cupcakes rise, making them fluffy and light.
- 2 egg whites – They add volume and lightness to the batter.
- 120g sugar – Sweetness is key for a delicious cupcake!
- 120ml sunflower oil – This keeps the cupcakes moist and adds a lovely texture.
- 4 tbsp strained yogurt – It adds a bit of tartness and moisture.
- ½ tsp vanilla extract – For that perfect hint of vanilla flavor.
- 240g powdered sugar – Essential for making the frosting sweet and fluffy.
- 120g butter at room temperature – The base for the frosting, giving it richness.
- 2 tbsp heavy cream – This adds creaminess to the frosting.
- ½ tsp vanilla extract – Another layer of delicious vanilla flavor in the frosting.
- Yellow food coloring – To create vibrant yellow chicks.
- White sugar paste – Perfect for creating the bunny ears and other decorations.
- Black sugar paste – Used for the eyes and whiskers.
- Pink sugar paste – Adds a sweet touch for the bunny noses.
- Small chocolates – Great for adding little noses and eyes.
How to Make Easter Chick Bunny Cupcakes
Making the Easter Chick Bunny Cupcakes is a fun process that brings joy from start to finish. Follow these simple steps, and you’ll have a batch of delightful cupcakes ready in no time.
- Start by placing the flour in a bowl along with the baking powder. Whisk them together to ensure they are well combined, and set this mixture aside. This step is crucial for getting the right texture, so be sure to mix thoroughly.
- In another large bowl, add the egg whites and sugar. Whisk them together until the mixture becomes fluffy and forms soft peaks. This can take a couple of minutes, and you’ll notice the volume increasing significantly.
- Next, slowly drizzle in the sunflower oil while whisking continuously. Then, add the vanilla extract and strained yogurt. Mix until everything is well blended. This will create a creamy base.
- Gradually add the flour mixture to the wet ingredients in batches, stirring gently. Be careful not to overmix; you want to keep the batter light and airy.
- Prepare the cupcake molds by lining them with butter and dusting with flour. Pour the batter into each mold, filling them about two-thirds full. Bake in a preheated oven at 175°C (345°F) for 18 to 20 minutes. Keep an eye on them; they should be lightly golden and a toothpick should come out clean.
- Once baked, remove the cupcakes from the oven and let them cool completely in the molds before unmolding. This is crucial to prevent them from breaking apart.
- While the cupcakes are cooling, prepare the frosting. Start by placing the butter in a mixer bowl. Whisk it at high speed until fluffy, which should take about 3 to 5 minutes. The butter should be light in color and airy in texture.
- Add the powdered sugar, the remaining vanilla extract, and heavy cream to the bowl. Continue mixing until everything is well combined and creamy. This is your delicious frosting base!
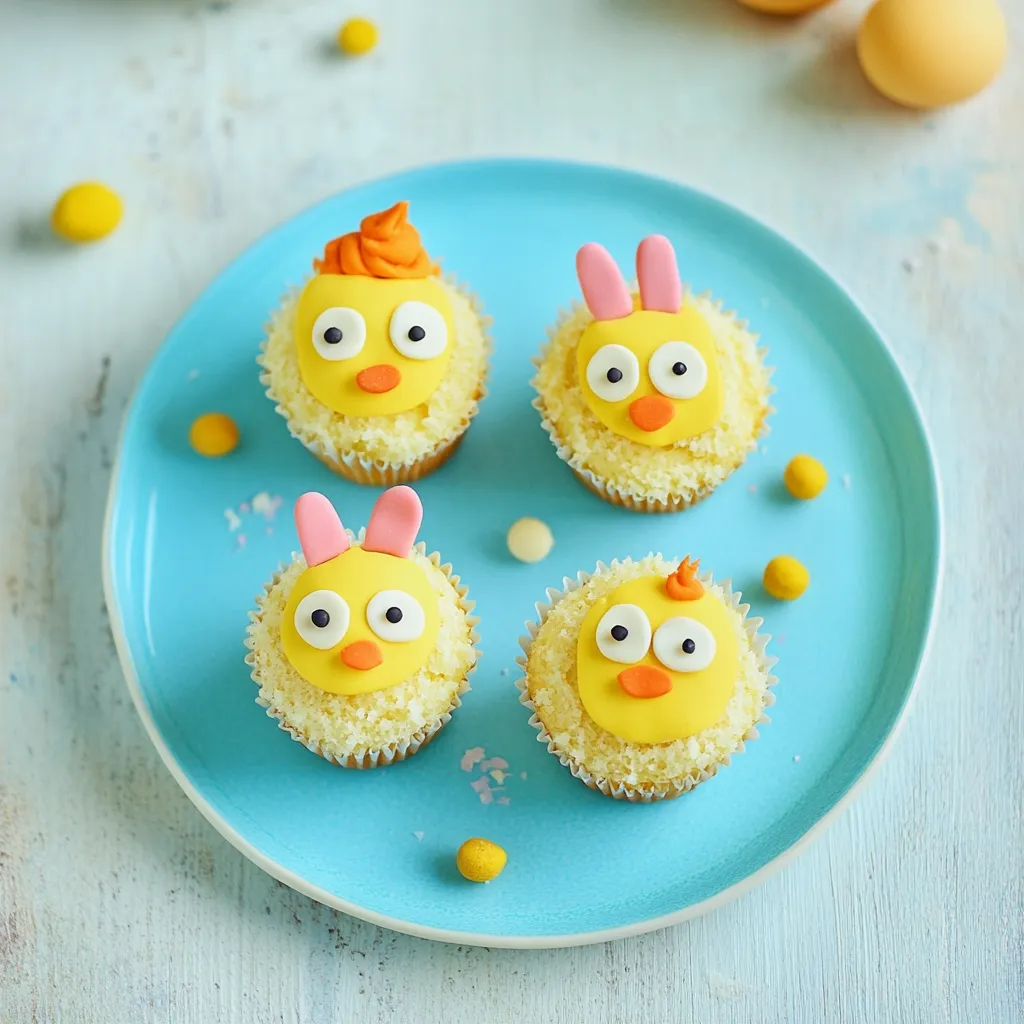
- Divide the frosting mixture into two parts. To one part, add the yellow food coloring until you reach the desired hue. This will be for the chick cupcakes.
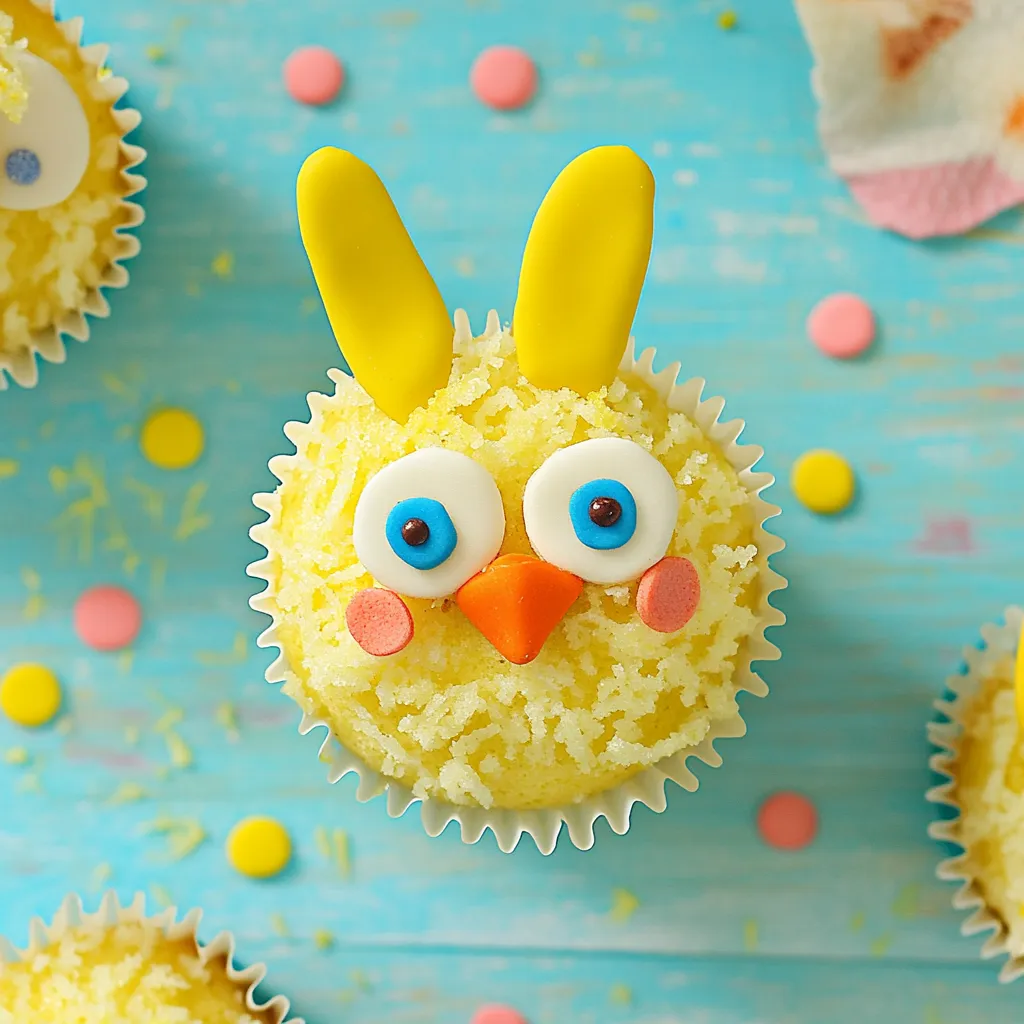
- Fill two pastry bags with the two colors of frosting. Now comes the fun part: decorating! Use the yellow frosting to create a swirl on the yellow cupcakes and add little white sugar paste eyes using the black sugar paste for pupils. A small piece of pink sugar paste can be used for the nose.
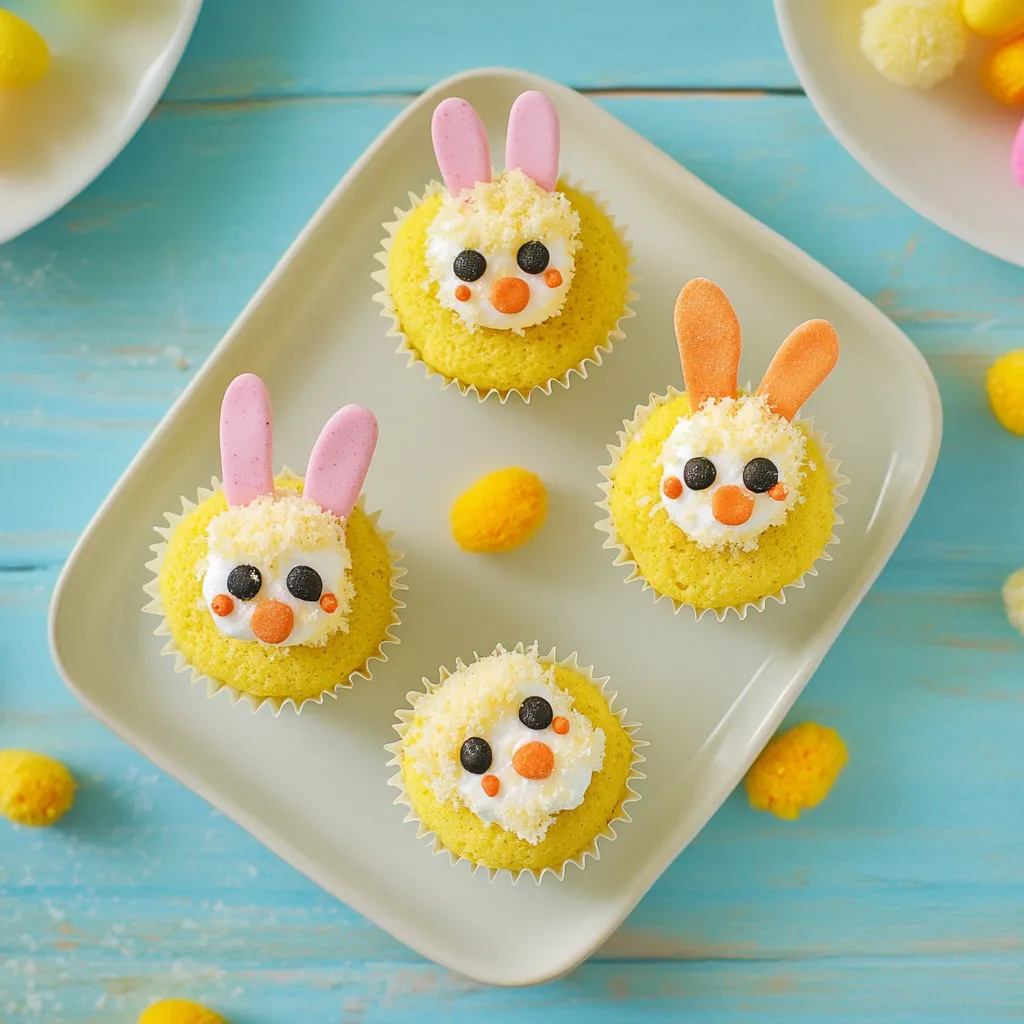
- For the white frosted cupcakes, use white sugar paste to create ears, and use black sugar paste for whiskers. Again, use pink sugar paste for the nose and add two small chocolates for the eyes. Your cupcakes should now look adorable!
- Once decorated, serve them immediately or keep them refrigerated if there are leftovers. Enjoy the smiles they bring!
Things Worth Knowing
- Use Room Temperature Ingredients: Ensure that your butter and eggs are at room temperature for better incorporation.
- Don’t Overmix: When combining wet and dry ingredients, mix until just combined to keep the cupcakes fluffy.
- Cooling Time is Essential: Allow cupcakes to cool completely before frosting to avoid melting the frosting.
- Storage Tips: Keep leftover cupcakes in an airtight container in the fridge for up to three days.
Recipe Tips about Easter Chick Bunny Cupcakes
Here are some helpful tips to ensure your Easter Chick Bunny Cupcakes turn out perfectly every time. Whether you’re a novice or a seasoned baker, these tips will help you get the best results.
- Storage: Keep your cupcakes in an airtight container in the refrigerator to maintain freshness.
- Freezing: You can freeze the baked cupcakes without frosting for later use. Just wrap them tightly and they can last up to three months.
- Pairing: These cupcakes pair wonderfully with a glass of milk or a cup of tea for a delightful afternoon treat.
- Decoration: Feel free to get creative with the decorations; use different colors or shapes to personalize your cupcakes!
- Experiment with Flavors: Try adding lemon zest or orange zest to the batter for a citrus twist.
Serve This Easter Chick Bunny Cupcakes With
- Springtime Picnics: These cupcakes are perfect for outdoor gatherings. Their playful designs fit right in with the cheerful atmosphere.
- Birthday Parties: The Easter Chick Bunny Cupcakes are a hit at kids’ birthday parties, bringing joy to everyone.
- Coffee Breaks: Enjoy them with a warm cup of coffee or tea for a cozy afternoon.
- Family Gatherings: They make a delightful addition to family dinners and celebrations, bringing a festive touch to your table.
- Easter Brunch: Serve them as part of your Easter brunch spread for a sweet touch that everyone will love.
FAQ
Conclusion
The Easter Chick Bunny Cupcakes are not just a treat; they represent a joyful celebration of spring and family togetherness. Their adorable designs and delightful flavors make them a must-try for any festive occasion. I encourage you to gather your loved ones, roll up your sleeves, and enjoy the process of making these charming cupcakes. The joy they bring to your table will certainly be worth it!

Easter Chick Bunny Cupcakes
Equipment
- Mixing Bowl
- Baking Sheet
- Wooden Spoon
- Whisk
- Oven
Ingredients
- 140g All-purpose flour
- ½ tsp Baking powder
- 2 Egg whites medium
- 120g Sugar
- 120ml Sunflower oil
- 4 tbsp Strained yogurt
- ½ tsp Vanilla extract
- 240g Powdered sugar
- 120g Butter at room temperature
- 2 tbsp Heavy cream full fat
- ½ tsp Vanilla extract
- Yellow food coloring
- White sugar paste
- Black sugar paste
- Pink sugar paste
- Small chocolates
Instructions
- 1. Start by placing the flour in a bowl along with the baking powder. Whisk them together to ensure they are well combined, and set this mixture aside. This step is crucial for getting the right texture, so be sure to mix thoroughly.
- 2. In another large bowl, add the egg whites and sugar. Whisk them together until the mixture becomes fluffy and forms soft peaks. This can take a couple of minutes, and you’ll notice the volume increasing significantly.
- 3. Next, slowly drizzle in the sunflower oil while whisking continuously. Then, add the vanilla extract and strained yogurt. Mix until everything is well blended. This will create a creamy base.
- 4. Gradually add the flour mixture to the wet ingredients in batches, stirring gently. Be careful not to overmix; you want to keep the batter light and airy.
- 5. Prepare the cupcake molds by lining them with butter and dusting with flour. Pour the batter into each mold, filling them about two-thirds full. Bake in a preheated oven at 175°C (345°F) for 18 to 20 minutes. Keep an eye on them; they should be lightly golden and a toothpick should come out clean.
- 6. Once baked, remove the cupcakes from the oven and let them cool completely in the molds before unmolding. This is crucial to prevent them from breaking apart.
- 7. While the cupcakes are cooling, prepare the frosting. Start by placing the butter in a mixer bowl. Whisk it at high speed until fluffy, which should take about 3 to 5 minutes. The butter should be light in color and airy in texture.
- 8. Add the powdered sugar, the remaining vanilla extract, and heavy cream to the bowl. Continue mixing until everything is well combined and creamy. This is your delicious frosting base!
- 9. Divide the frosting mixture into two parts. To one part, add the yellow food coloring until you reach the desired hue. This will be for the chick cupcakes.
- 10. Fill two pastry bags with the two colors of frosting. Now comes the fun part: decorating! Use the yellow frosting to create a swirl on the yellow cupcakes and add little white sugar paste eyes using the black sugar paste for pupils. A small piece of pink sugar paste can be used for the nose.
- 11. For the white frosted cupcakes, use white sugar paste to create ears, and use black sugar paste for whiskers. Again, use pink sugar paste for the nose and add two small chocolates for the eyes. Your cupcakes should now look adorable!
- 12. Once decorated, serve them immediately or keep them refrigerated if there are leftovers. Enjoy the smiles they bring!
Notes
- Tip 1: Allow the cupcakes to cool well before adding the frosting to prevent it from melting.