Christmas Oreos
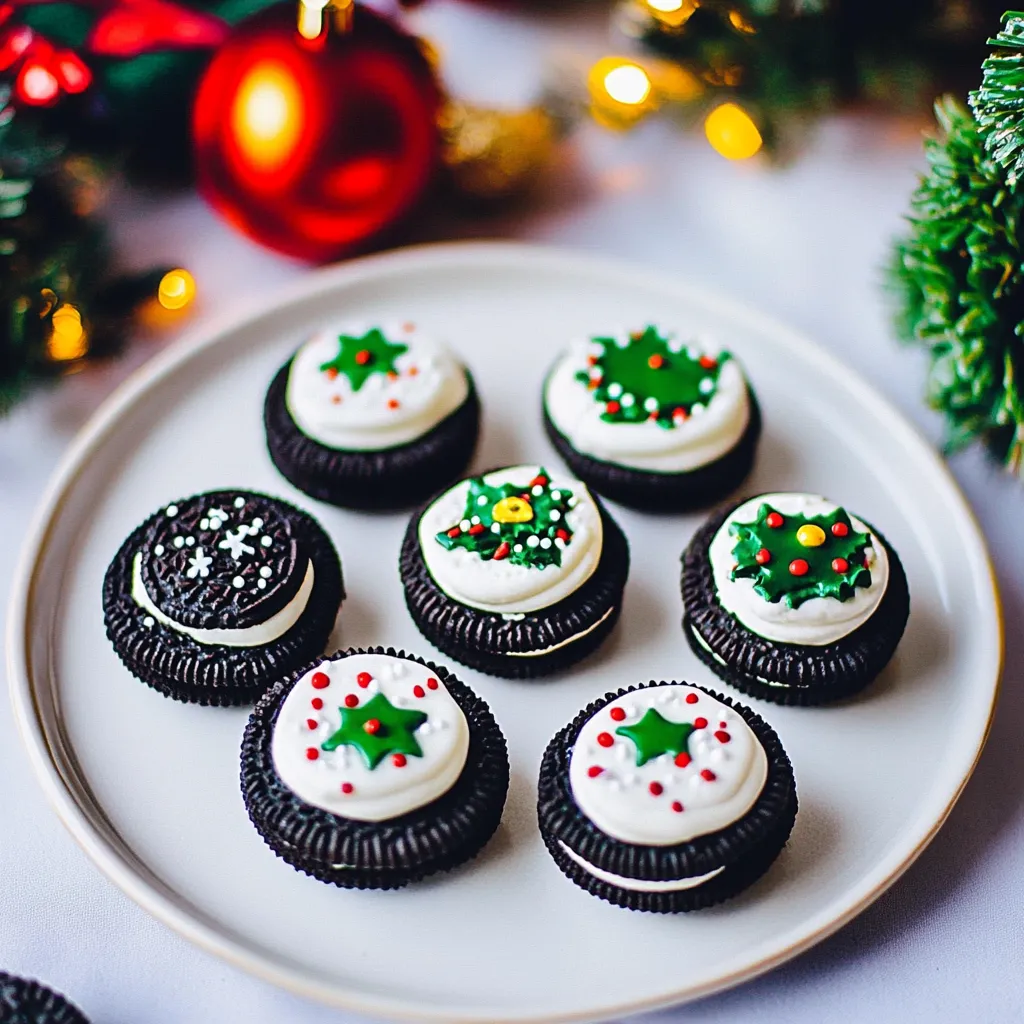
There’s something magical about the holiday season, and one of the best ways to celebrate is with Christmas Oreos. Every year, I look forward to creating sweet treats that capture the joy of the festivities. This year, I decided to bring a twist to the classic Oreo by transforming them into delightful holiday-themed cookies. The kitchen fills with sweet aromas, and it’s hard not to sneak a taste while decorating. Imagine the excitement on my family’s faces when they see these cute, edible ornaments! Each design is a mini masterpiece, perfect for sharing at holiday parties or simply enjoying at home. They make great gifts too! If you’re looking for a fun, engaging way to get into the holiday spirit, making Christmas Oreos together is a fantastic idea.
Recipe Snapshot
35 mins
35 mins
0 mins
Medium
120 kcal
1 g
Vegan, Gluten-Free, AIP
6 g
Large sheet pan (15″ x 21″), Parchment paper
Why You’ll Love This Christmas Oreos
1. Creative Expression
One of the best parts about making Christmas Oreos is the creative freedom it allows. You can make them look like Christmas trees, snowmen, or even Rudolph! Each design offers an opportunity to express yourself in the kitchen.
2. Fun for All Ages
These cookies are perfect for family bonding. Kids love decorating, and adults can get creative with the designs. It’s a fantastic way to make memories together during the holiday season.
3. Customizable Ingredients
You can tailor the ingredients to suit your tastes. Whether you prefer standard Oreos or want to experiment with seasonal flavors, the options are endless. Mix and match decorations to create a personalized touch.
4. Deliciously Indulgent
Each bite of a Christmas Oreo is a delightful explosion of flavors. The combination of chocolate and cream, along with the added toppings, results in a treat that’s irresistible and indulgent.
5. Perfect for Any Gathering
These festive cookies are an excellent addition to any holiday gathering. They’re sure to impress guests and become a topic of conversation. Plus, they make a wonderful centerpiece for dessert tables.
Key Ingredients for Christmas Oreos
Creating the perfect Christmas Oreos requires a few key ingredients that work together beautifully. The combination of flavors and textures is what makes each bite special. Essential players include the classic Oreo cookie, which serves as the base, and various melting chocolates that add sweetness and richness. Don’t forget the toppings—these are where you can get creative!
- 12 Oreos – Any variety will do. These are the foundation of your cookies, so choose your favorite!
- ½ cup white chocolate melting wafers – These create a sweet coating that adds a festive touch.
- ¼ cup green candy melts – Perfect for decorating your trees, giving them that bright, cheery color.
- Decoration toppings – Such as gold star sprinkles and Christmas non-pareil sprinkles, which add a festive flair.
- 1 cup chocolate melting wafers – Essential for coating and creating those delicious designs.
- 1/4 cup chocolate melting wafers – Additional chocolate for versatility in designs.
- Decoration toppings – Edible candy eyes and miniature M&M’s for added fun and decoration.
Directions for Christmas Oreos
Making Christmas Oreos is a fun and engaging experience that anyone can enjoy. Follow these steps to create beautiful holiday-themed cookies that are sure to bring smiles. Remember, the key is to work quickly to prevent the chocolate from hardening.
Start by lining a large sheet pan with parchment paper or a silicone baking mat. This will help prevent the cookies from sticking and make for easy cleanup.
For the Christmas Trees, combine white chocolate melting wafers and a small amount of vegetable oil in a microwave-safe bowl. Microwave in bursts of 25 seconds, stirring in between, until the chocolate is fully melted and smooth.
Dip the bottom half of one Oreo into the melted white chocolate, allowing any excess to drip off, and place it on the prepared sheet pan to set. Repeat this process for the remaining cookies.
Next, melt the green candy melts with a touch of oil until smooth. Transfer the melted chocolate into a resealable plastic bag, seal it tightly, and cut off a small tip.
Using the green candy melts, pipe a zig-zag shape onto each Oreo to create the outline of a tree. Quickly sprinkle with nonpareil sprinkles and finish with a gold star sprinkle on top, along with a chocolate sprinkle to resemble a trunk.
Now, let’s create the Melted Snowmen! Use the remaining white chocolate and repeat the melting process. Use a small amount of melted chocolate to attach a Reese’s mini to the top of the Oreo.
Dip a fork into the melted chocolate, then place the Oreo right side up on the fork. Spoon melted chocolate over the cookie to coat it evenly, and tap gently to remove excess chocolate. Transfer the coated Oreo back to the prepared sheet pan.
Quickly attach two mini M&M’s for buttons and an orange jimmie sprinkle for the nose before the chocolate hardens. For the eyes and arms, melt milk chocolate and pipe onto the cookie.
For Rudolph, melt more milk chocolate and follow a similar process as with the snowmen. Dip the Oreo, place it on the sheet pan, and attach two edible eyes and a red mini M&M for the nose. Use melted chocolate to pipe on antlers.
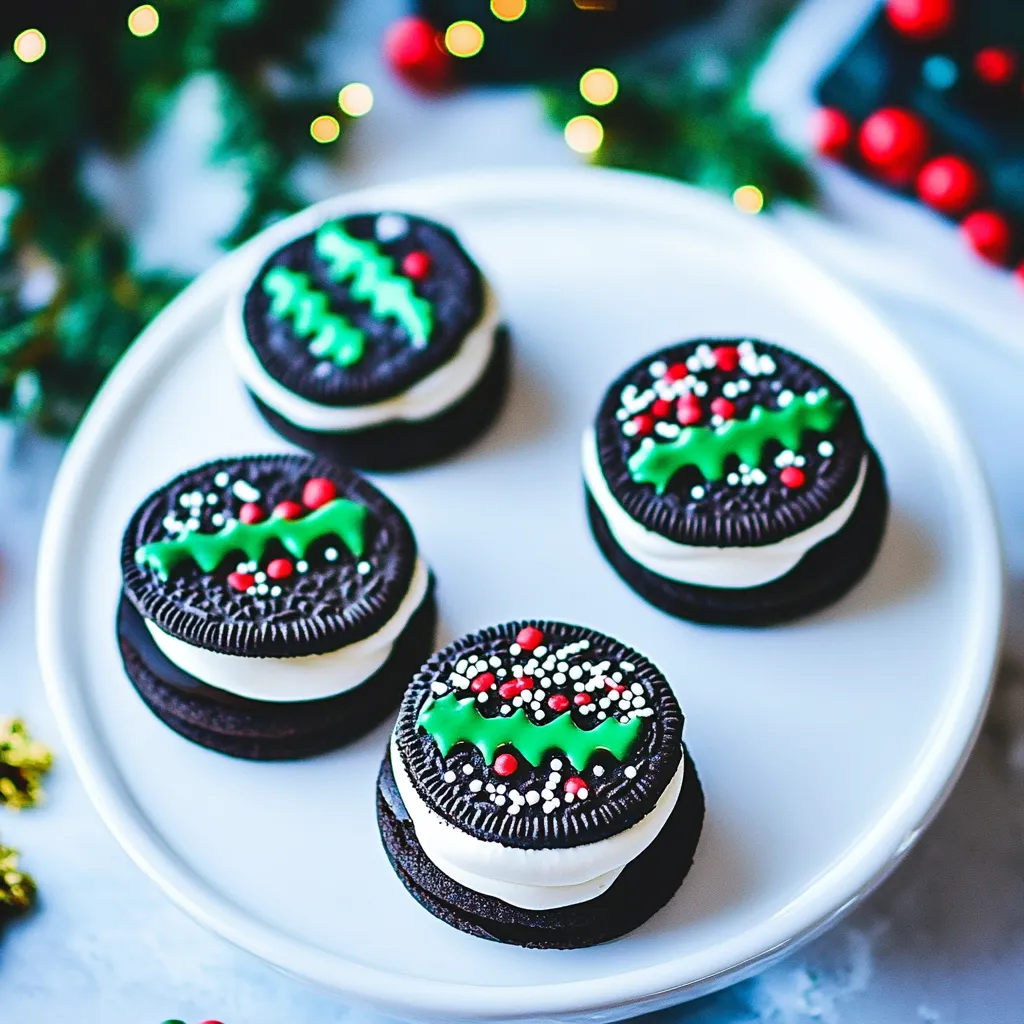
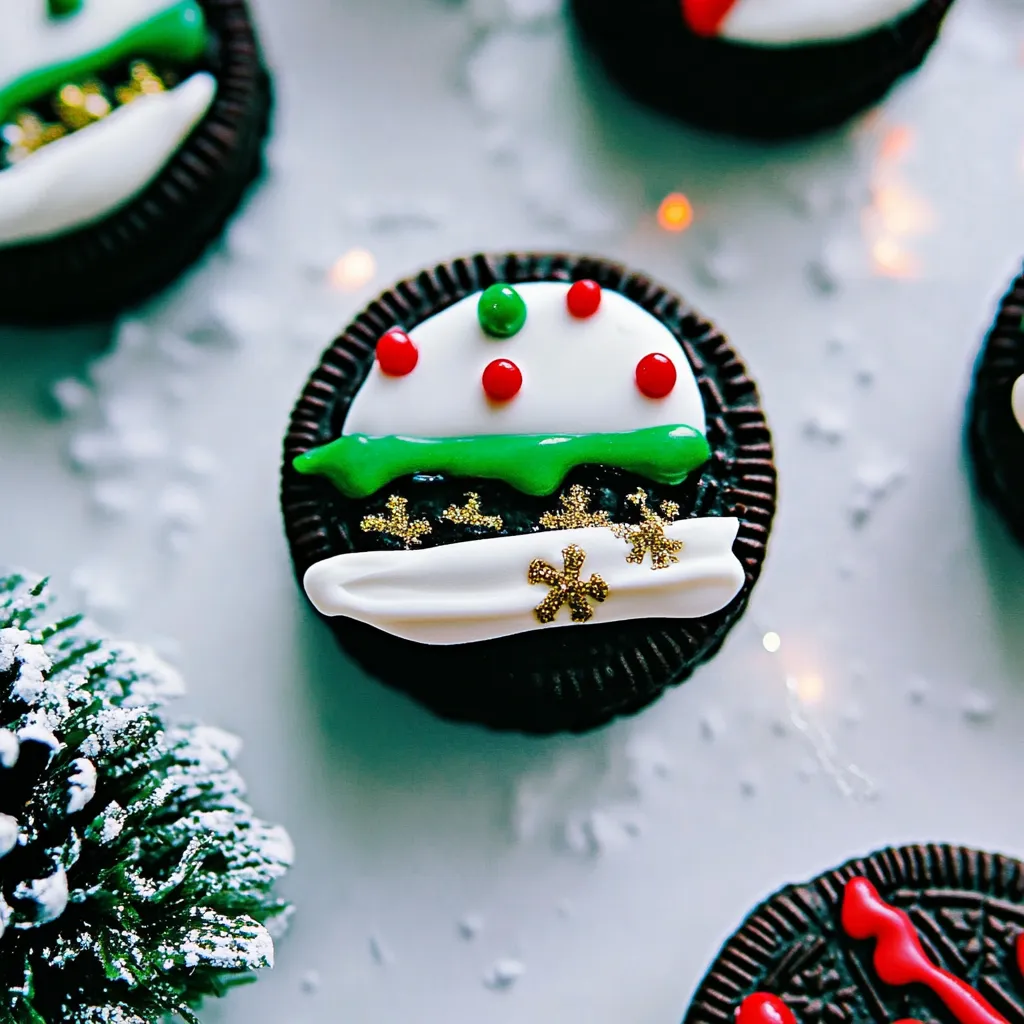
Finally, for the Ornaments, repeat the melting process with white chocolate. Dip the Oreo and place it on the sheet pan. Attach a mini Reese’s at the top edge and decorate it with sprinkles or mini M&M’s to resemble a festive ornament.
Allow all cookies to set at room temperature before serving or packaging. Enjoy your festive creations!
Things Worth Knowing
- Chocolate Melting Quality: Always use melting chocolate or wafers designed specifically for coating. This ensures a smooth finish and easy application.
- Creative Decoration: Let your imagination run wild! Feel free to mix colors and toppings to personalize each Christmas Oreo.
- Working Quickly: Chocolate sets quickly, so work on one design at a time to prevent melting and dripping.
- Storage Tips: Store decorated cookies in a sealed container at room temperature for a few days or refrigerate in hot weather to prevent melting.
Helpful Hints
Here are some extra tips to help you create the best Christmas Oreos possible!
- Storage: Keep decorated Christmas Oreos in a sealed container at room temperature for a few days. In hot, humid weather, refrigerate to prevent melting.
- Freezing: You can freeze these cookies for longer storage. Just make sure they are in an airtight container to prevent freezer burn.
- Variations: Experiment with different types of cookies such as chocolate or peanut butter for a fun twist.
- Gift Ideas: Package the cookies in festive tins or boxes to give as gifts during the holiday season.
- Decorating Tools: Invest in some piping bags and tips for more intricate designs.
Side Dish Ideas for Christmas Oreos
When it comes to serving Christmas Oreos, it’s all about the festive spirit! Here are some fun ideas:
- Festive Platters: Arrange your cookies on colorful platters to brighten up your dessert table.
- Ice Cream: Serve your decorated cookies with scoops of vanilla or peppermint ice cream for a delicious treat.
- Hot Chocolate: Pair them with a warm mug of hot chocolate for a cozy winter snack.
- Holiday Parties: These cookies make a great addition to any holiday gathering or family get-together.
- Gift Giving: Package them in decorative boxes for a thoughtful homemade gift.
- Cookie Exchange: Bring these to a cookie exchange event to share with friends and family.
FAQ
Conclusion
In conclusion, Christmas Oreos are not just delicious treats, but they also bring joy and creativity into your holiday celebrations. They are perfect for gatherings, gifts, or simply indulging your sweet tooth. I encourage you to try making them this holiday season. Gather your family and friends, and enjoy the laughter and fun that comes with decorating these festive cookies!

Christmas Oreos
Equipment
- Large sheet pan (15" x 21")
- Parchment Paper
Ingredients
- 12 cookies Oreo Any variety will do.
- 0.5 cup white chocolate melting wafers Use for coating.
- 0.25 cup green candy melts For decorating trees.
- as desired Decoration toppings Gold star sprinkles, Christmas non-pareil sprinkles, etc.
- 0.25 cup chocolate melting wafers For additional designs.
- 1 cup chocolate melting wafers For coating.
Instructions
- Start by lining a large sheet pan with parchment paper or a silicone baking mat. This will help prevent the cookies from sticking and make for easy cleanup.
- For the Christmas Trees, combine white chocolate melting wafers and a small amount of vegetable oil in a microwave-safe bowl. Microwave in bursts of 25 seconds, stirring in between, until the chocolate is fully melted and smooth.
- Dip the bottom half of one Oreo into the melted white chocolate, allowing any excess to drip off, and place it on the prepared sheet pan to set. Repeat this process for the remaining cookies.
- Next, melt the green candy melts with a touch of oil until smooth. Transfer the melted chocolate into a resealable plastic bag, seal it tightly, and cut off a small tip.
- Using the green candy melts, pipe a zig-zag shape onto each Oreo to create the outline of a tree. Quickly sprinkle with nonpareil sprinkles and finish with a gold star sprinkle on top, along with a chocolate sprinkle to resemble a trunk.
- Now, let's create the Melted Snowmen! Use the remaining white chocolate and repeat the melting process. Use a small amount of melted chocolate to attach a Reese's mini to the top of the Oreo.
- Dip a fork into the melted chocolate, then place the Oreo right side up on the fork. Spoon melted chocolate over the cookie to coat it evenly, and tap gently to remove excess chocolate. Transfer the coated Oreo back to the prepared sheet pan.
- Quickly attach two mini M&M’s for buttons and an orange jimmie sprinkle for the nose before the chocolate hardens. For the eyes and arms, melt milk chocolate and pipe onto the cookie.
- For Rudolph, melt more milk chocolate and follow a similar process as with the snowmen. Dip the Oreo, place it on the sheet pan, and attach two edible eyes and a red mini M&M for the nose. Use melted chocolate to pipe on antlers.
- Finally, for the Ornaments, repeat the melting process with white chocolate. Dip the Oreo and place it on the sheet pan. Attach a mini Reese's at the top edge and decorate it with sprinkles or mini M&M’s to resemble a festive ornament.
- Allow all cookies to set at room temperature before serving or packaging. Enjoy your festive creations!
Notes
- Tip 1: You can either make a variety of all 4 designs, or focus on just 1. To make all 4 designs, get a family-size box of Oreos (which has 48 cookies). Decorate 12 cookies per design. If you prefer to stick to 1 design, simply multiply the recipe for that design to decorate the desired number of cookies.
- Tip 2: It is important to use chocolate that is made for melting, such as good quality baking bars or melting wafers. These types of chocolate can be found in the baking aisle of the store and melt smoothly, creating a beautiful and even coating on the Oreos.
- Tip 3: You may have a bit of chocolate left over after decorating, but it’s best to melt it in the specified quantity. You also may need to melt more chocolate for dipping Oreos, depending on how thick you want the coating to be.
- Tip 4: Keep decorated Christmas Oreos in a sealed container at room temp for a few days. In hot, humid weather, refrigerate to stop melting.